StudioCraft Tutorials
Welcome to this series of tutorials, which teaches you the basic tools and techniques of StudioCraft for After Effects. This tutorial introduces you to how to add tags to your document.
You can use StudioCraft for After Effects to apply brand guideline rules to images or objects in your layout. Here you will discover how to apply tags to objects.
Please use Master Template file CT Soda Ad and Customisation assets to practice what you learn in this tutorial.
Please make sure you have an Active Master Template if not please refer to creating new master templates

You will also need to have uploaded these Automation Assets (project files) to the Master Template Automation folder if not please refer to Upload Automation Assets
Brand guidelines
The following text and videos clips can be customised
Video clip Can Intro - Cherry can be customised
Video clip Fruit Flavour - Cherry fruit can be customised

Headline text WHAT WOULD YOU DO can be customised
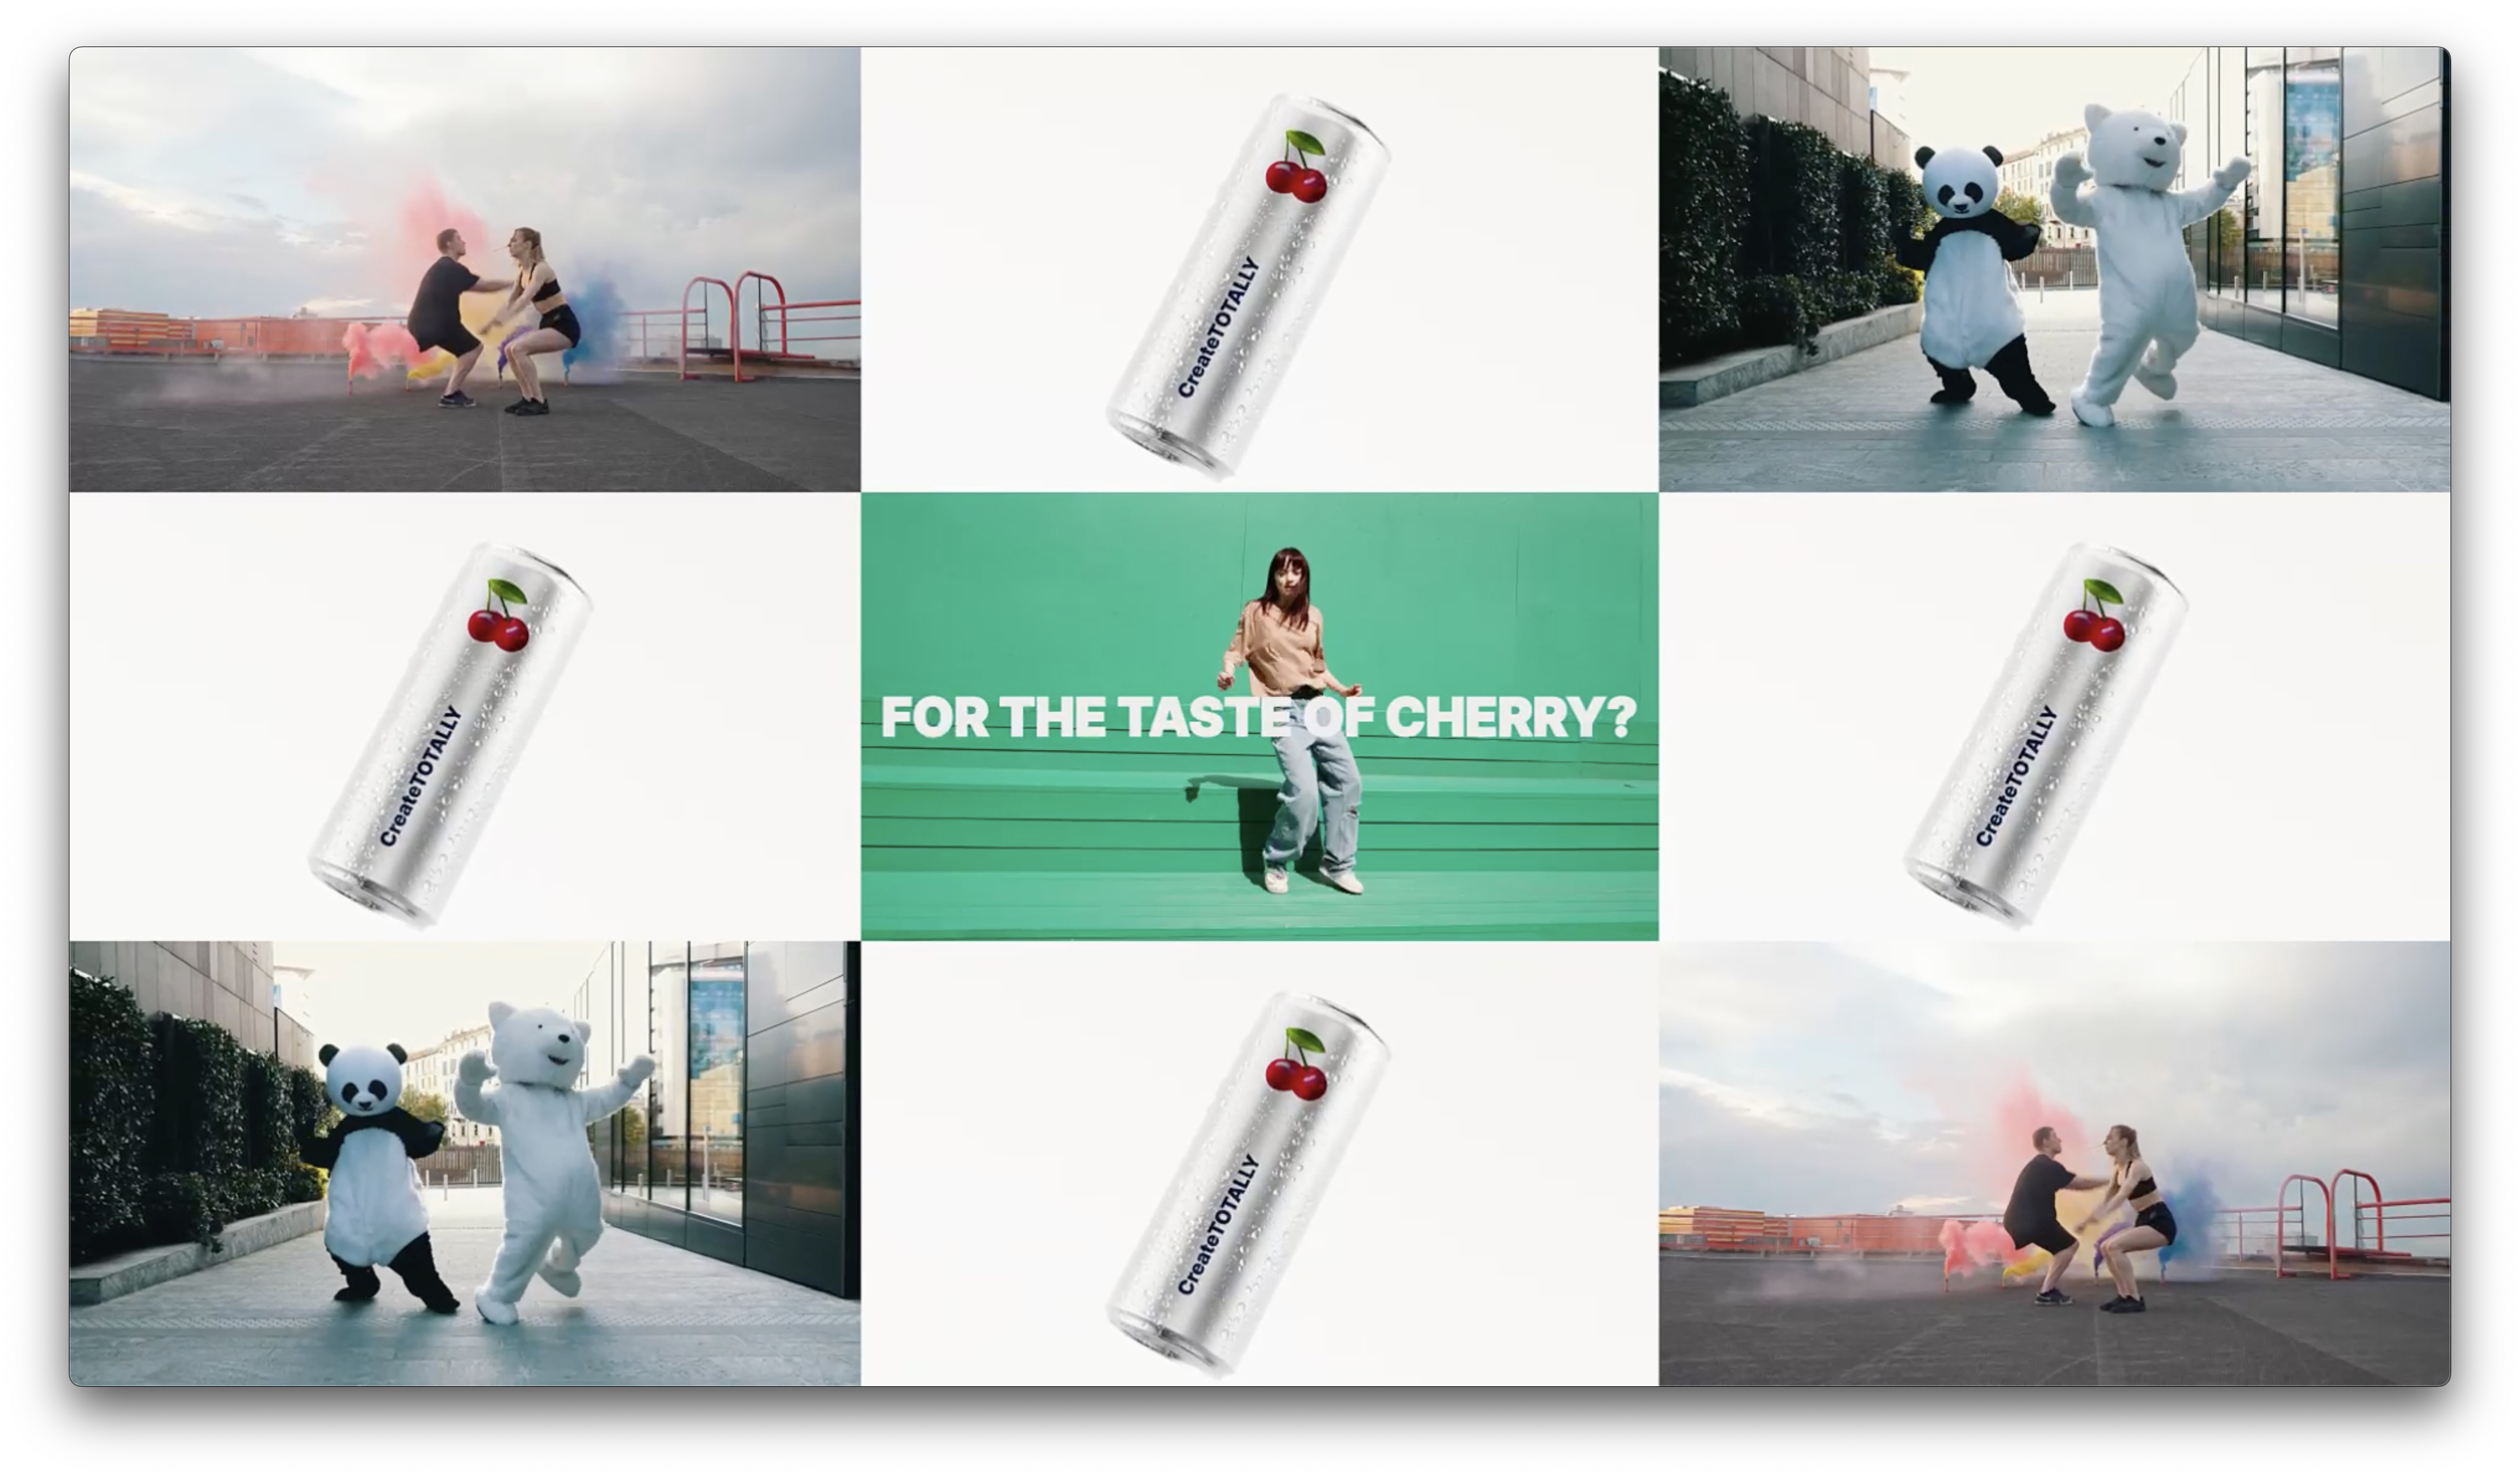
Subheadline text FOR THE TASTE OF CHERRY? can be customised
Video clip Clip 01 - Backflip sequence can be customised
Video clip Clip 02 - Girl sequence can be customised
Video clip Clip 03 - Bears sequence can be customised
Video clip Can Outro - Cherry can be customised
Automation Assets
Analyse Ae master
Once all of your project files have been uploaded, click on the Analyse button. Analysing identifies all of the elements within the project, allowing them to be customised during automation.

Select which images/ videos can be customised
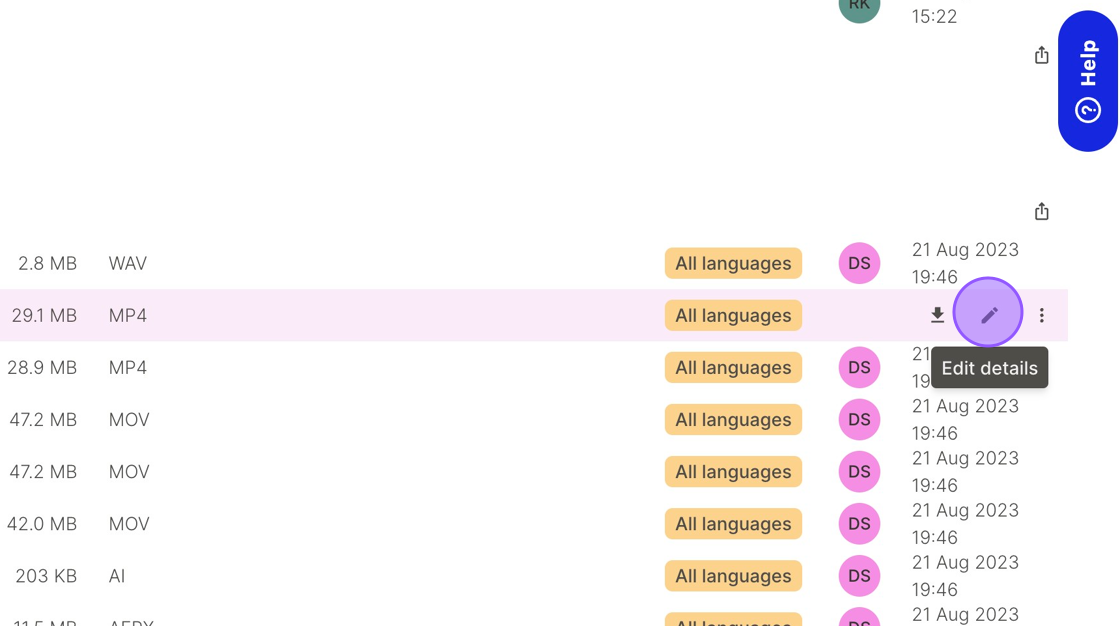
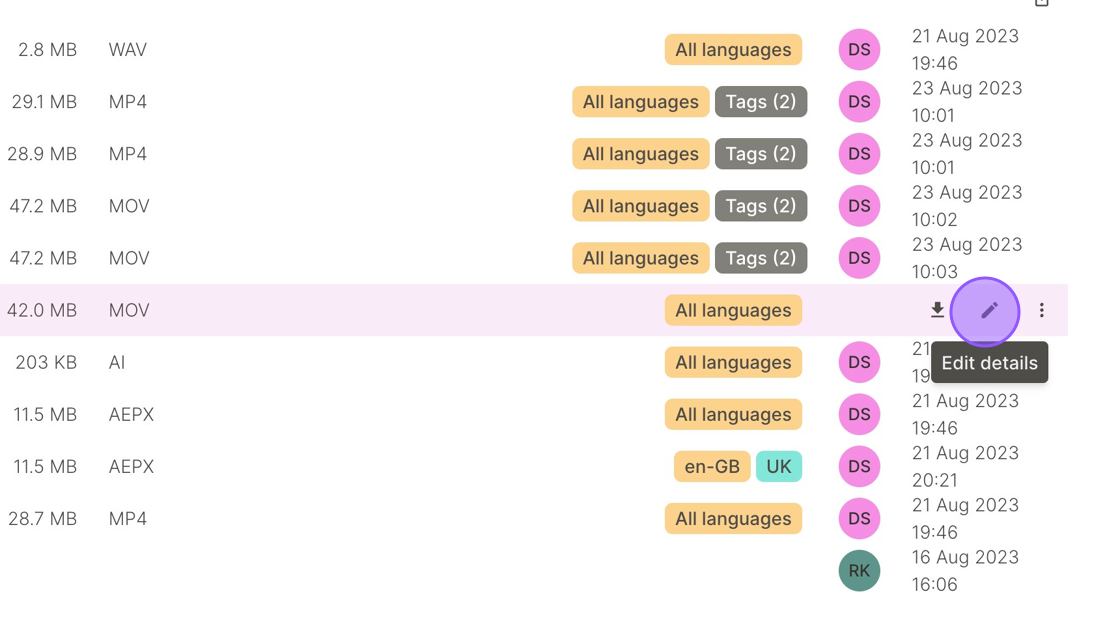
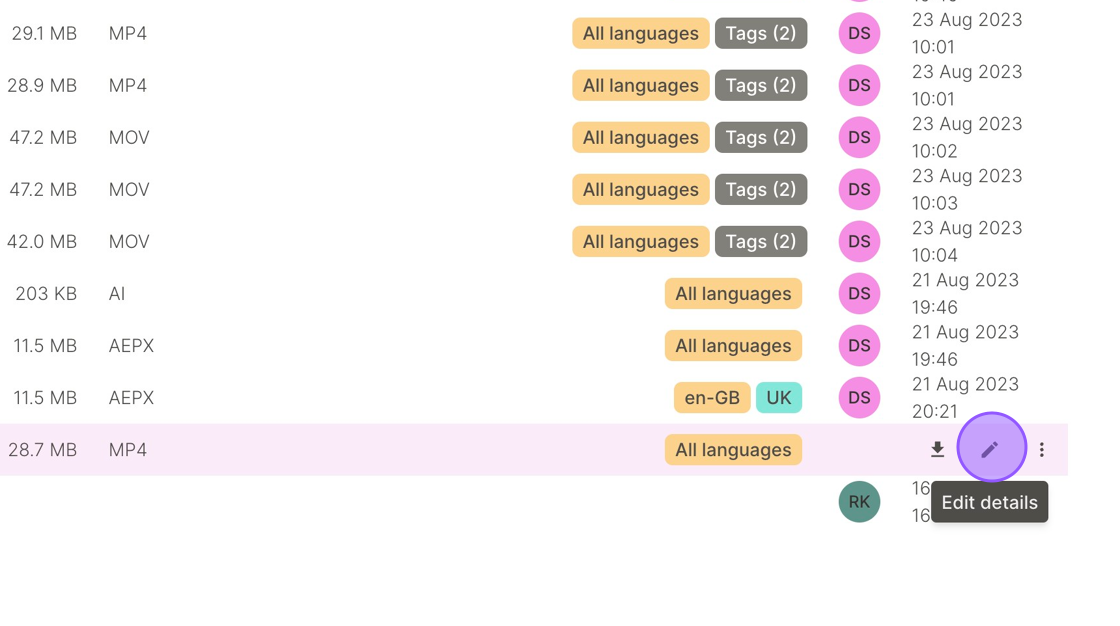
To specify which images/ videos can be customised, as well as what assets should be available for customisation, go to Sys admin > Master Template > File Tree and navigate to the Master Template you require. In the Automation folder, click the pencil icon next to the image/ video you want to customise to edit its details.
You can then mark it as customisable by toggling on "make variable". The variable name is what will appear to users during creative allocation or when completing a bulk content form. Make sure it is clear what this element is.
Tags need to be applied to the image to define what assets from Asset Manager will be available during customisation. You can apply 1 or more tags which will need to also be on the assets for them to be available. If you apply multiple tags, only assets that have ALL of the selected tags on them will be displayed.
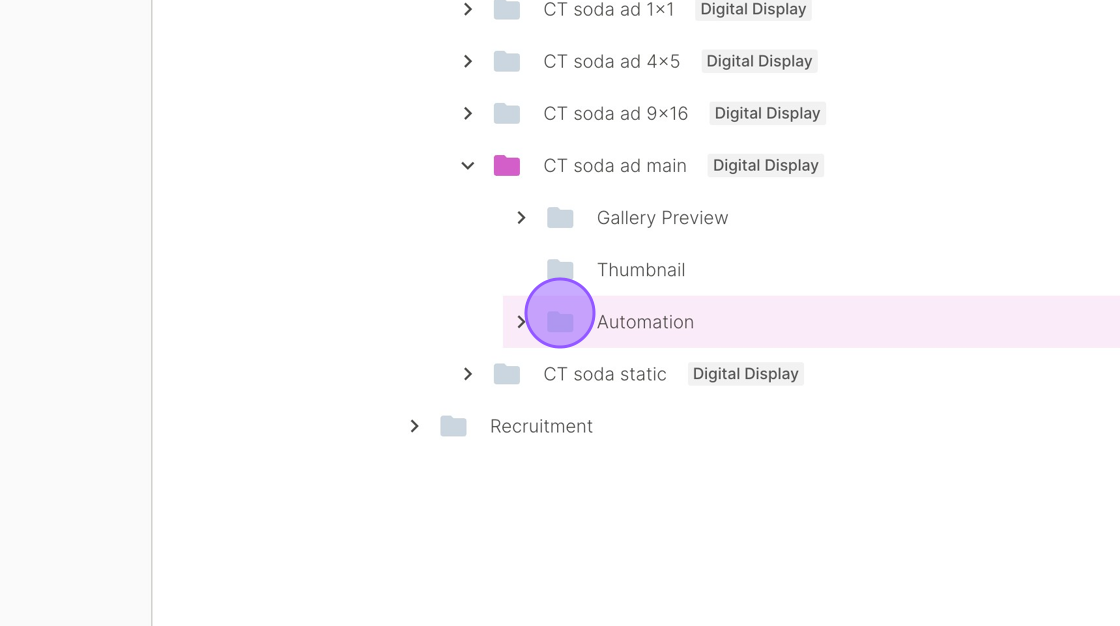
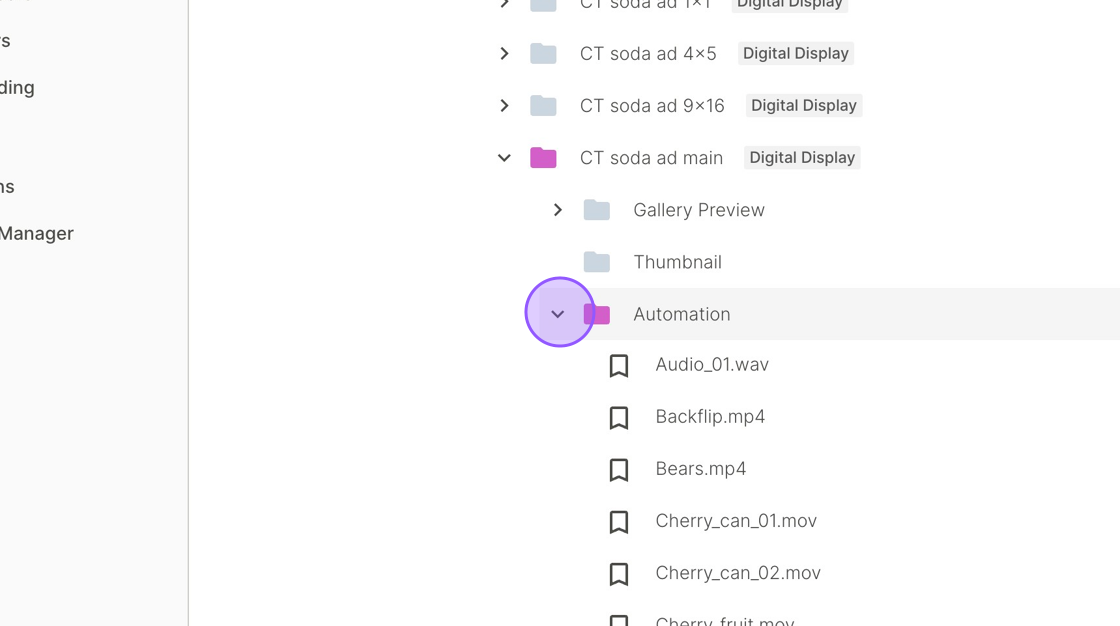
Click Automation to expand folder
Tag Clip 01 - Backflip
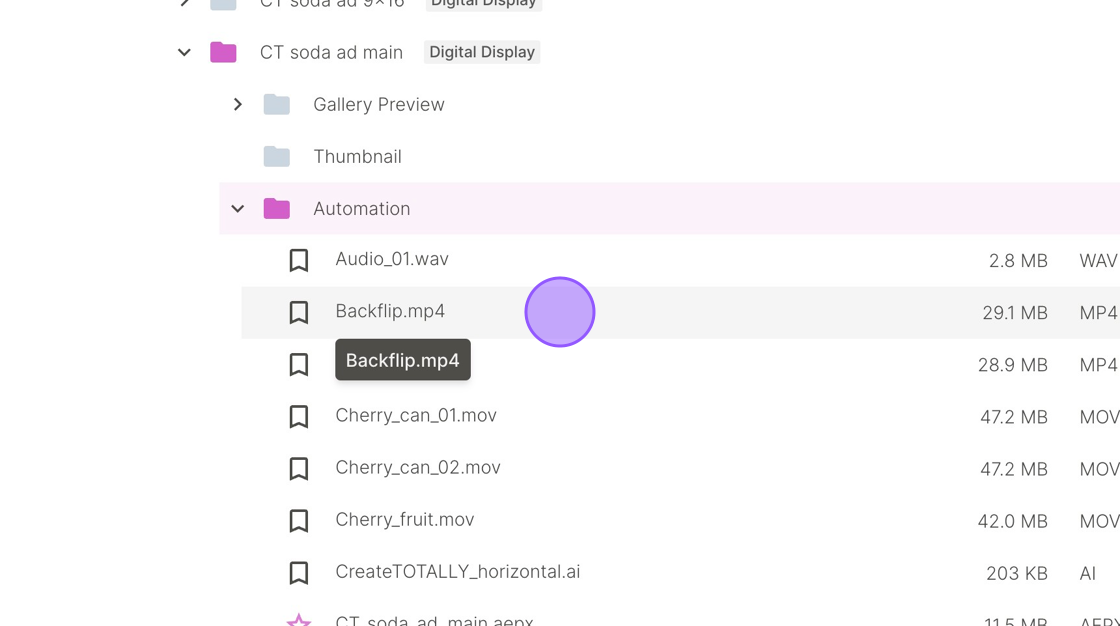
Click Backflip.mp4
Click Pencil icon to Edit details.
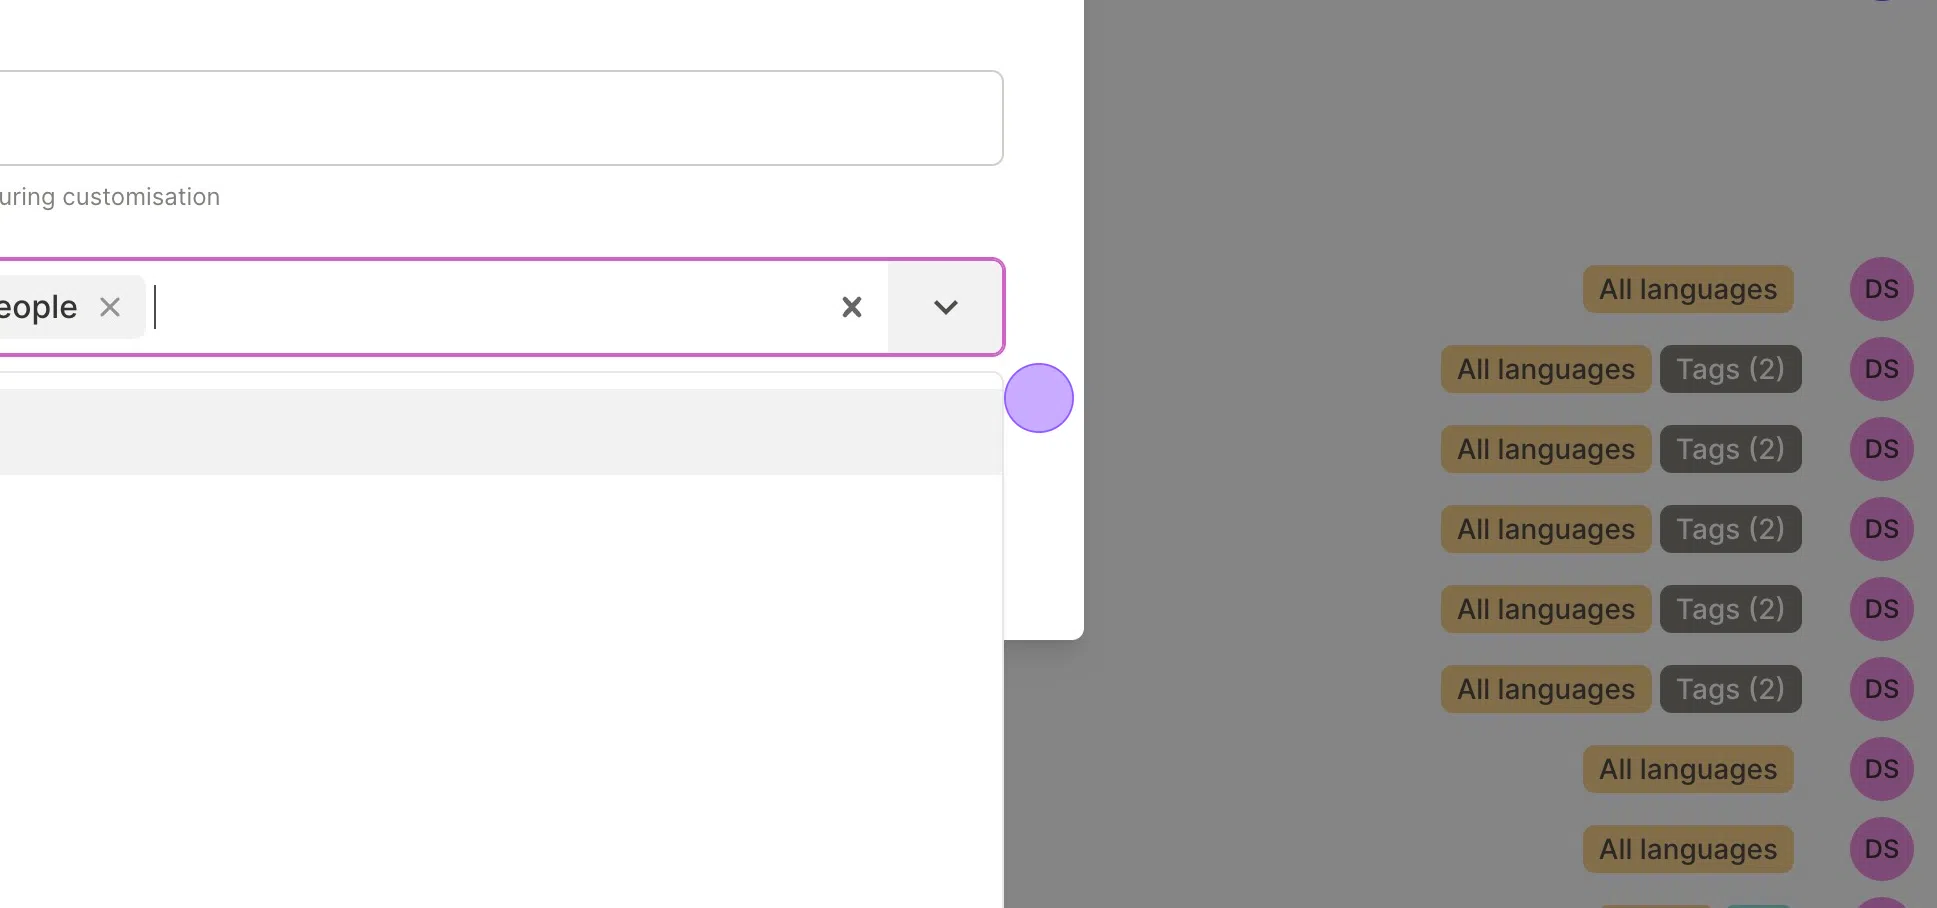
Click the Variable name field.
Type Clip 01
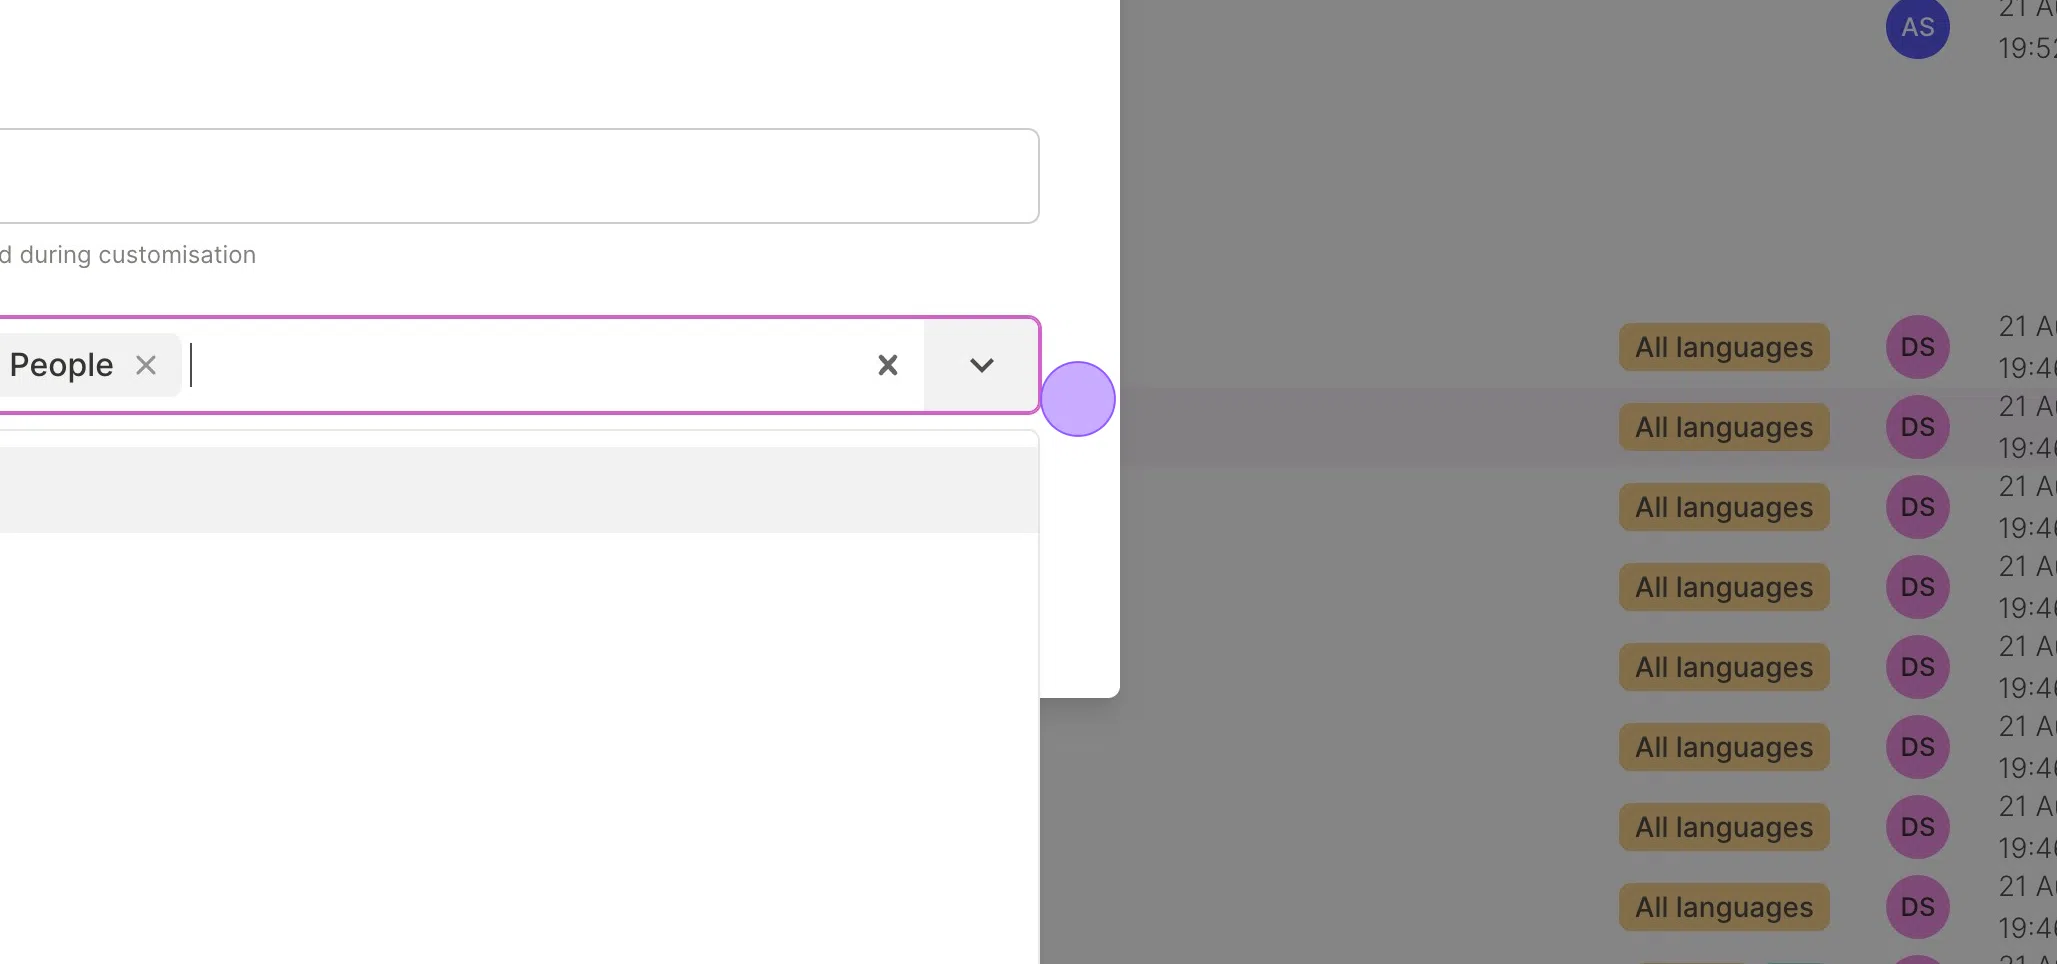
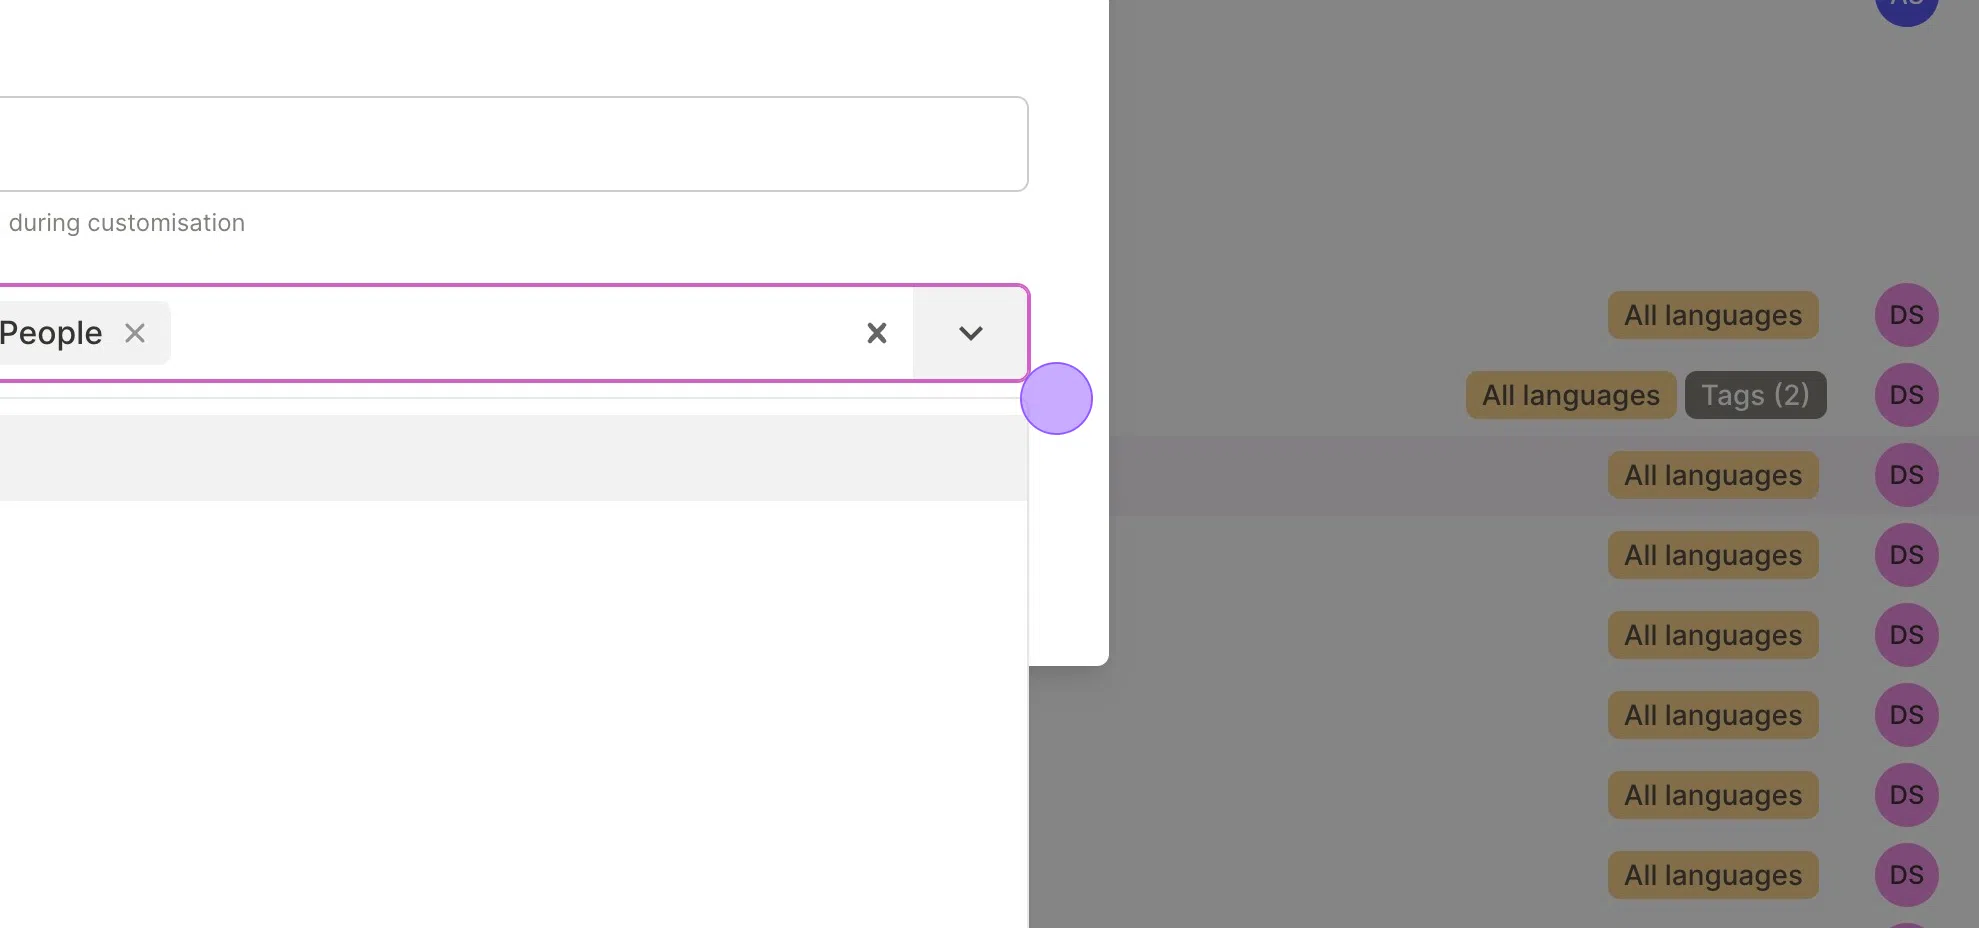
Click Tags dropdown
Select Background
Select People
![Screenshot of: Click here.Click the "Variable name" field.Type " [[CapsLock]] Clip 01"Click "Please select..."Click "Background"Type "pe"Click "People"](https://cdn.prod.website-files.com/648c13eb6bf8dd3844341221/64e5cd260df999e4b8072d56_stack_animation.webp)
Click Update
Tag Clip 03 - Bears
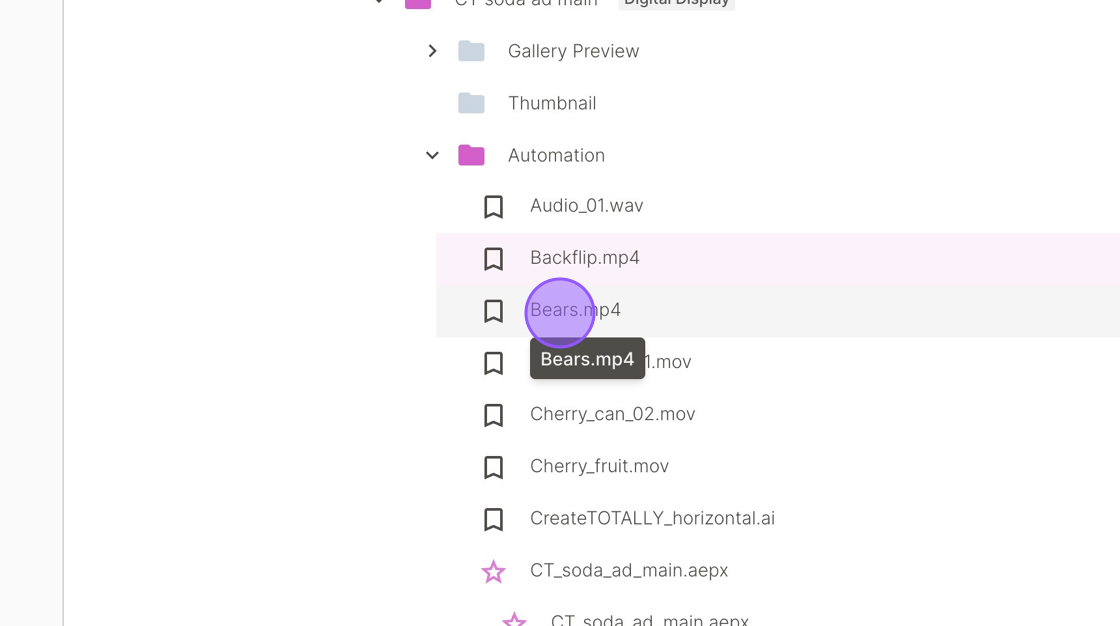
Click Bears.mp4
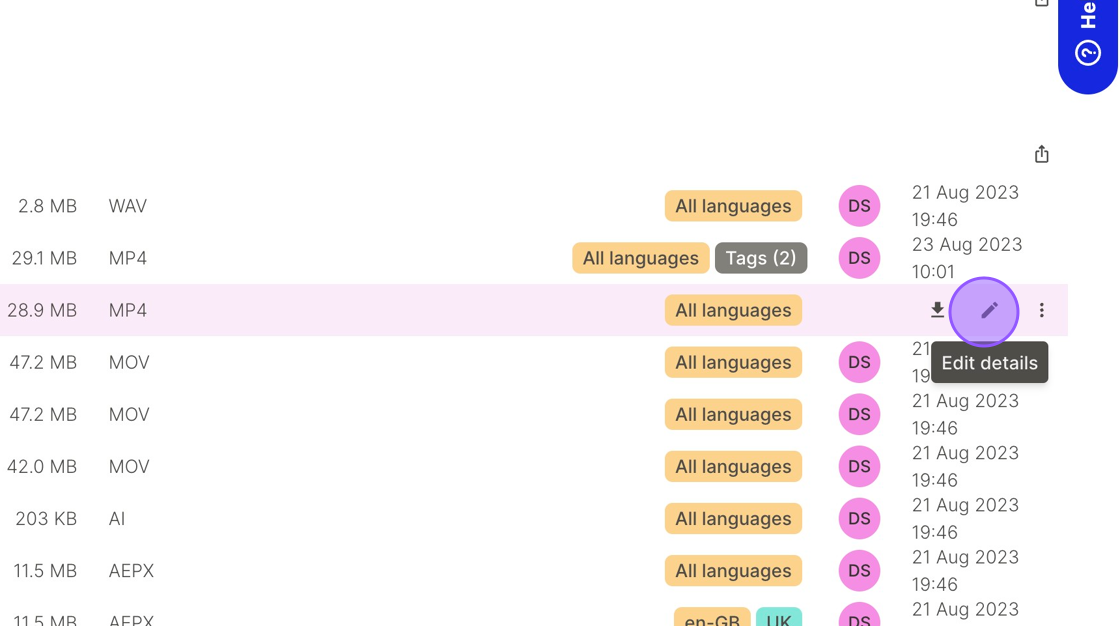
Click Pencil icon to Edit details.
Click the Variable name field.
Type Clip 03
Click Tags dropdown
Select Background
Select People
![Screenshot of: Click here.Click the "Variable name" field.Type " [[CapsLock]] Clip 03"Click "Please select..."Click "Background"Type " [[CapsLock]] PE"Click "People"](https://cdn.prod.website-files.com/648c13eb6bf8dd3844341221/64e5cd282e79f0f5cd70ff22_stack_animation.webp)
Click Update
Tag Can Intro - Cherry
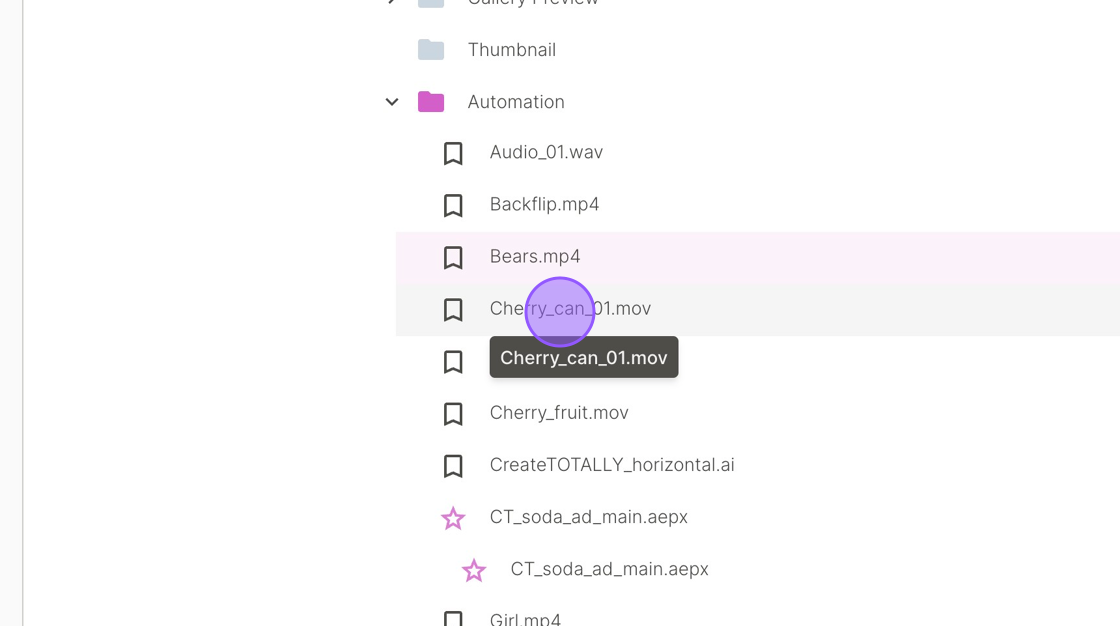
Click Cherry_can_01.mov
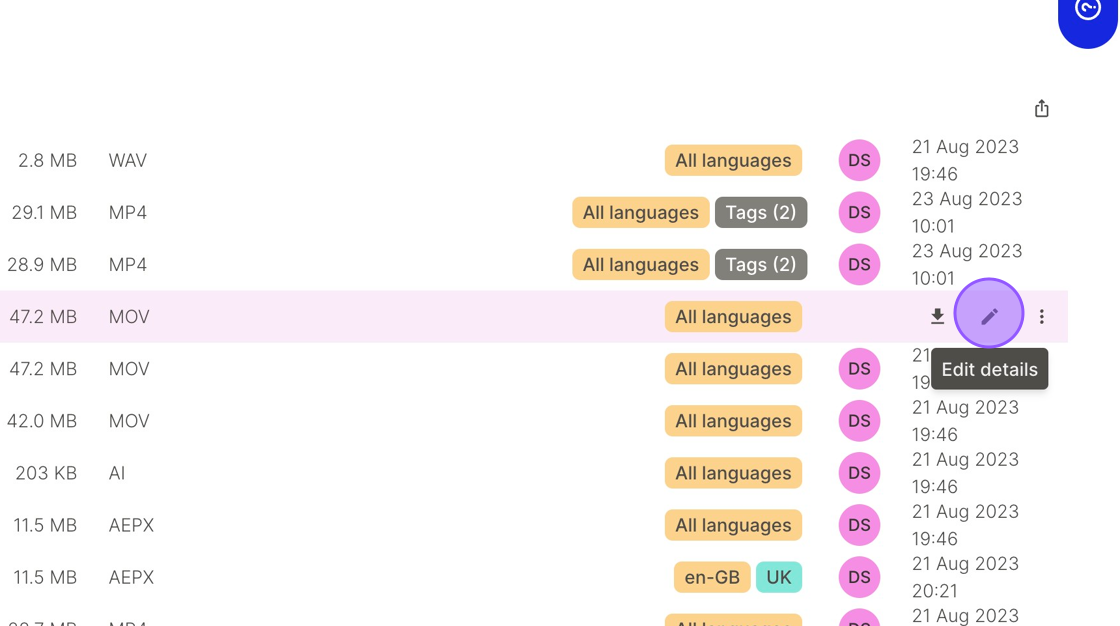
Click Pencil icon to Edit details.
Click the Variable name field.
Type Can Intro
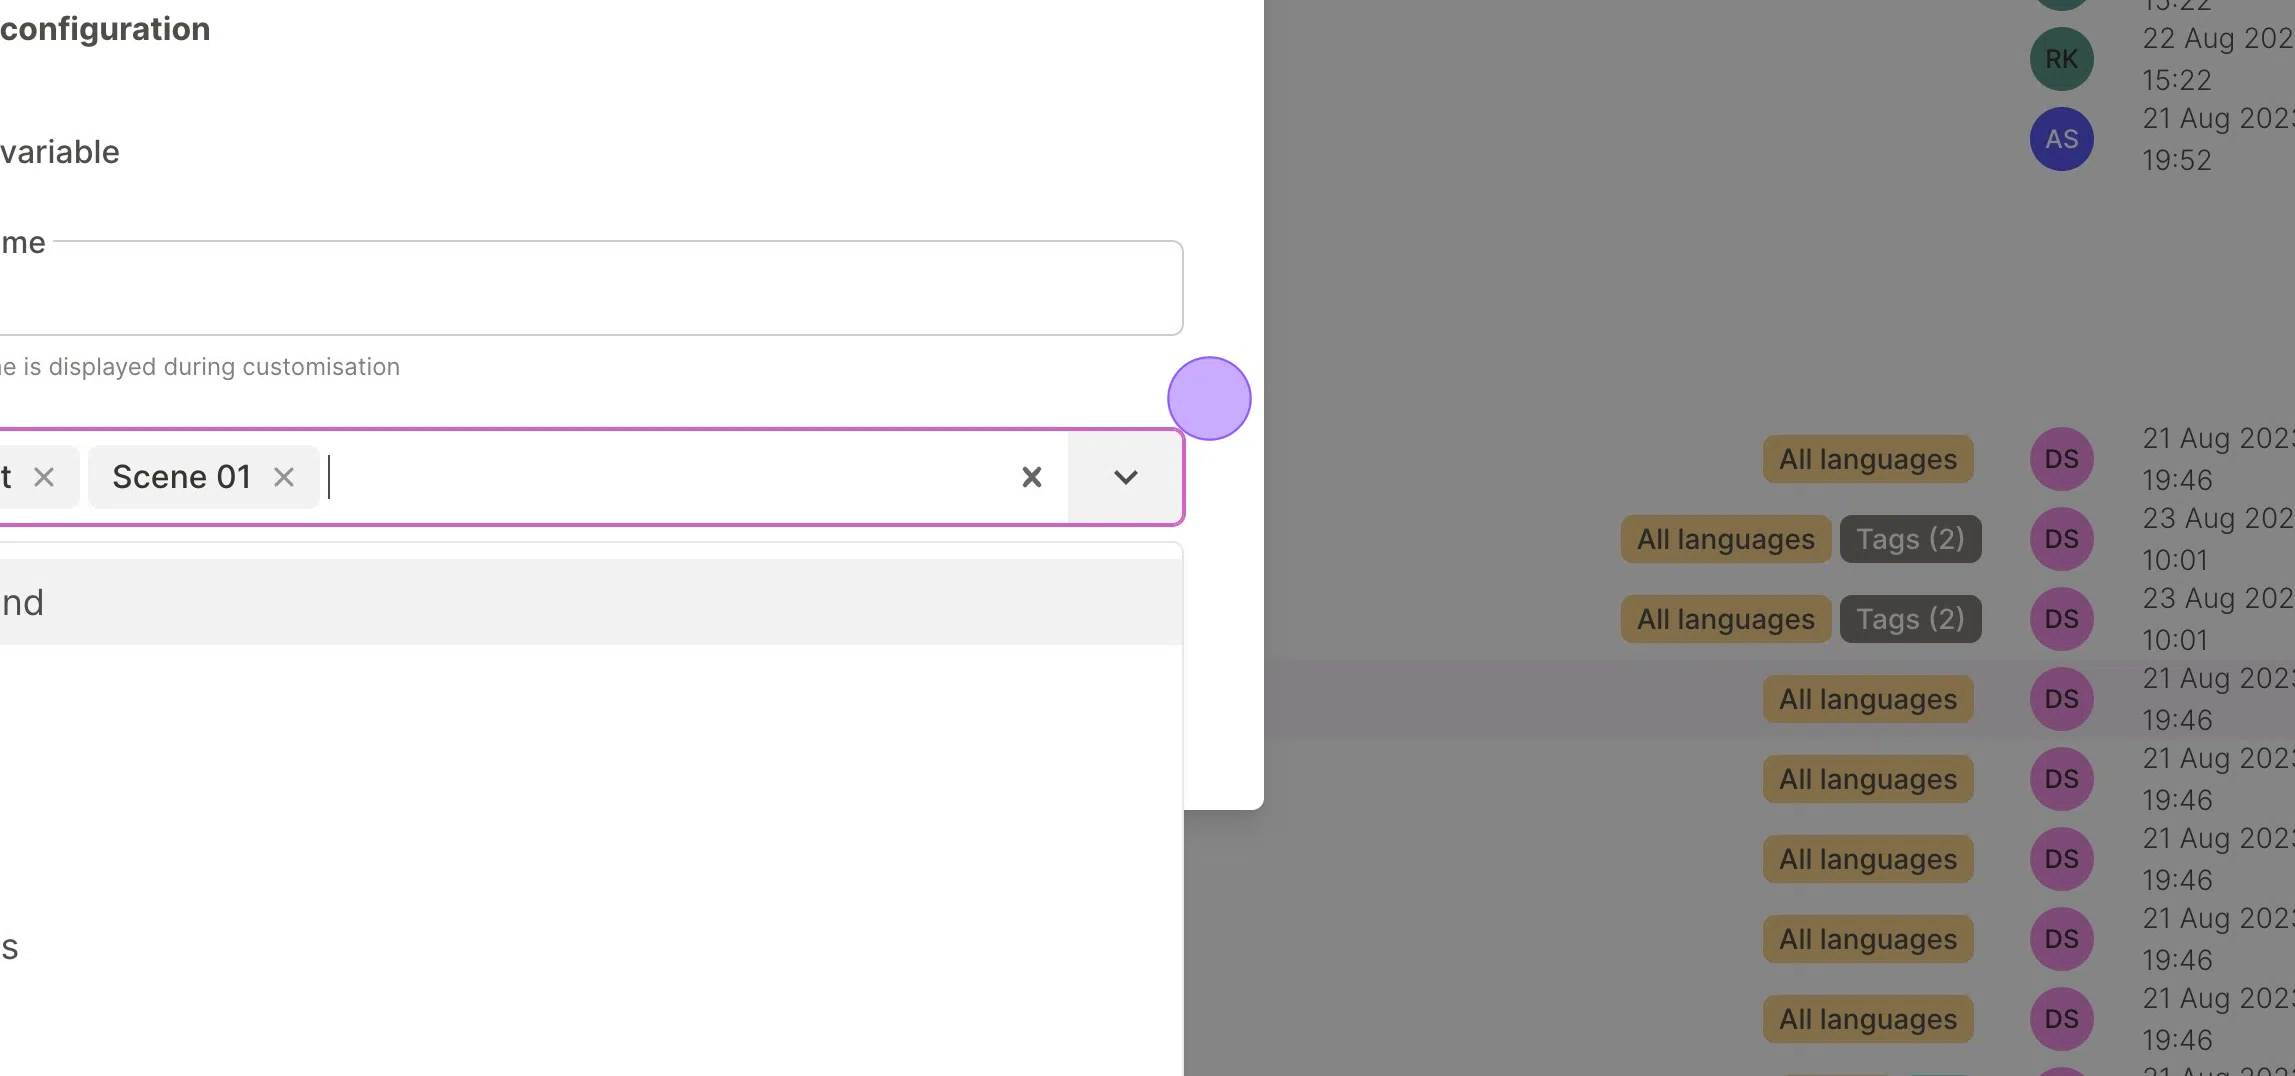
Click Tags dropdown
Select Packshot
Select Scene 01
![Screenshot of: Click here.Click the "Variable name" field.Type "Can [[CapsLock]] Intro"Click "Please select..."Click "Packshot"Type " [[CapsLock]] SC"Click "Scene 01"](https://cdn.prod.website-files.com/648c13eb6bf8dd3844341221/64e5cd283905869717db9295_stack_animation.webp)
Click Update
Tag Can Outro - Cherry
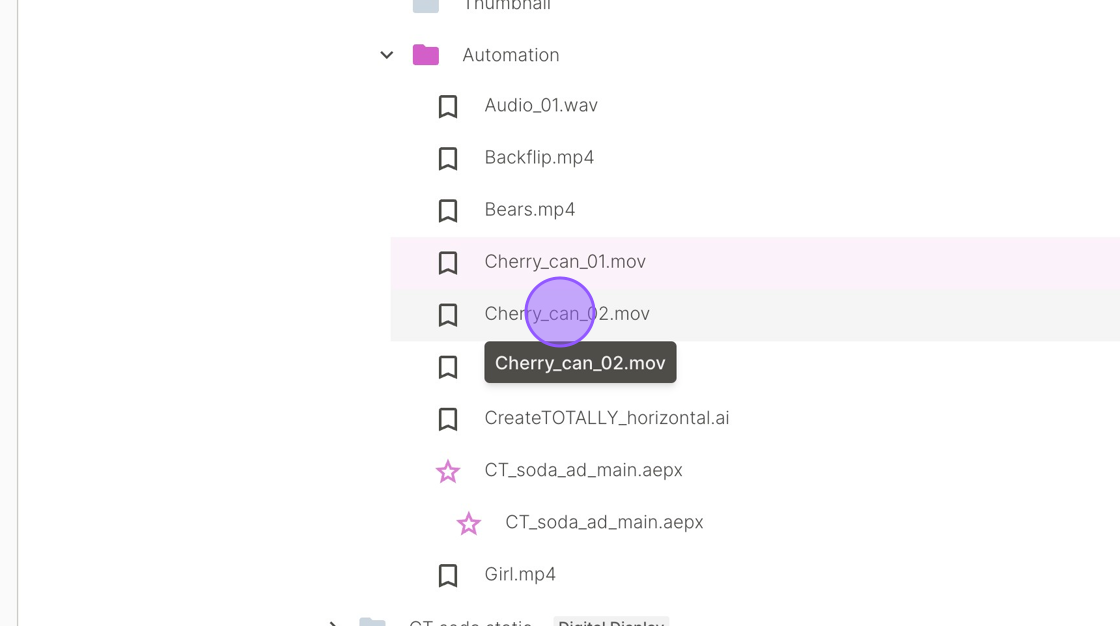
Click Cherry_can_02.mov
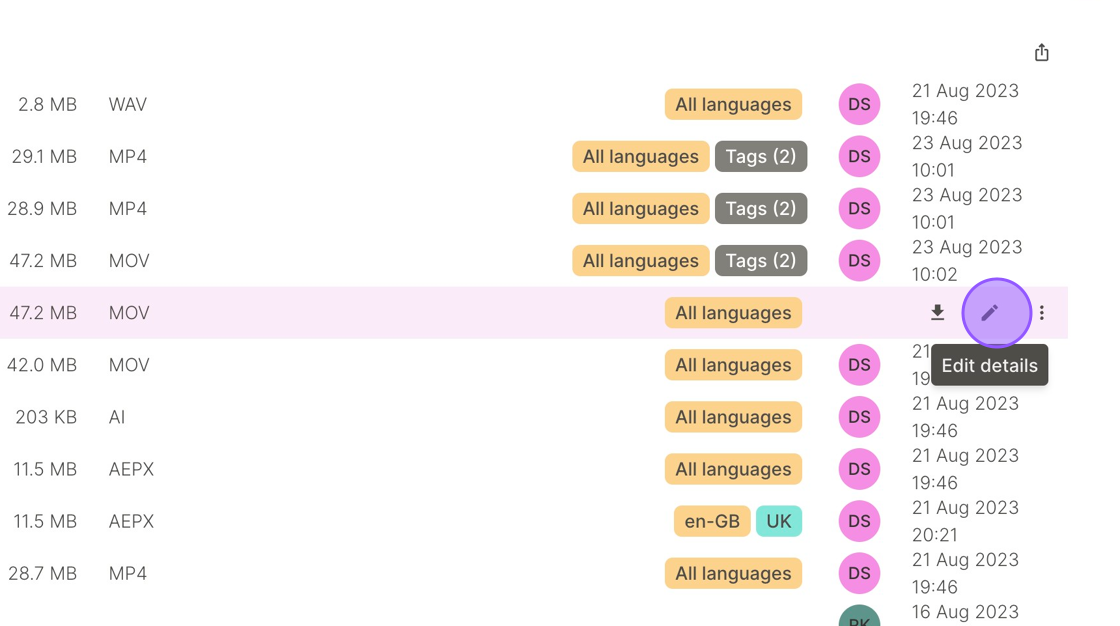
Click Pencil icon to Edit details.
Click the Variable name field.
Type Can Outro
Click Tags dropdown
Select Packshot
Select End Frame
![Screenshot of: Click here.Click the "Variable name" field.Type "Can oOutro"Click "Please select..."Click "Packshot"Type " [[CapsLock]] End"Click "End Frame"](https://cdn.prod.website-files.com/648c13eb6bf8dd3844341221/64e5cd2a0977715a16a06b65_stack_animation.webp)
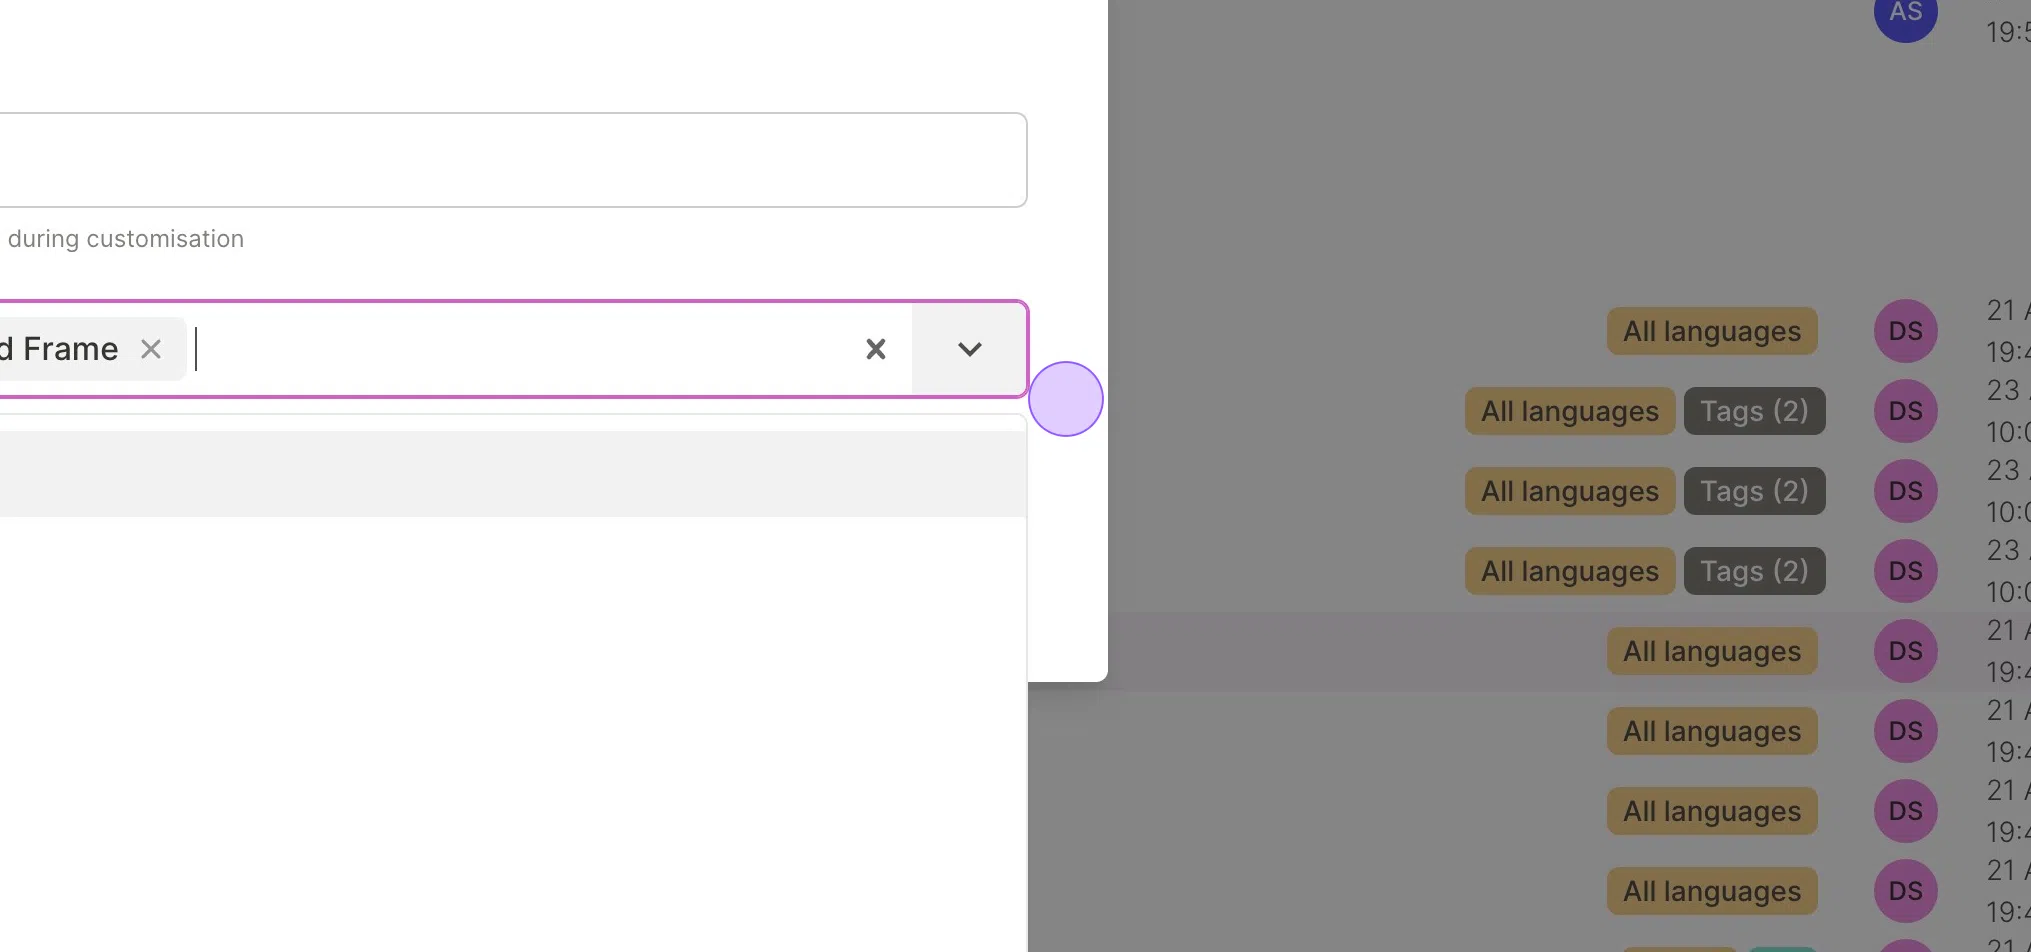
Click Update
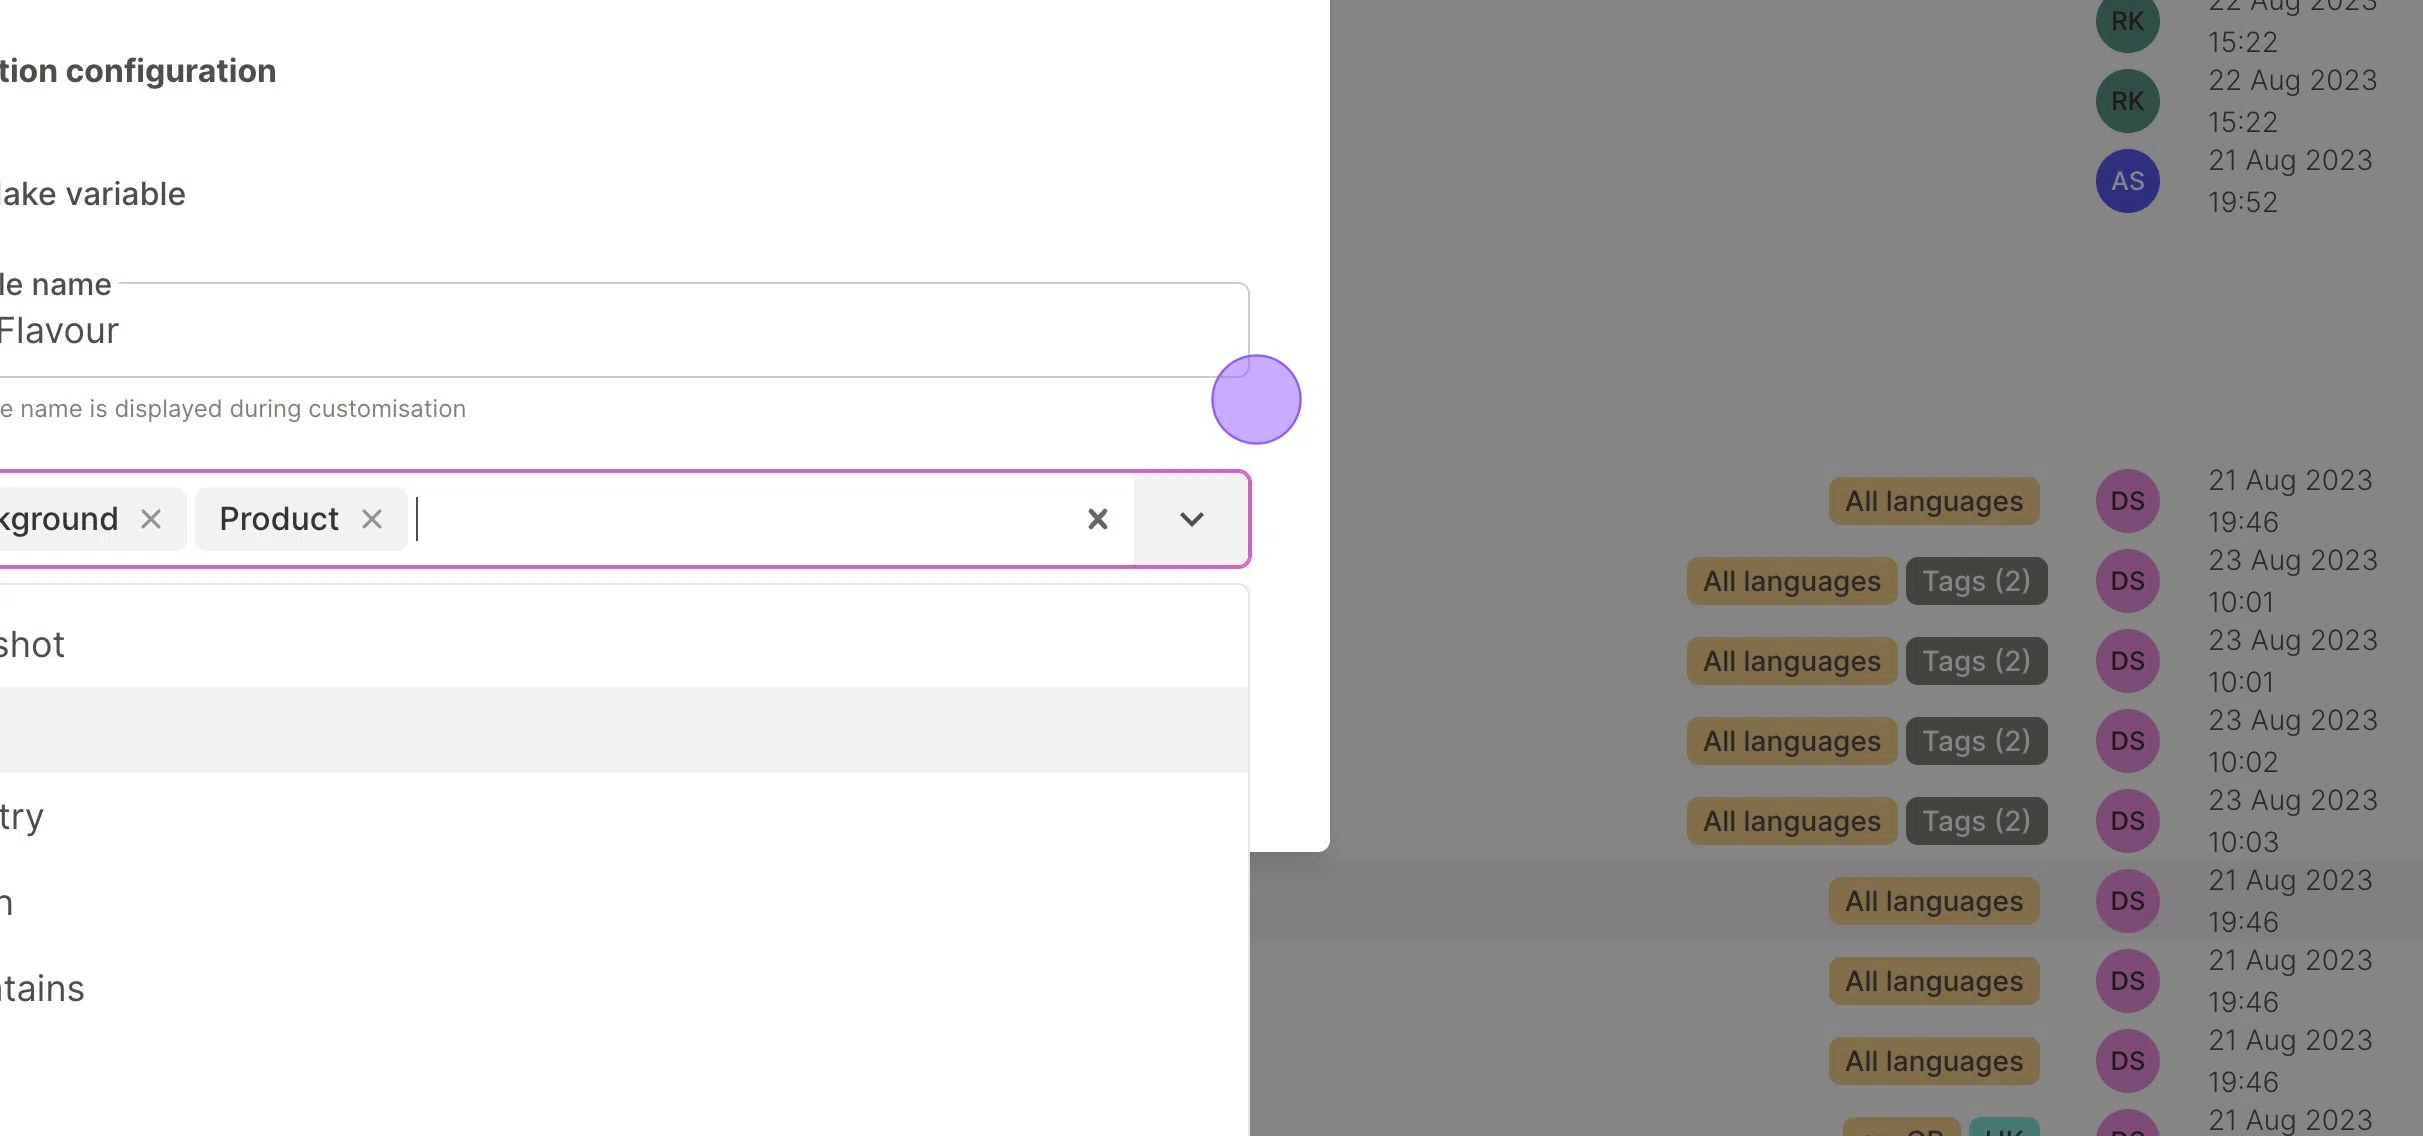
Tag - Fruit Flavour - Cherry fruit
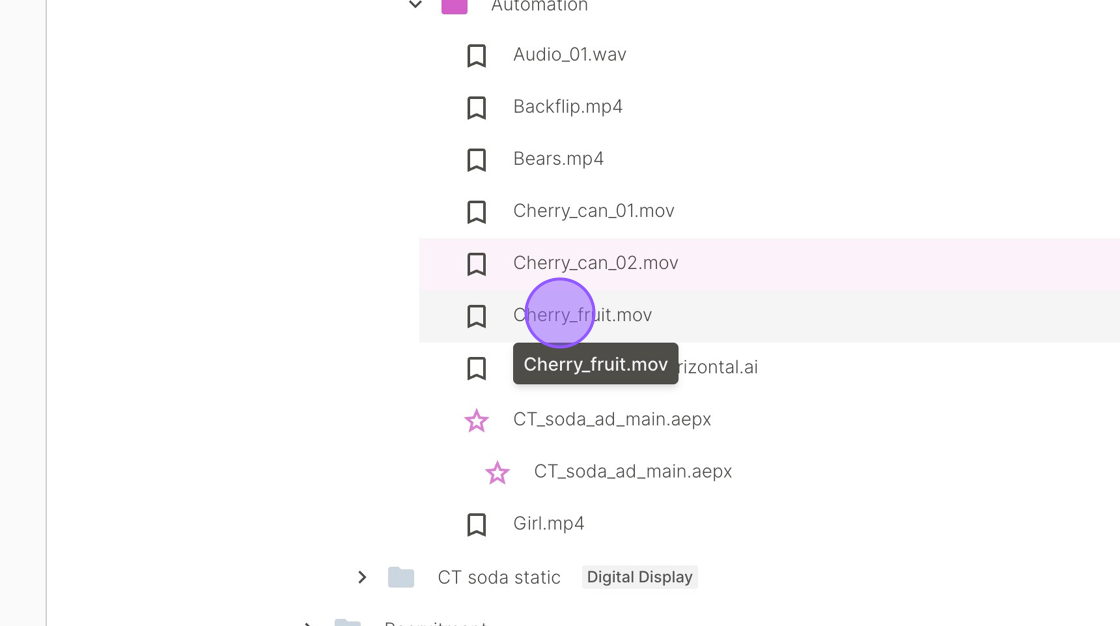
Click Cherry_fruit.mov
Click Pencil icon to Edit details.
Click the Variable name field.
Type Fruit Flavour
Click Tags dropdown
Select Background
Select Product
![Screenshot of: Click here.Click the "Variable name" field.Type " [[CapsLock]] Fruit [[CapsLock]] Flavour"Click "Please select..."Click "Background"Type " [[CapsLock]] PR"Click "Product"](https://cdn.prod.website-files.com/648c13eb6bf8dd3844341221/64e5cd2a63464953dab1311e_stack_animation.webp)
Click Update
Tag Clip 02 Girl
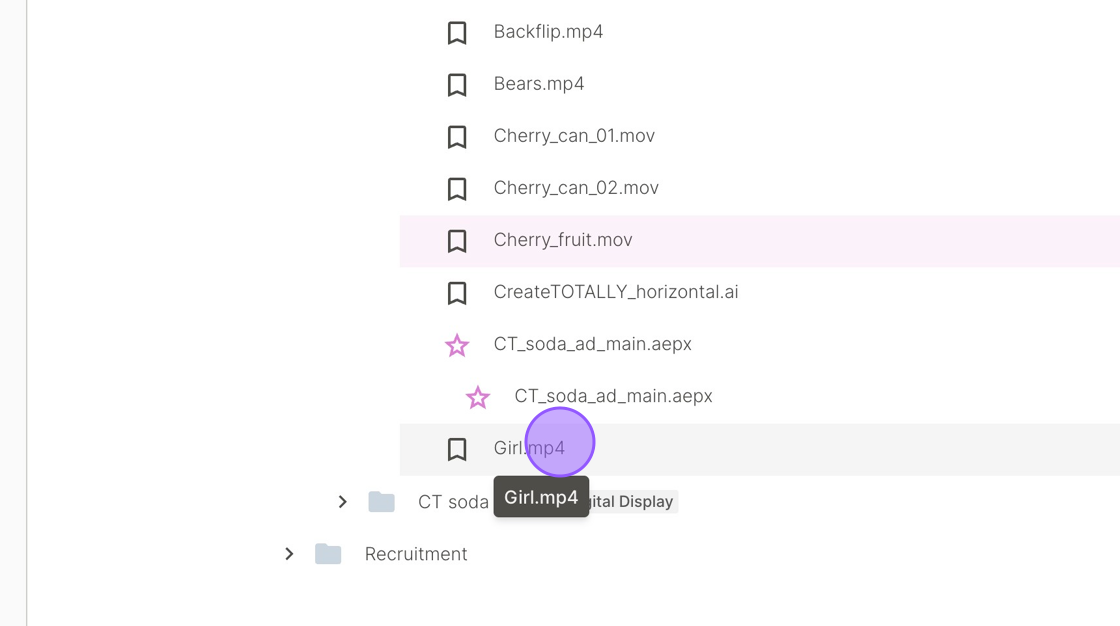
Click Girl.mp4
Click Pencil icon to Edit details.
Click the Variable name field.
Type Clip 02
Click Tags dropdown
Select Background
Select People
![Screenshot of: Click here.Click the "Variable name" field.Type "Clip 02"Click "Please select..."Click "Background"Type " [[CapsLock]] Pe"Click "People"](https://cdn.prod.website-files.com/648c13eb6bf8dd3844341221/64e5cd2b98bd36e2690e5707_stack_animation.webp)
Click Update
Click Automation to collapse folder
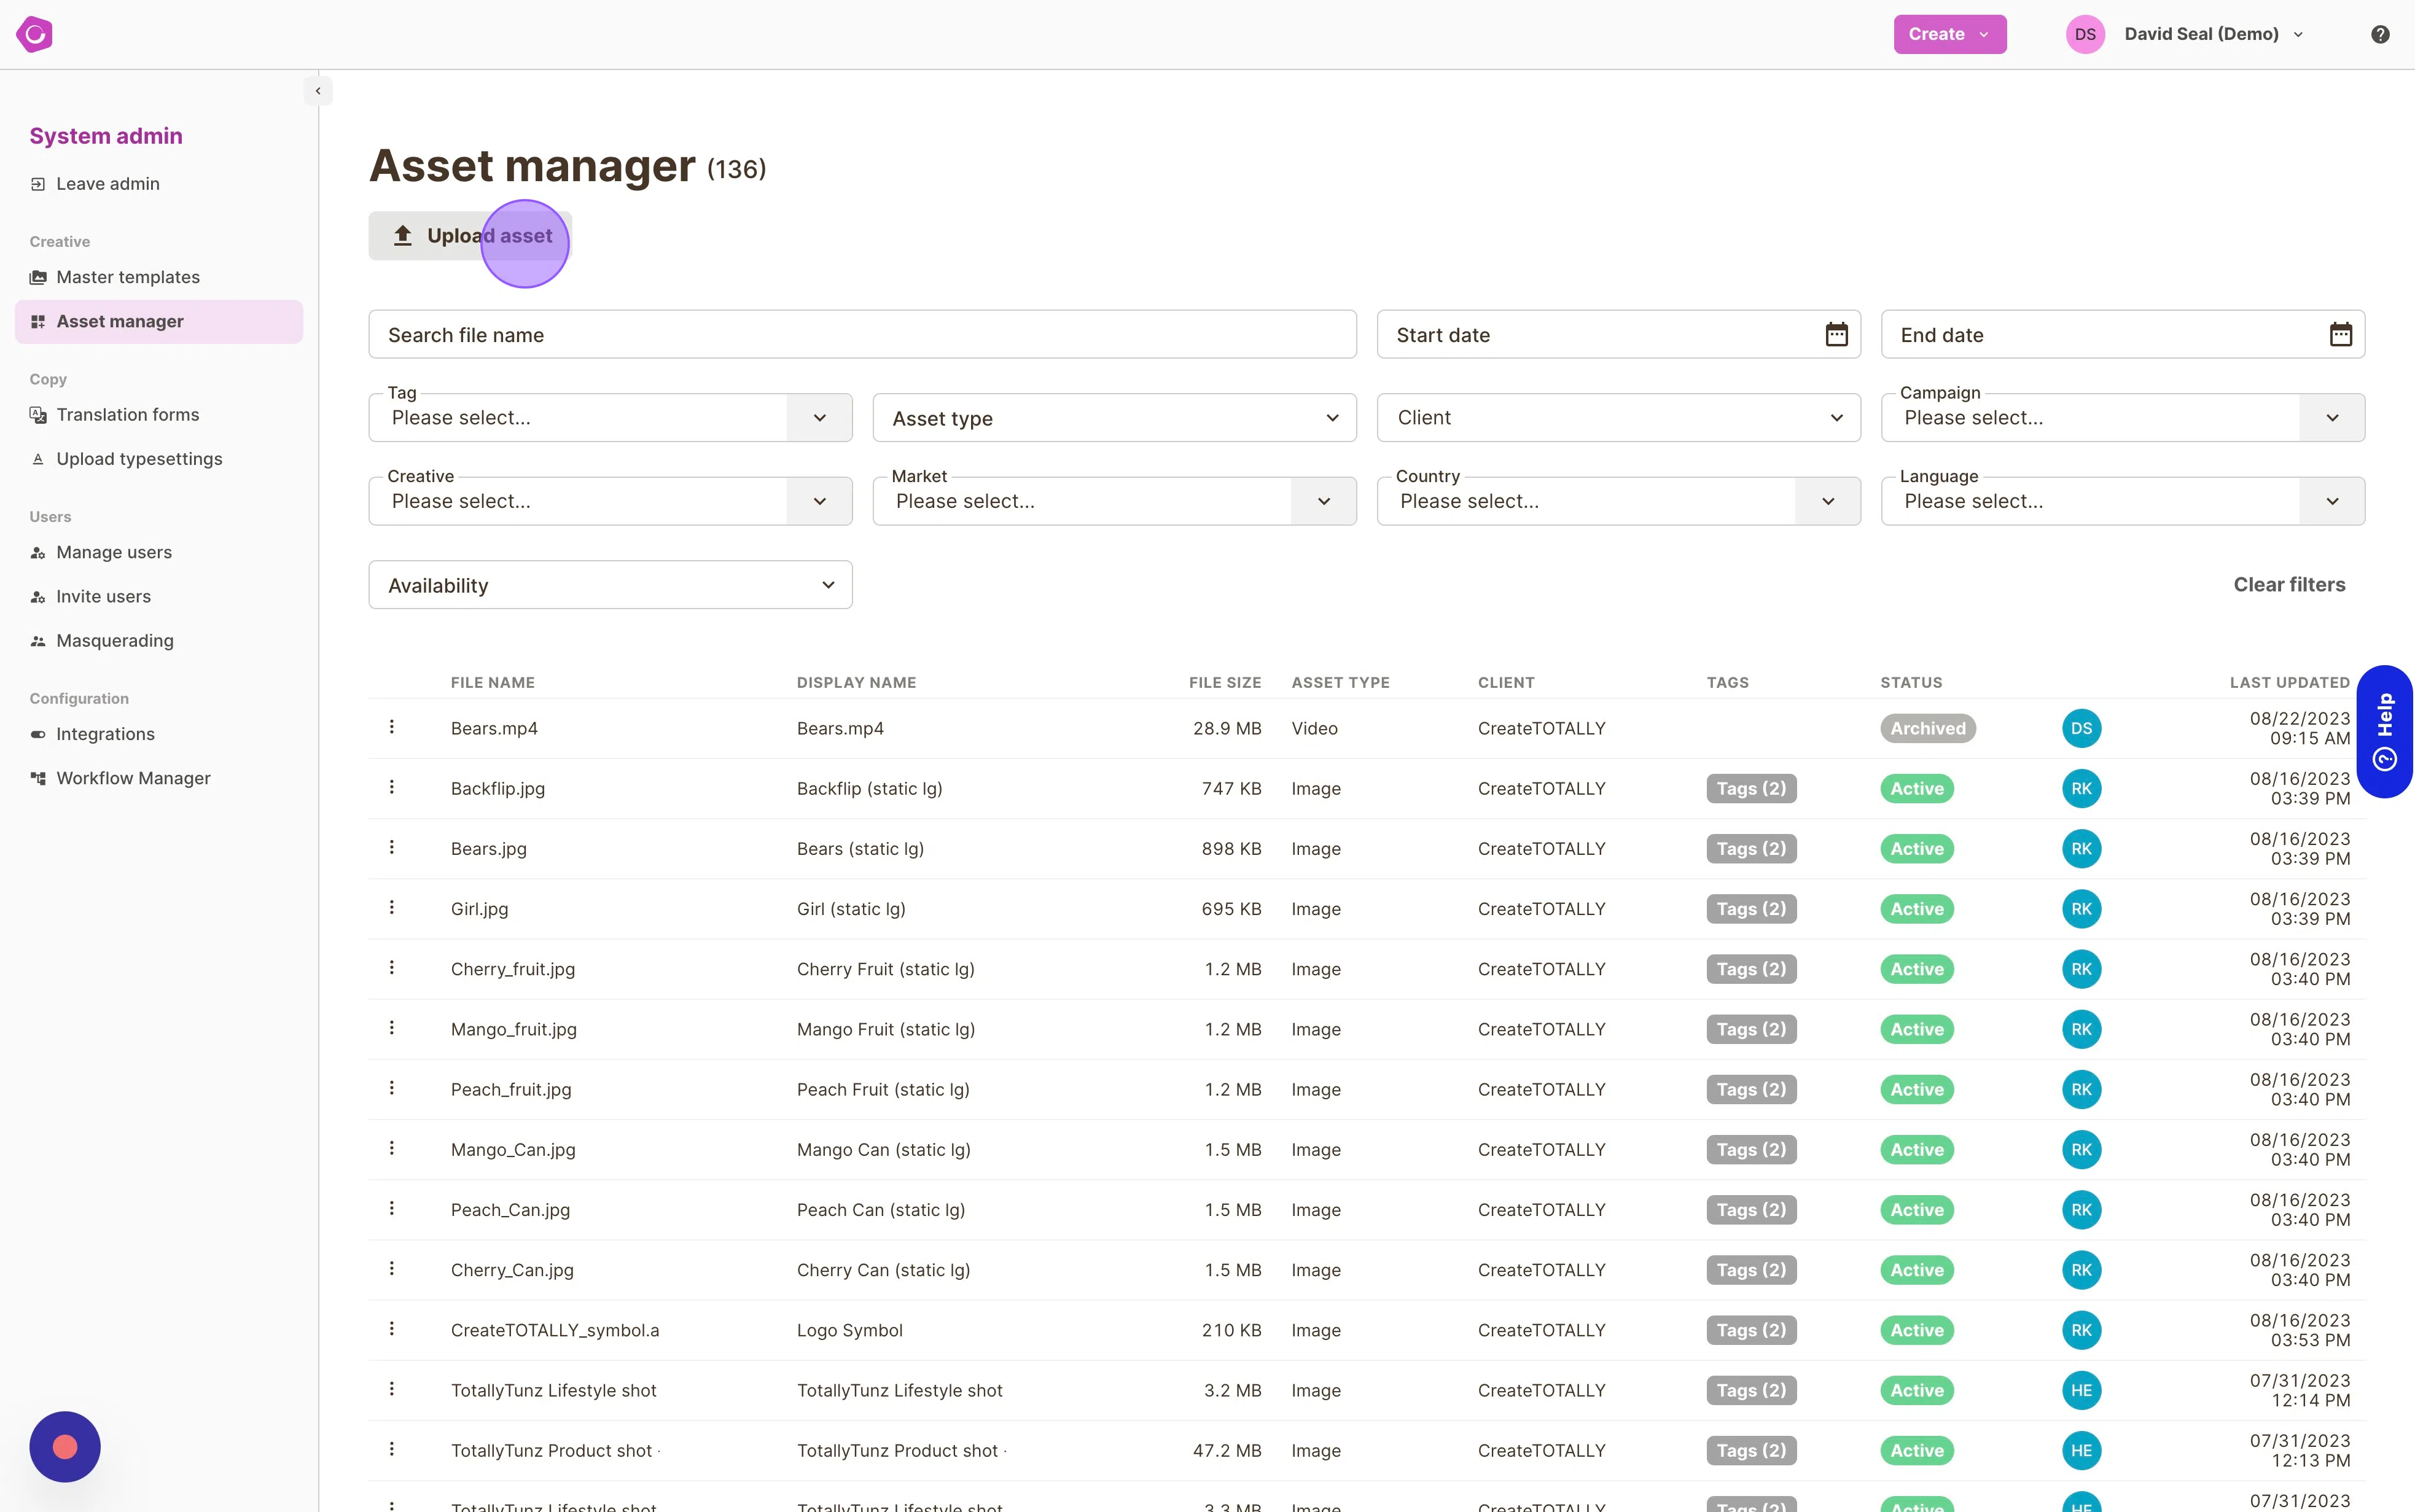
Upload customised assets to Asset Manager
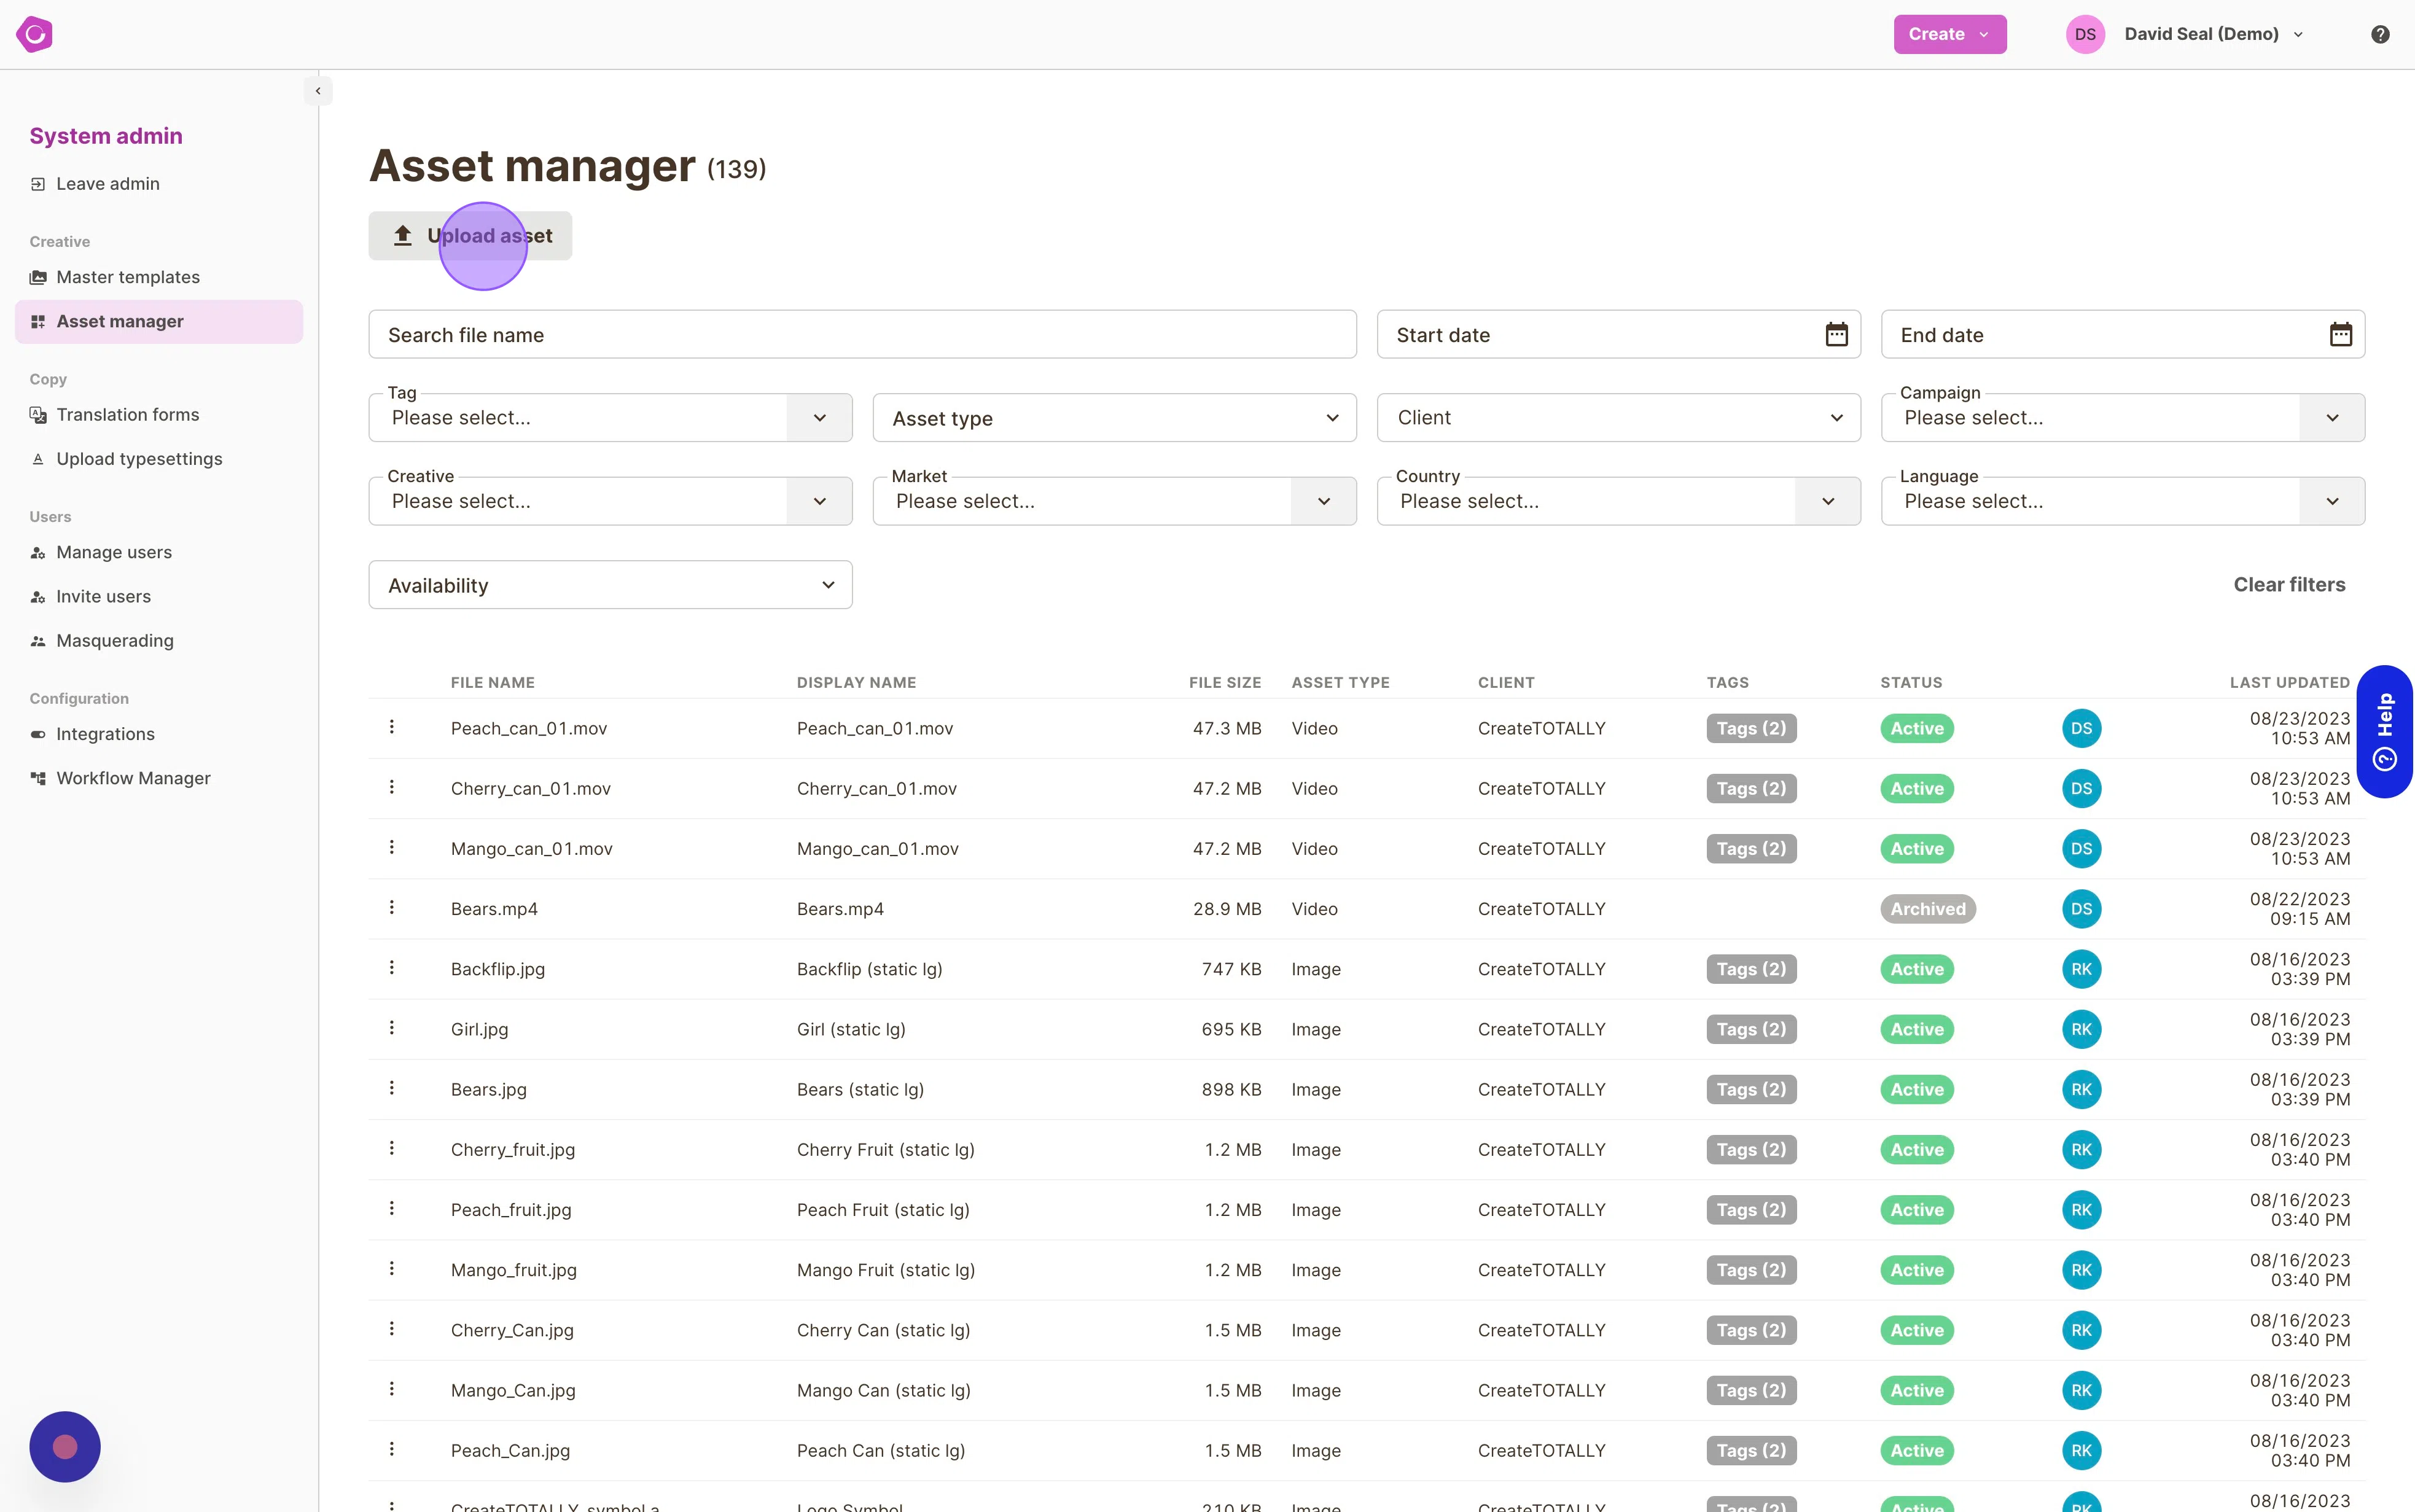
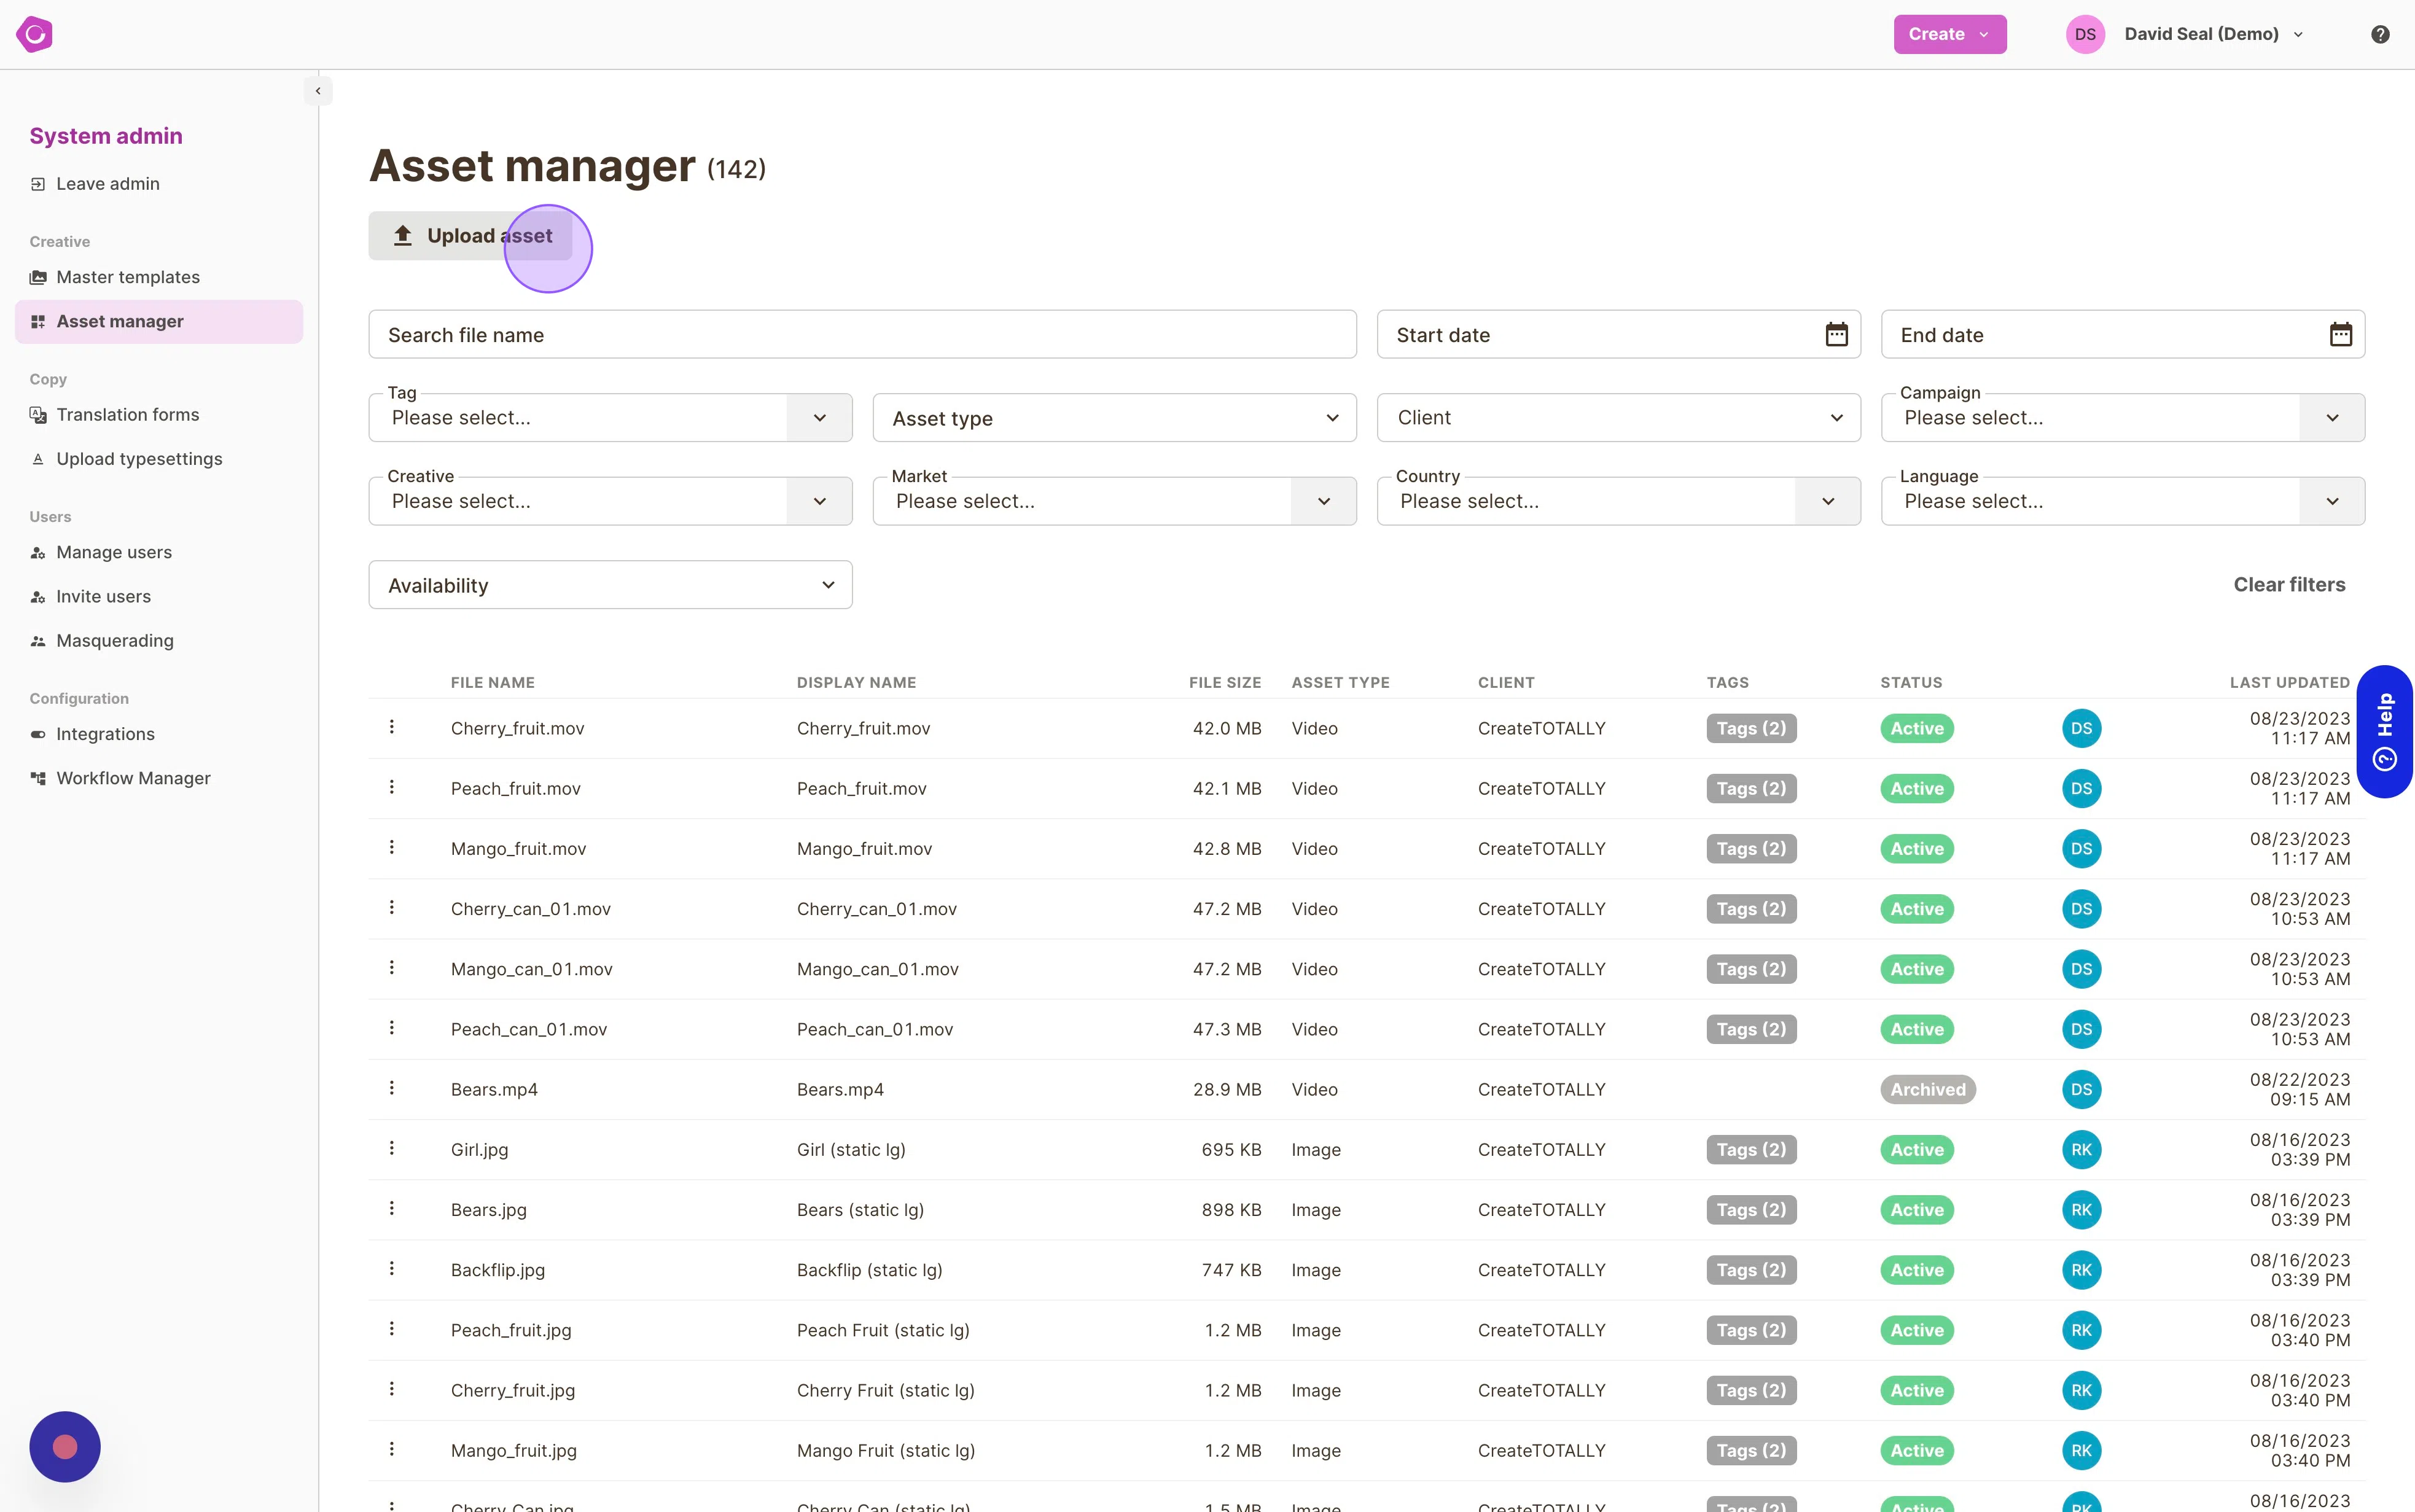
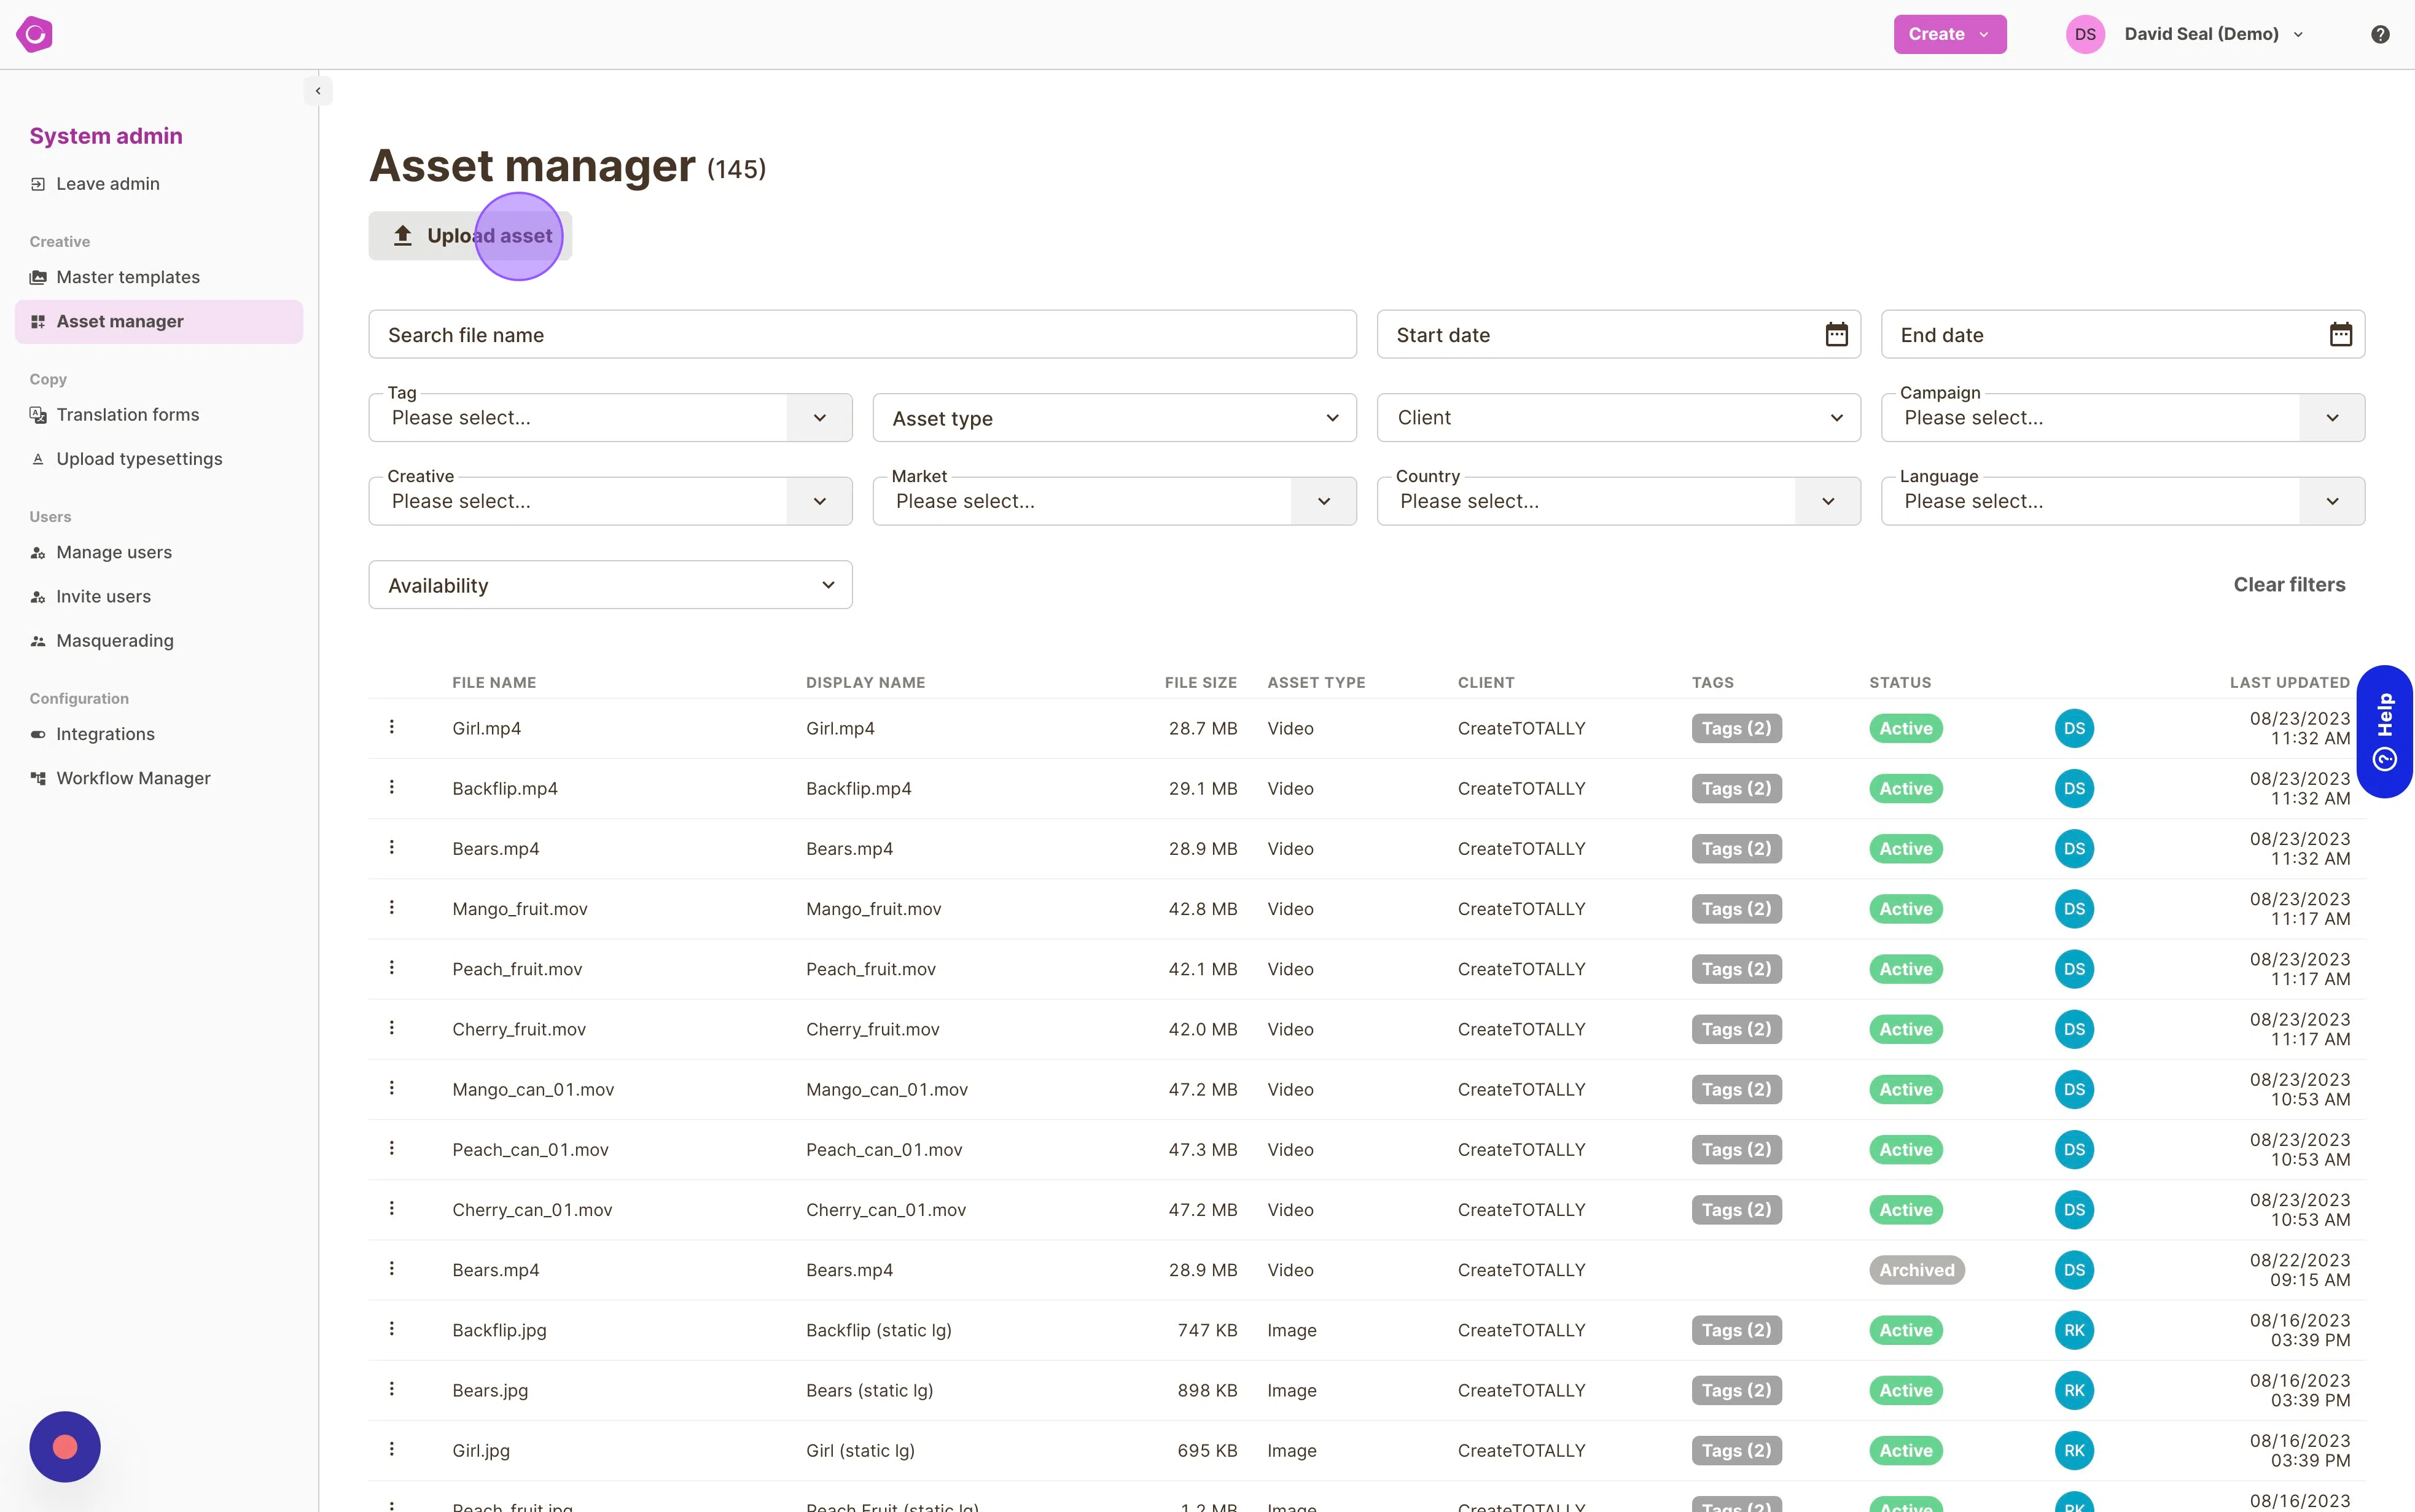
Uploading assets
To upload new assets, click on the Upload Asset button at the top of the screen. This will allow you to drag and drop or use the file browser to locate the files for upload. Download Customisation assets
Intro Cans - Cherry, Mango and Peach

Upload
Peach_can_01.mov
Mango_can_01.mov
Cherry_can_01.mov
Apply Tags
Packshot and Scene 01
Fruit Flavours - Cherry, Mango and Peach
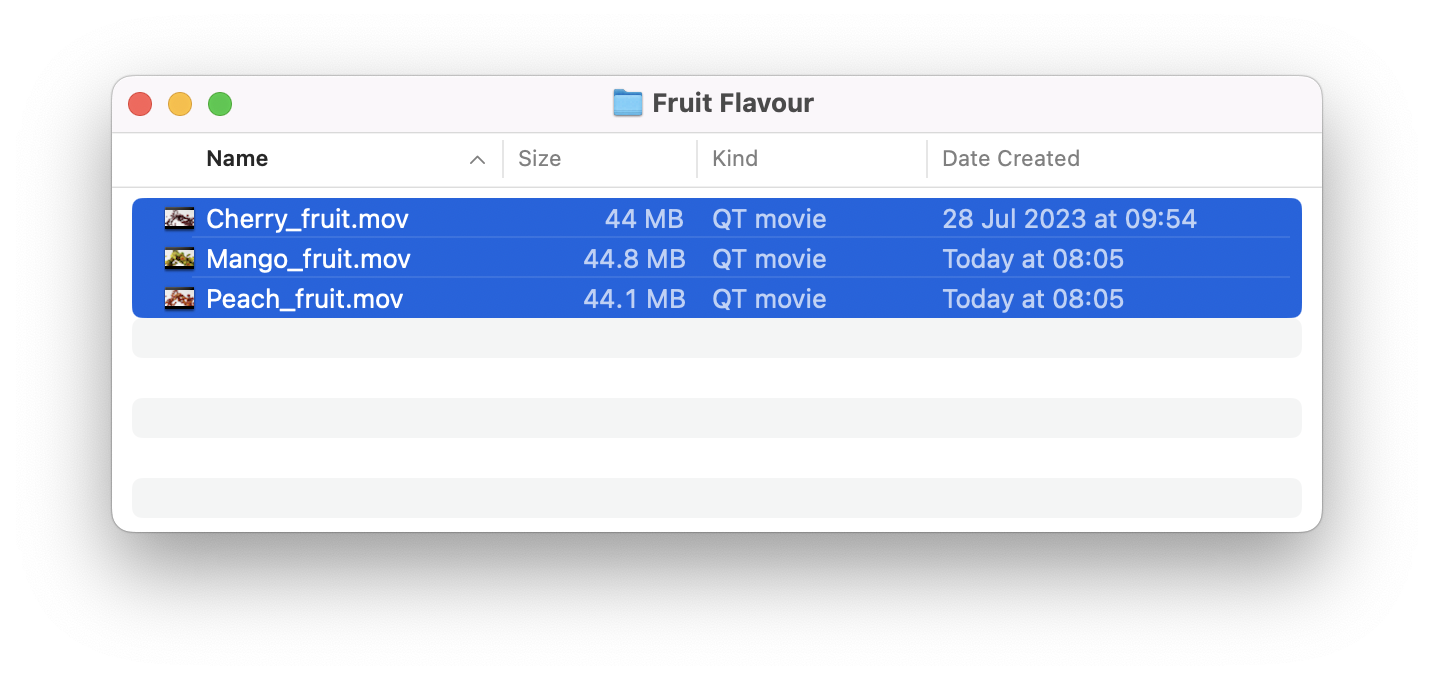
Upload files
Peach_fruit.mov
Mango_fruit.mov
Cherry_fruit.mov
Apply Tags
Background and Product
Lifestyle - Girl, Backflip and Bears
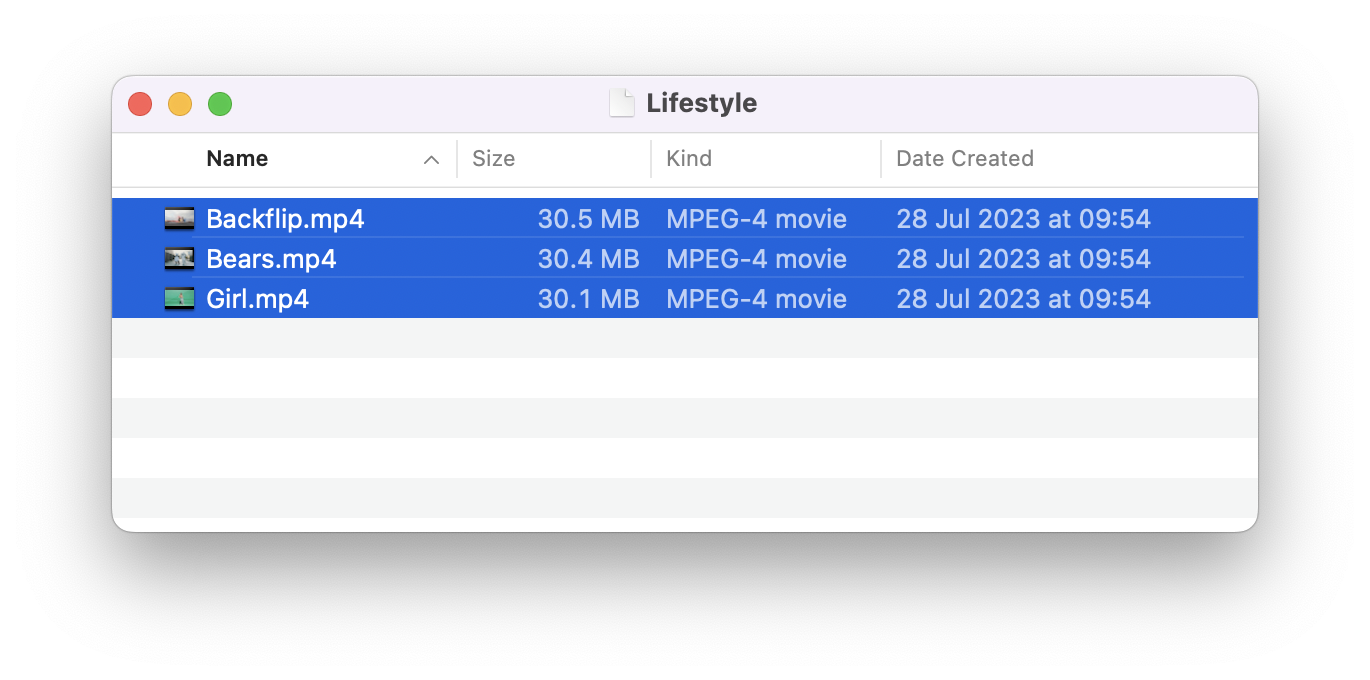
Upload files
Girl.mp4
Bears.mp4
Backflip.mp4
Apply tags
Background and People
Outro Cans - Cherry, Mango and Peach

Upload files
Peach_can_02.mov
Mango_can_02.mov
Cherry_can_02.mov
Apply Tags
Packshot
End Frame
Creating a bulk content plan
If don't want to track the media spend information of your ads, importing a content plan is the quickest way to create and customise your adaptations. It allows you to prepare a spreadsheet with the creative requirements.
Navigate to Content plans and then click on Import content plan to get started.
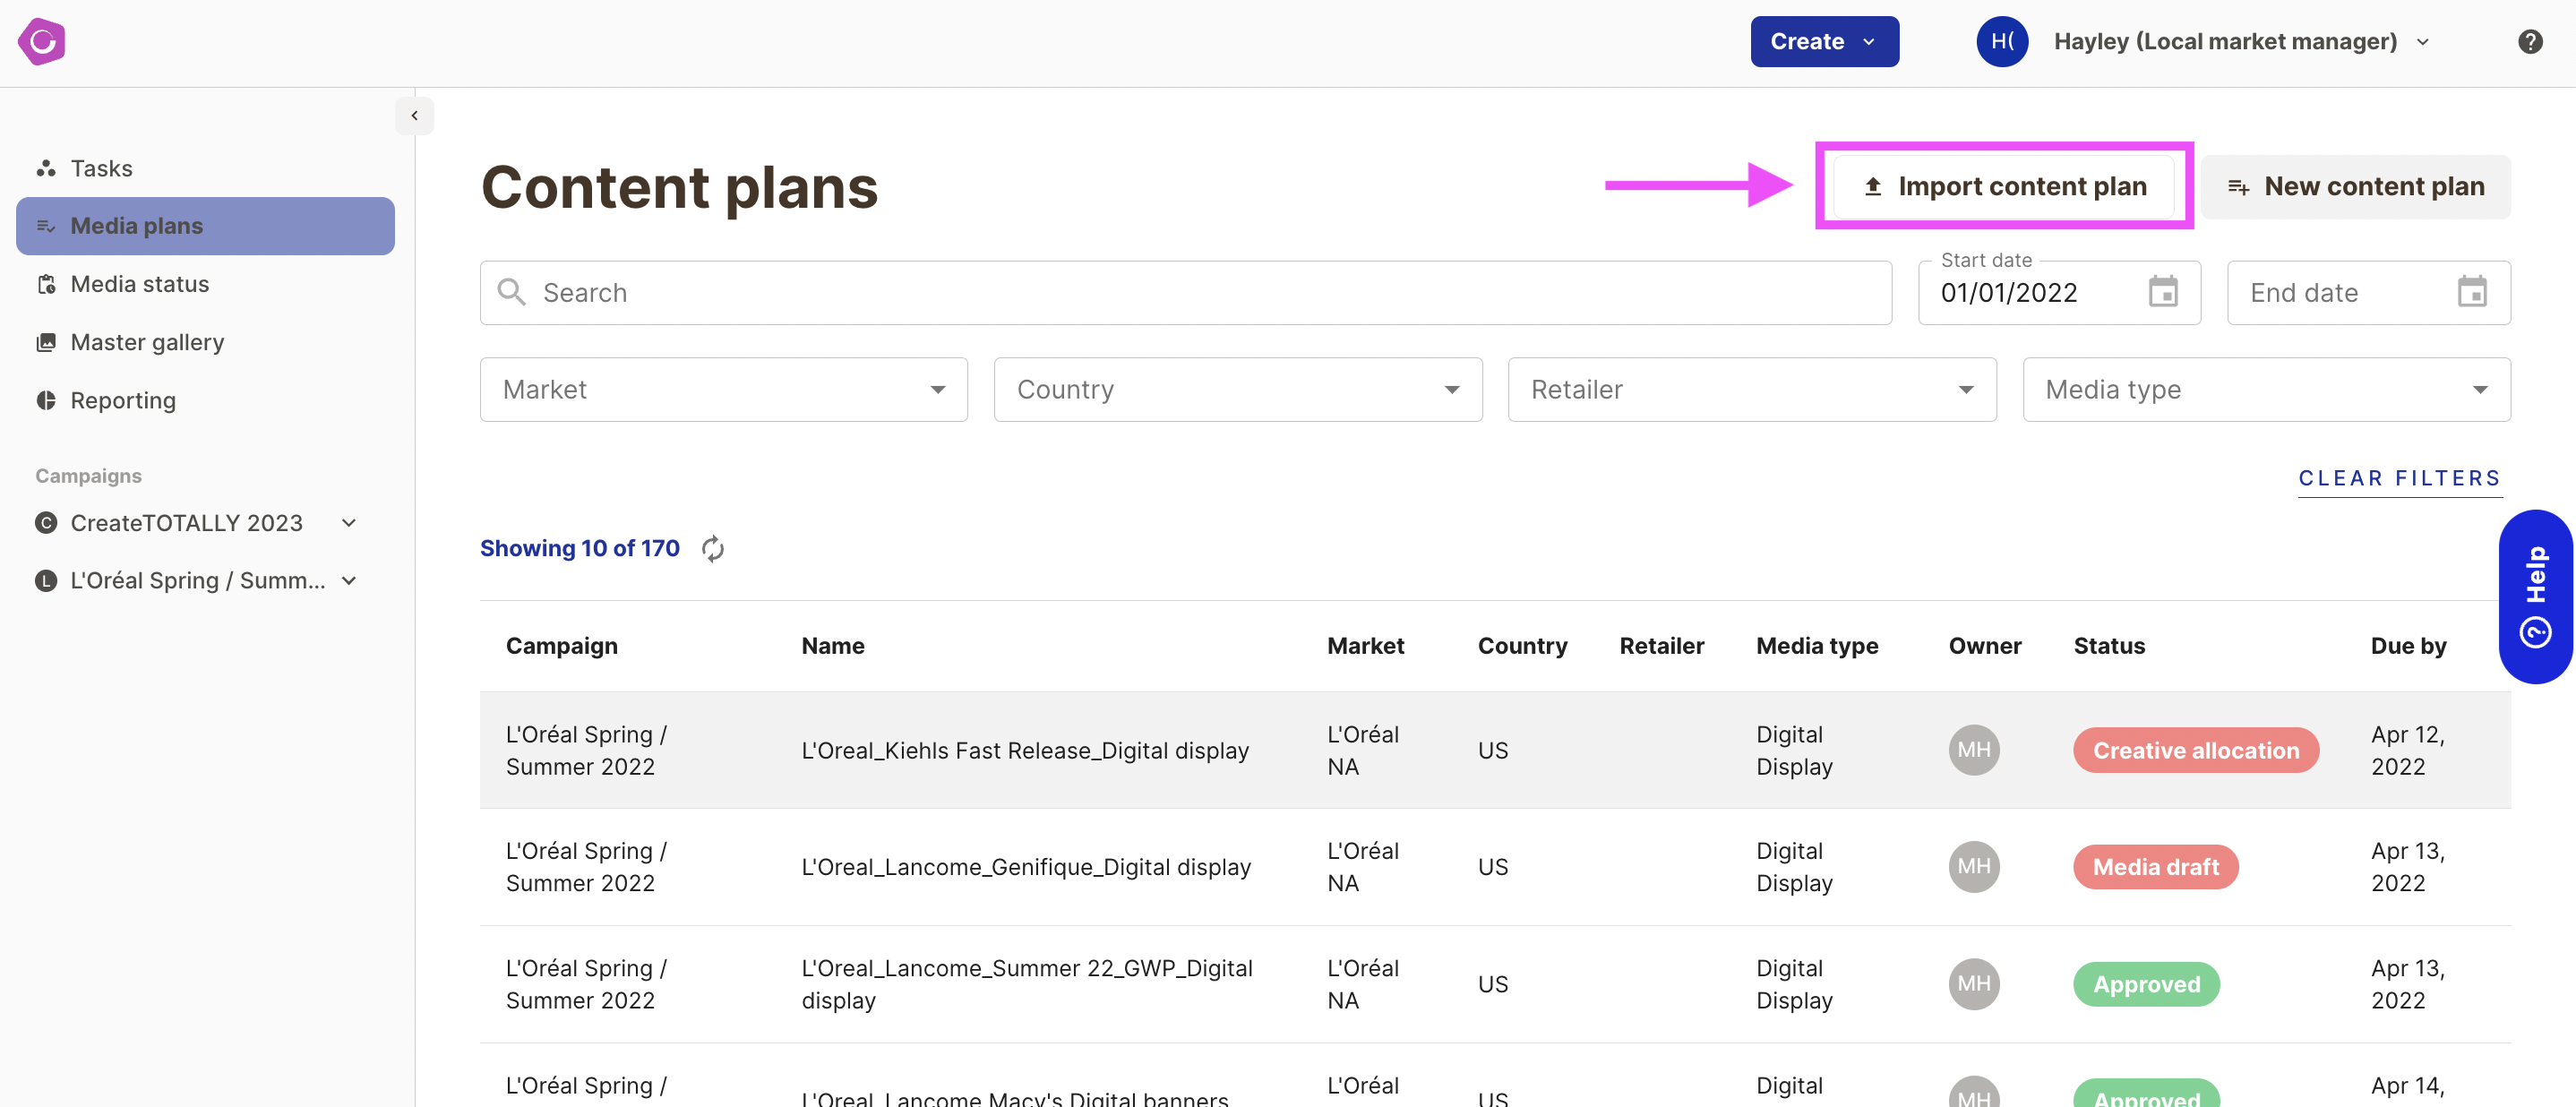
You will be guided through a step by step process to import your plan. First complete the basic details by giving the plan a name and selecting which campaign, media type, market and country it is for.
Next you can download an Excel file with the specific details for the Master Templates you need to create content from. Only Master Templates available for your Campaign and Media Type will be shown in the selector. Once you have made your selections, download the file.
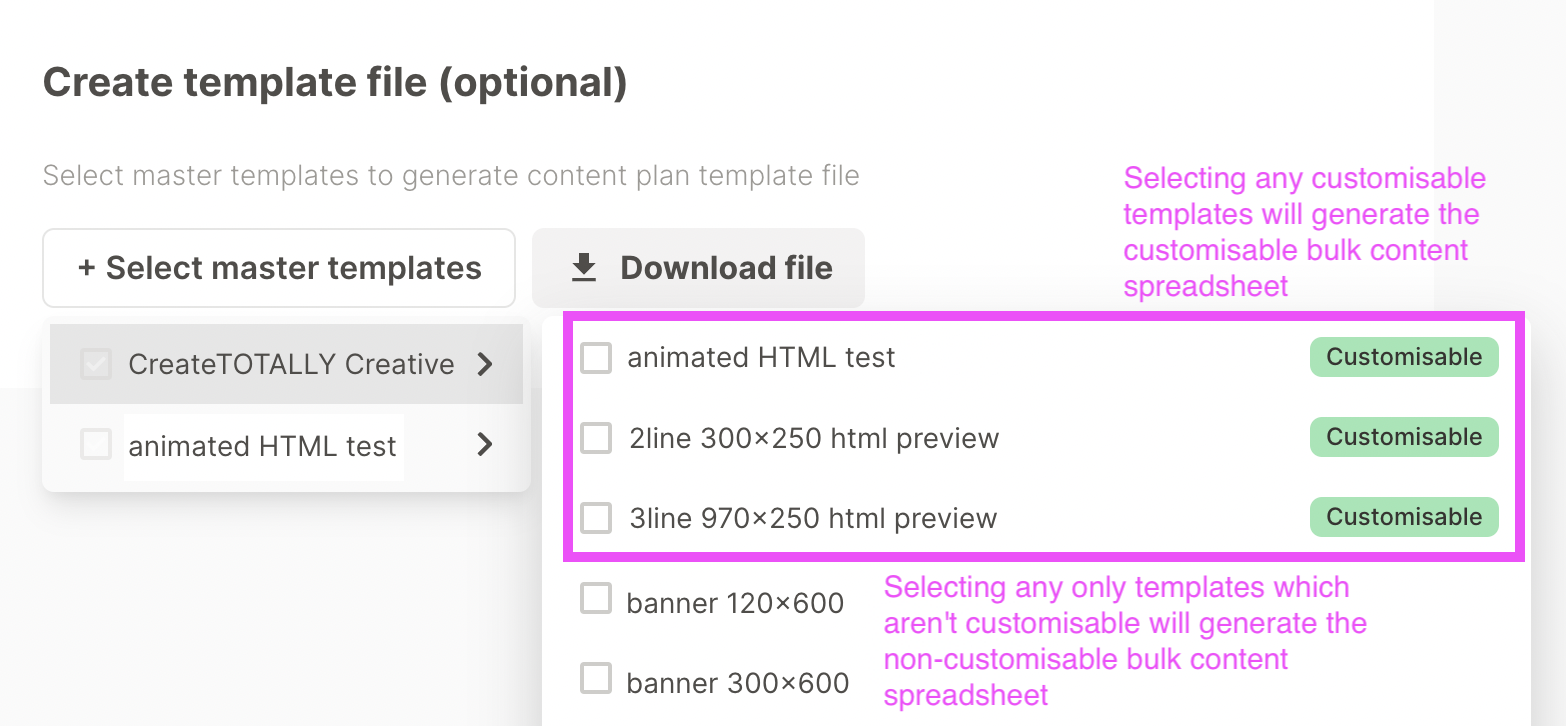
The Excel file you generate will depend on whether the selected master templates are customisable:
1. Non-customisable templates - if you select only templates that aren't customisable, you will download a spreadsheet with a single tab. Each row you complete in the spreadsheet will be a new adaptation. You will need to enter details for the following:
- Template - a drop-down of the templates you selected when generating the spreadsheet
- Placement - this is the name of the publication/ site that you are creating the adaptation for. Note - it needs to exist in the media database for the country and client you are creating the ad for.
- Format - this is the specific ad format you require. This must be available to the placement selected.
- Start date - the date your ad will run from
- Copy date - when the ad needs to be supplied. Note the copy date is used to calculate due dates for proof review tasks in the platform
- Language - each adaptation needs to have a language specified. You can select from all the languages available in the platform from a drop-down here. Note - if your templates are linked to a translation form, the language selected which copy is included.

2. Customisable spreadsheet - if you select any templates that are customisable, you will download a spreadsheet that contains a tab for each of the Master Templates you selected. You will need to enter details for the following:
- Placement - this is the name of the publication/ site that you are creating the adaptation for. Note - it needs to exist in the media database for the country and client you are creating the ad for.
- Format - this is the specific ad format you require. This must be available to the placement selected.
- Start date - the date your ad will run from
- Copy date - when the ad needs to be supplied
- Language - each adaptation needs to have a language specified. You can select from all the languages available in the platform from a drop-down here.
- Content customisation - here you will find a column for each of the variable elements of the selected Master Template. Simply enter your text (pressing option + return to add a line break) and add the display name of any image/ videos in these variable elements.
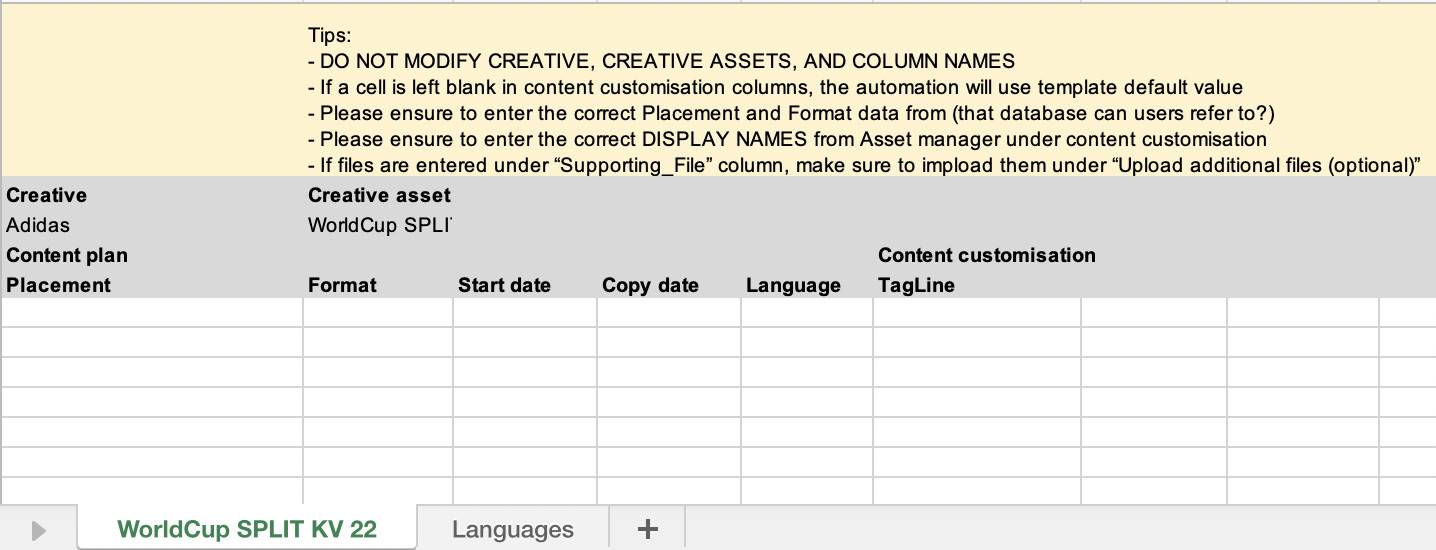
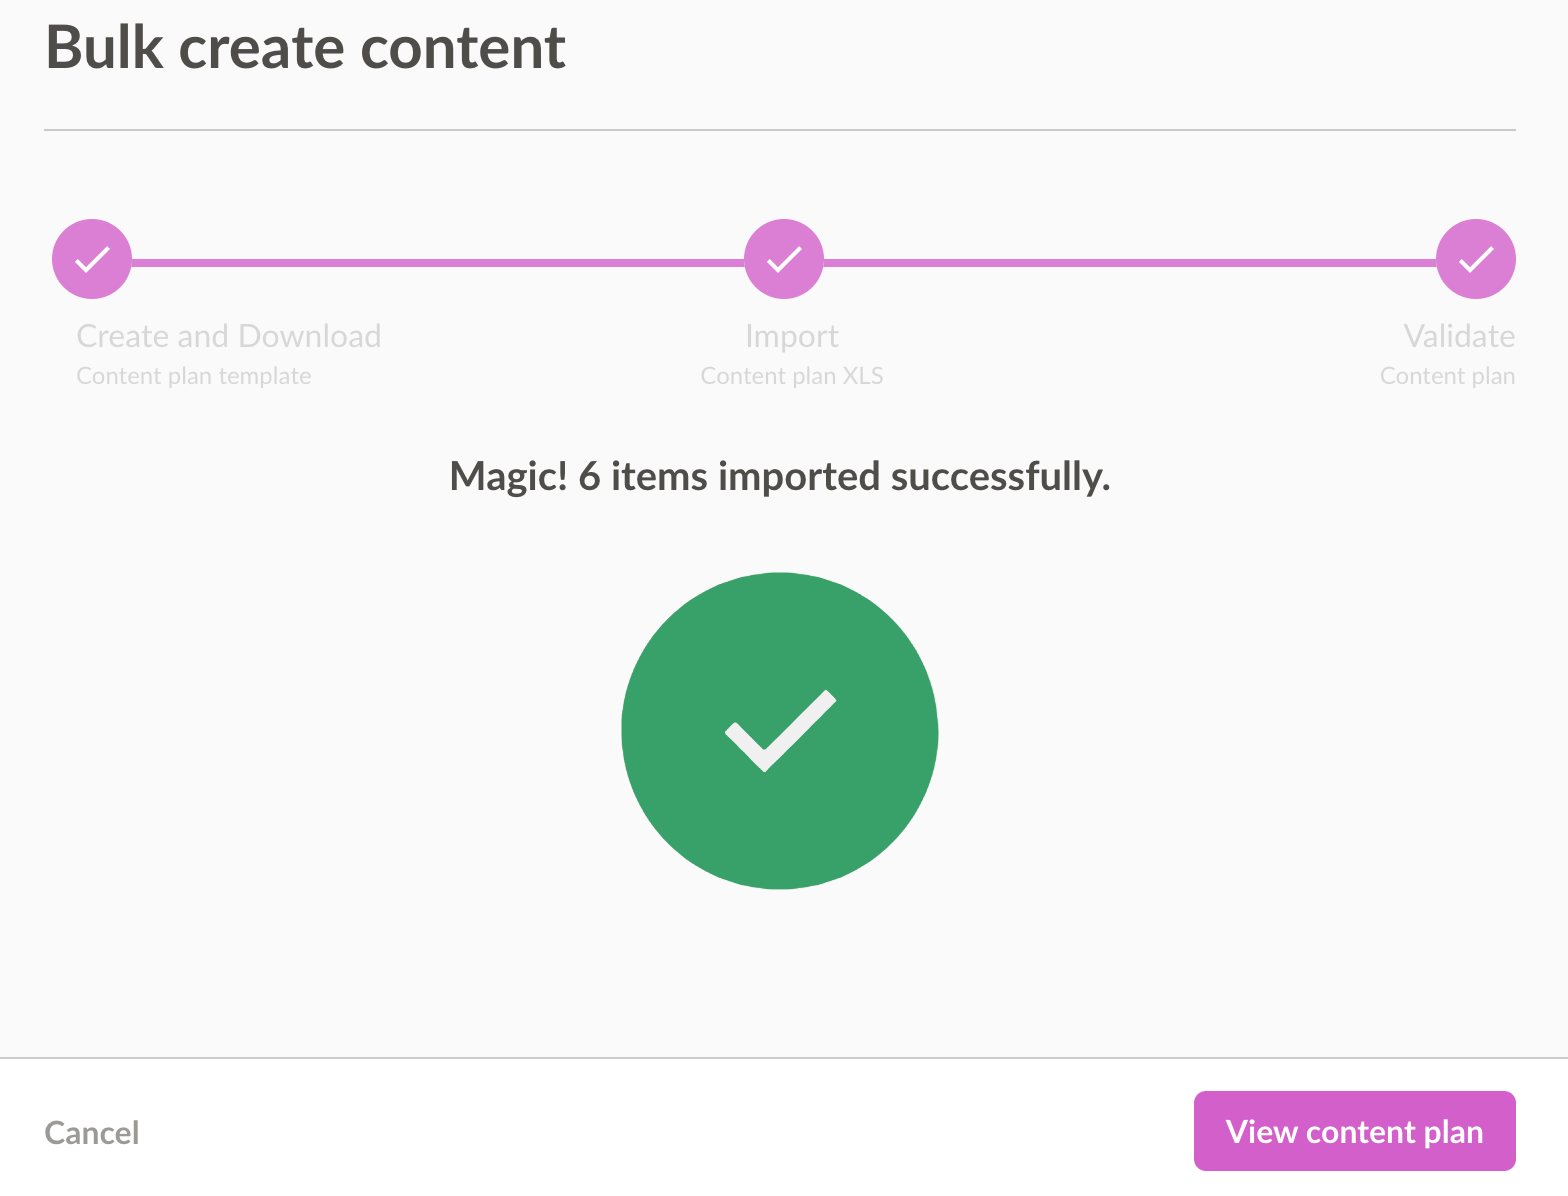
Once you've completed your spreadsheet, save as an XLSX file and upload on the next screen. Click Import & Validate to import.
If all your details are correct, you will be shown a success message. Click on View content plan to view and manage your content plan.