
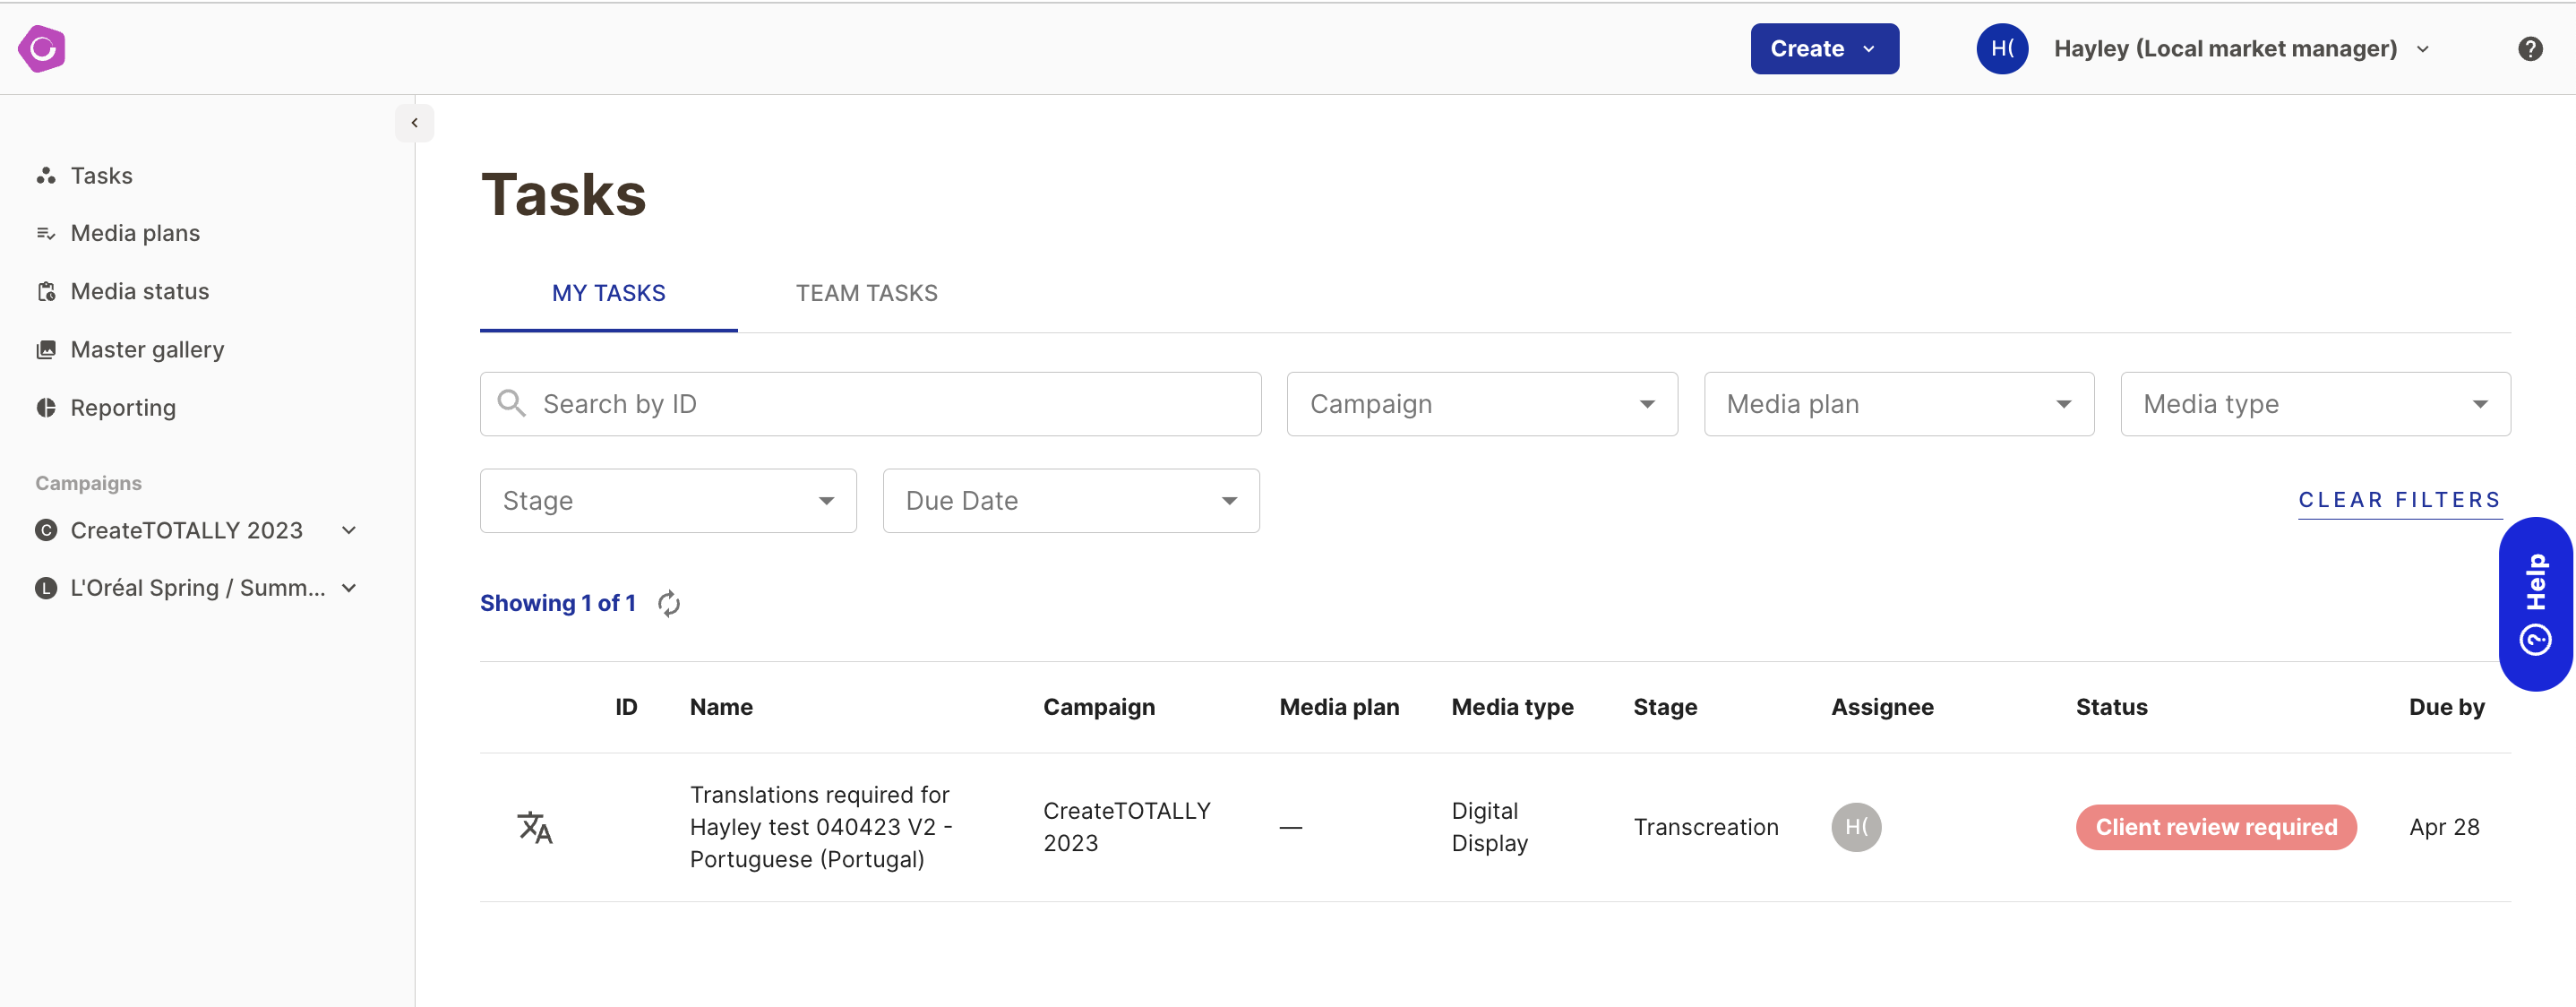
Accessing adaptation proofs
There are multiple ways to access proofs within CreateTOTALLY:
1. Email - each reviewer will receive an email to notify them that an adaptation requires approval. Clicking on this link will open the insertion screen where you can review the job details. Click on review to open the proof

2.Tasks list - this is the first page you see when you login to CreateTOTALLY. All your tasks will appear here. You can filter by stage - adaptation, to view all your proof tasks. Clicking on the row will open the proof for review.
Reviewing multiple proofs
If your adaptation belongs to a bulk content plan and you have more than 1 adaptation to review, when you click on a review task, or the review button you will be shown have 2 options of how to review these:
- Yes review all - shows you all the proofs as a preview gallery within the content plan
- Ignore - allows you to review the individual proof in detail in the review tool

If you choose to review all, you will see each of the adaptations in a gallery. From here you can quickly click on 1 or more tiles to make an approval decision. Note - if requesting changes, the same changes will be applied to all of the selected adaptations.
To see more or less adaptations, you can change the view of the gallery.
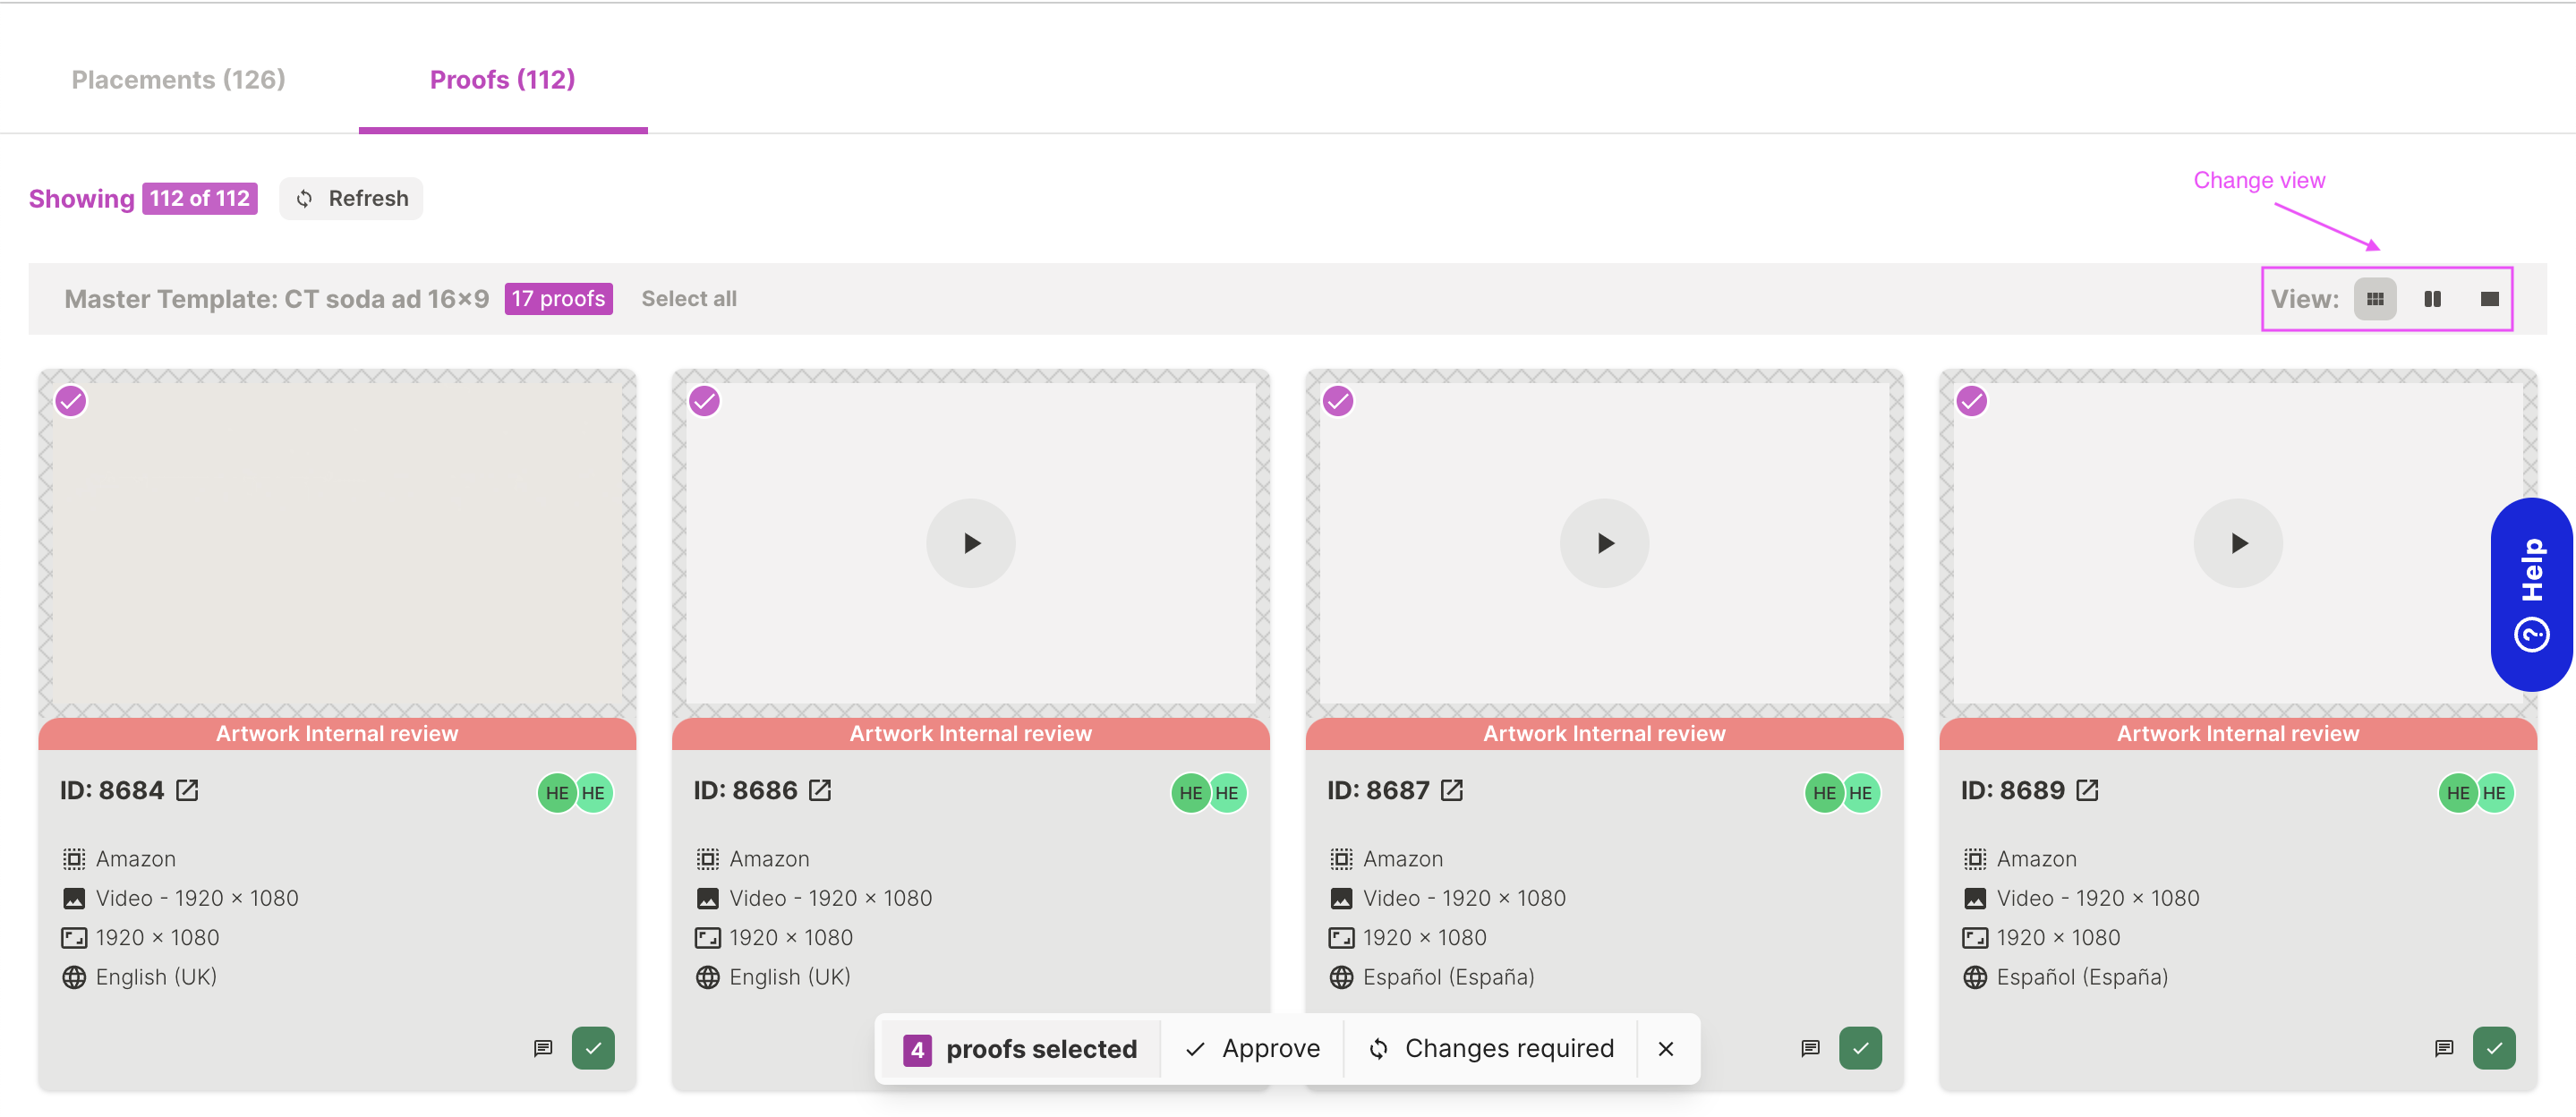
Preview tile details

Against each tile, you will see a preview of the adaptation, along with the status and assignees, ID and placement, format, size and language details.
Rich media will be displayed as a thumbnail with a play button, allowing you to preview the animation.
Once a video has been played, a toolbar will be displayed allowing you to pause, mute and play the video at twice speed. You can also scrub through the video by dragging the timeline.
Note: we currently only support MP4 view previews. Videos created in mov format cannot be reviewed in the gallery.
Re-assigning and adding reviewers
The people assigned to review the proof and the number of proof review stages are determined by the customised workflow set-up. Sometimes a specific proof may require different approvers. To achieve this you are able to:
1. Re-assign the reviewers from a stage to a single reviewer - re-assigning can be done from the tasks list or the insertion screen. It removes all the existing reviewers from a stage and assigns the review task to a single user
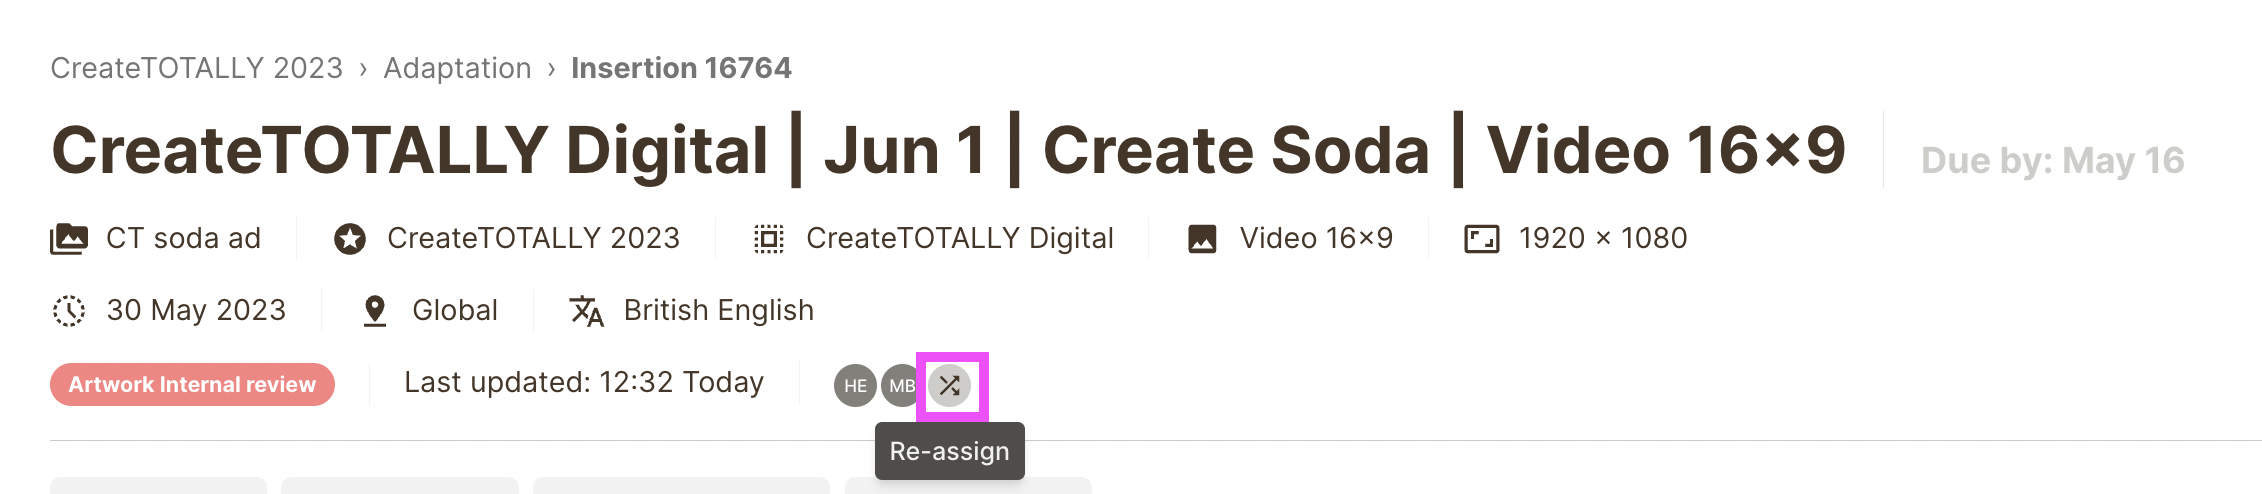
2. Add new user(s) to the current/ future proof stage - adding users to the current and future stages can be done by clicking the Review and Sign off tab.
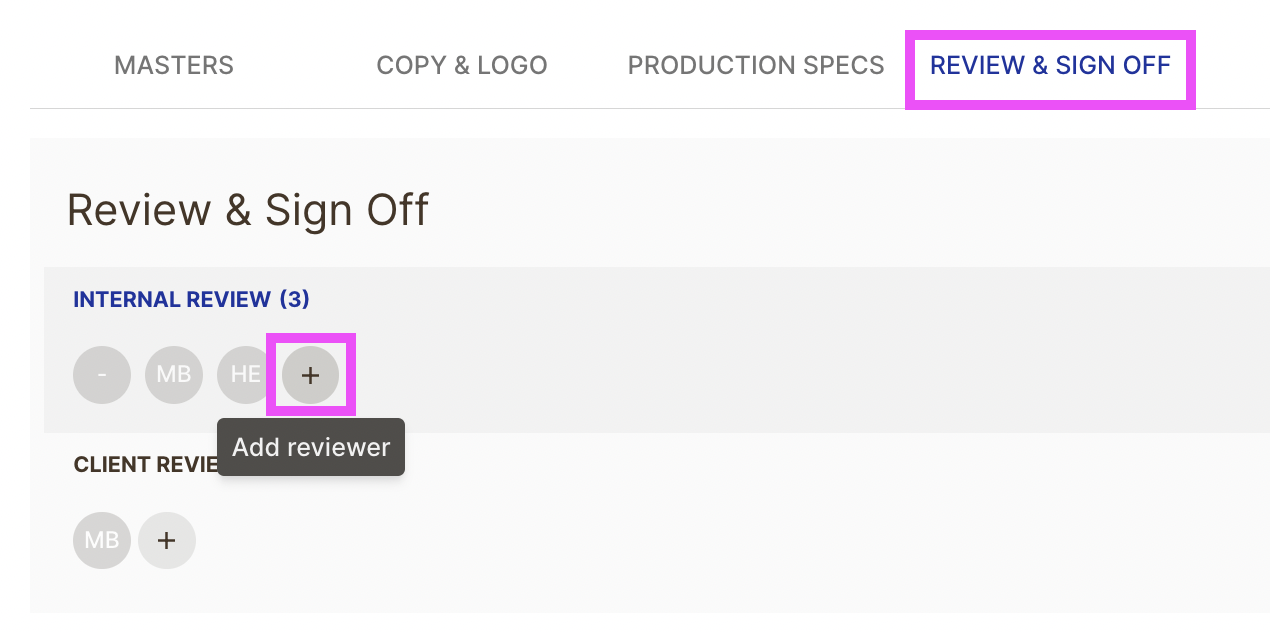
When you add a user to a stage or re-assign, you will be able to search a drop-down list to locate the user you require.

Proof previewer
The Proof previewer allows you to compare assets side-by-side as part of the review / approval process.
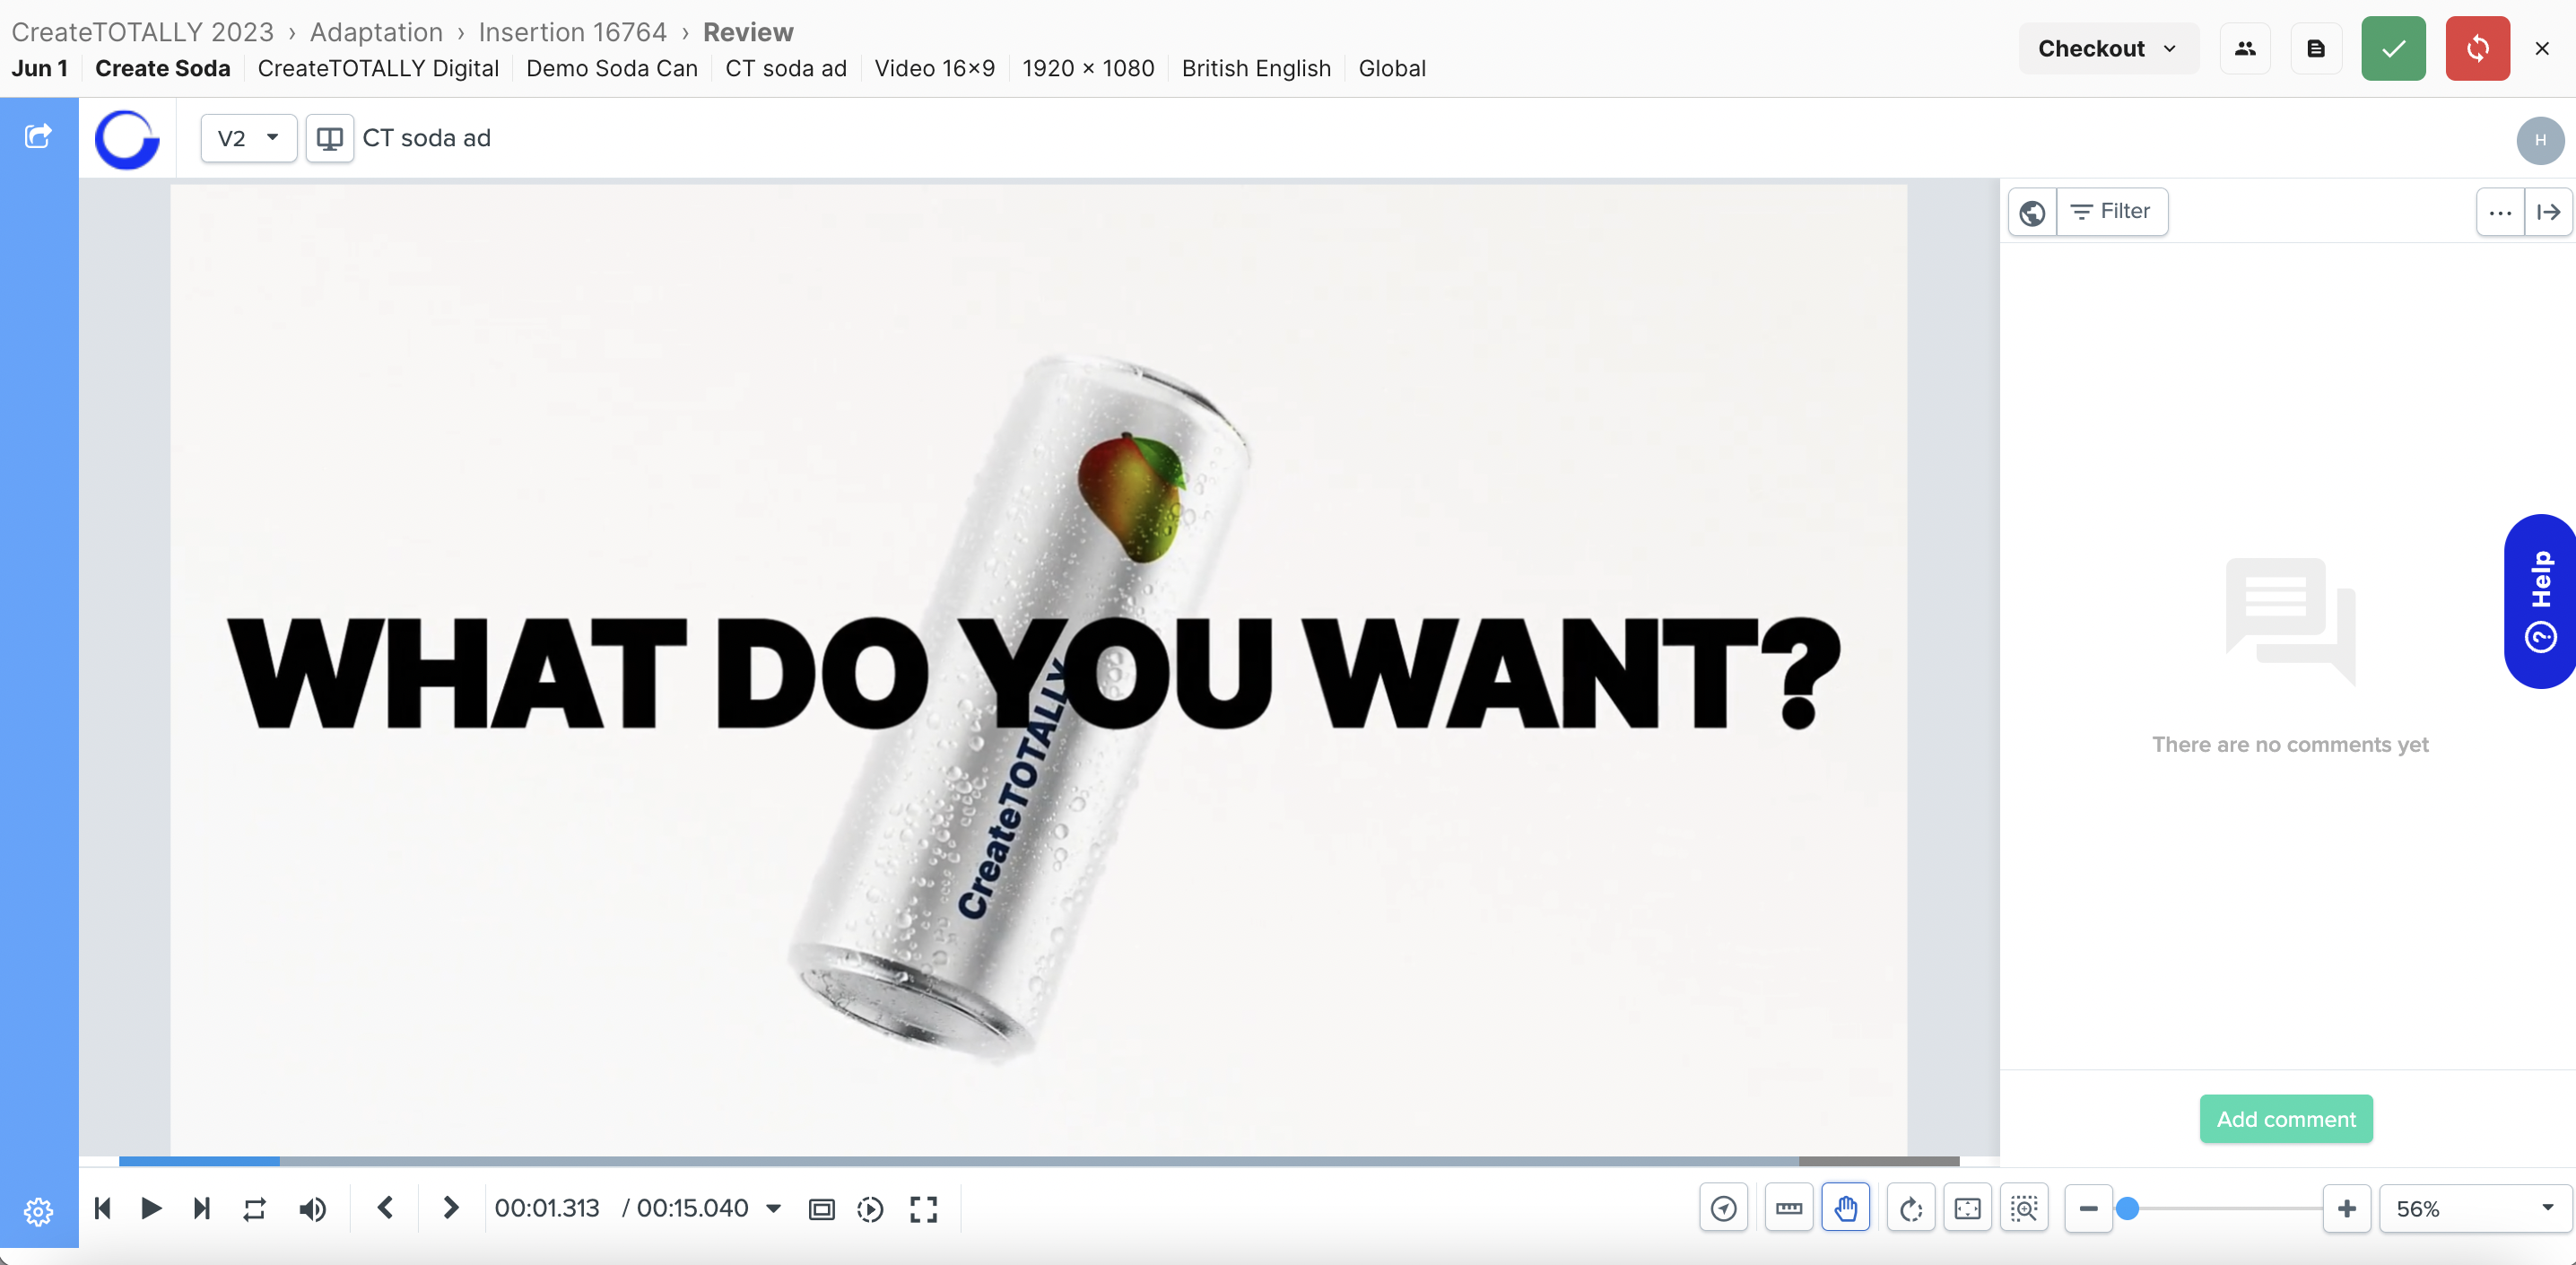
At the top of the page you will see confirmation of the specific asset details, such as insertion date, campaign name, publication name, media plan and publication size:

Side-by-side review
You can compare historical asset versions side-by-side by selecting the version / compare icon:
This will then activate the split view tool:

Adding a Comment
By clicking on the add comment button you can annotate the proof, to give details of the changes you believe should be made.

Comments can be made using a Private or Public preview access, which will limit who can see the annotations and comments that have been made.
Comments can be filtered by date, by reviewer or by comment type, allowing for any amends to be actioned quickly and efficiently.
Review Feature overview
The Proof previewer features and functions include:
The primary actions available within the Proofing Tool:

- Checkout - Downloads the project files to allow artwork changes to be made. When the project is checked in, a new version of the proof will be created. Note - this functionality is only visible to Studio users and Administrators.
- View approvers - Displays the proof stage names, reviewers at each stage and previous stage approval decisions.
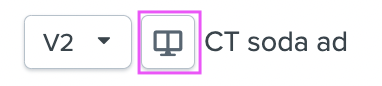
- View copy/ logo - Displays the selected copy (if using a translation) and logo (if applicable)
- Approve - Approves the artwork and moves it to the next stage
- Changes required - If changes are required, a comment should be left on the proof and then the changes required option selected.
Copy checker
The copy checker allows you to see the copy from the translation form that appears in the adaptation. To launch the copy checker, click on the icon below:
Video proofing tool
The Video Proof Viewer is designed to look and feel exactly the same as the standard Proof Viewer, with a few additional features.
.png)
- Skip to the next/previous frame - click these arrows in order to skip a video to the next/previous frame.
- Play/Pause - this button allows you to start and stop the video. Alternatively, you can hit the spacebar, and it will work the same as clicking the play/pause button.
- Loop - this button allows you to put a video on a loop, and it will start the video automatically once it reaches the end.
- Volume - this button allows you to increase or decrease the sound.
- Switch between comments/markups - those two arrows will help you to navigate through comments/markups. You can press the forward or backward arrow to quickly skip to different reviewers' comments.
- Timer and time format - the first set of numbers show time elapse, and second shows the total length of the video. You can also decide on what format should this timer be displayed: Time, TimeCode and Frames.
- Video timeline - if you hover over the timeline with your mouse, you can see the video frame by frame. You may also see user avatars. When a reviewer makes a comment/markup, their avatar will appear on the timeline. If you click on the avatar, it will take you to the exact frame where the comment/markup has been made.
- Safe area - this lets you see how the video will look in different formats
- Playback speed - click this button in order to increase or decrease video speed
- Full-screen mode - opens a video in a full-screen mode
- Range-based comments - if you need to add a comment that refers to some part of the audio/video file you can adjust the starting and ending point of the comment by moving comment indicators. Indicators range timeline will be additionally added under the comment
- Subtitles - if subtitles were added during proof creation this button will let reviewers to switch them on/off during video playback
The rest of the functionality of the Video Proof Viewer is the same as they are for static files. You can put your video in fullscreen, zoom in or out, fit the video to the screen, and of course add comments/markups etc.
Checking out project files
During the review process, designers can access the open project files in the software that was used to create them e.g InDesign, After Effects, Photoshop, Figma or Illustrator. This allows you to make tweaks to the automated output and create a new version of the file for approval.
To checkout files, you will need the StudioLink app installed. This can be downloaded from here.
Click Checkout > Full package from the insertion screen. This will download the project files to a temporary file location.
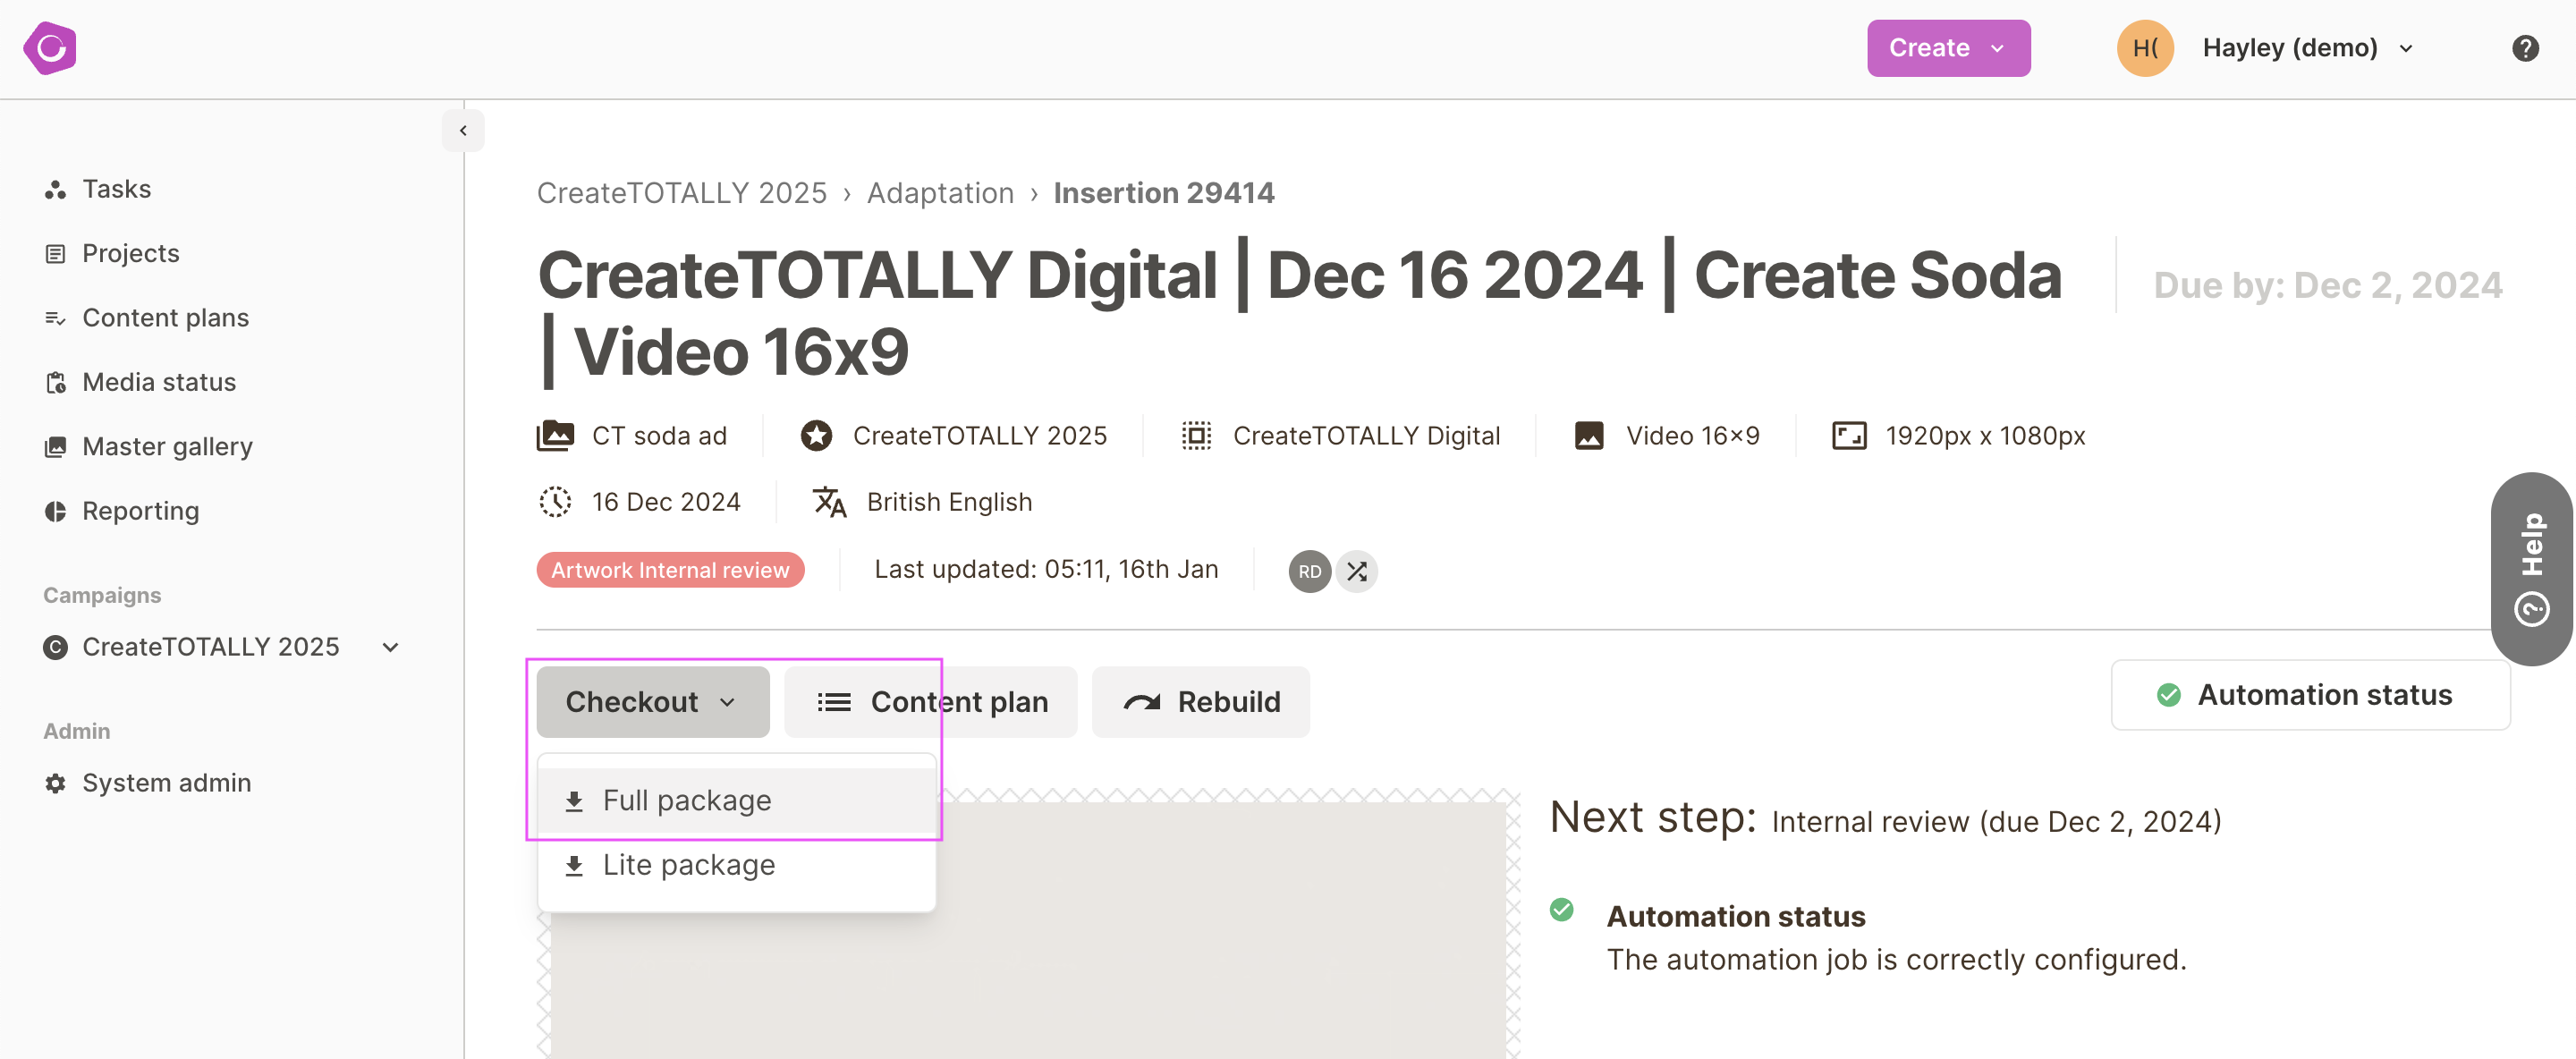
This will load the StudioLink app. You will see the job ID and a progress indicator while the project files are downloaded.

When the download is complete, the label Downloaded will appear along with an arrow. Clicking the arrow will take you to the project files.
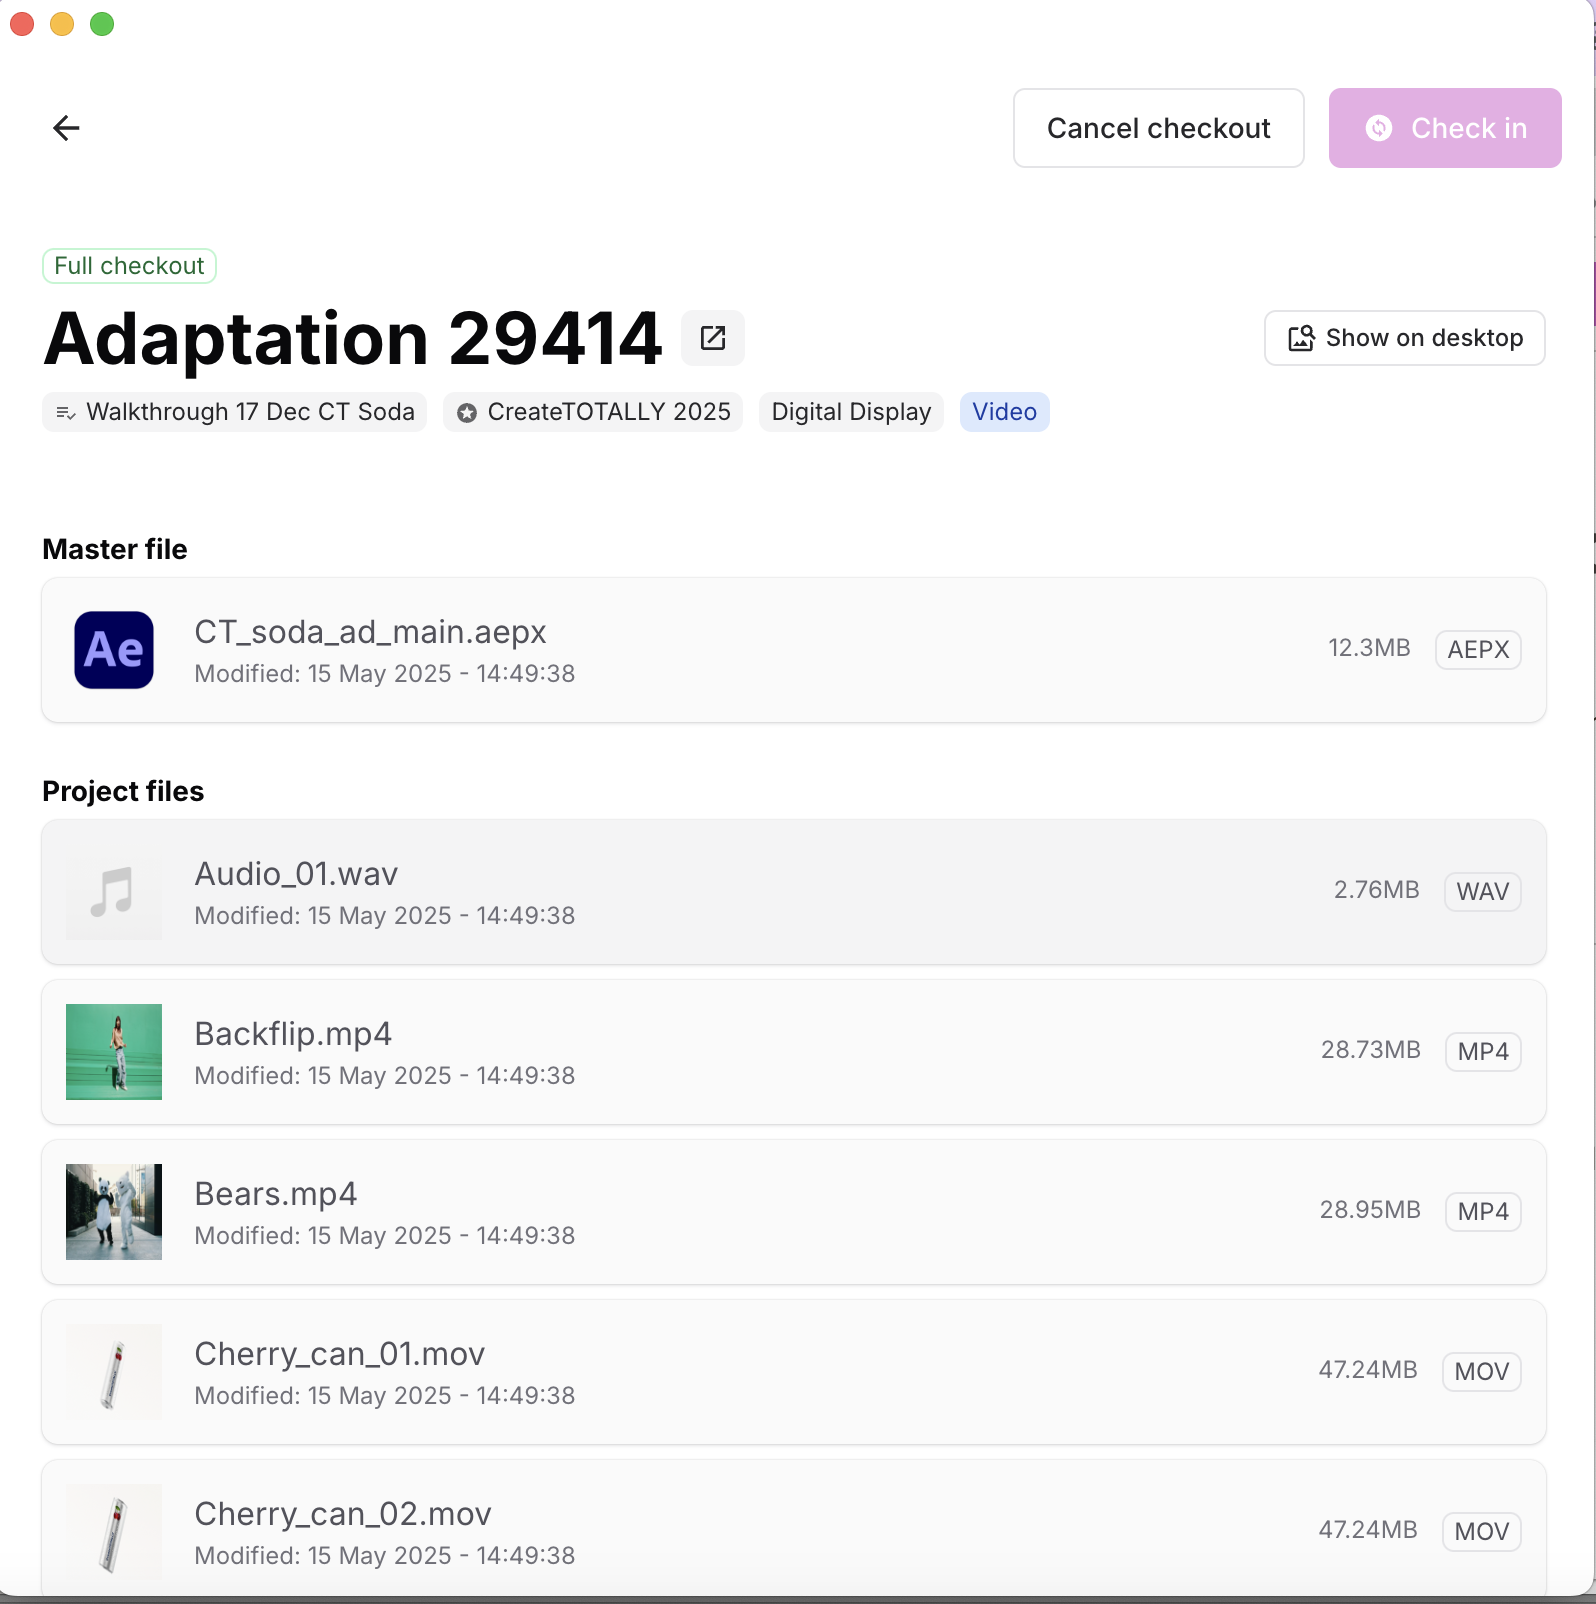
To make changes to the files, you can either double click on the master file, or click Show on desktop to see the files in a file browser. Make the changes you require, save and close the project file. Note - you must save and close the files before you checkin. You will see the label changed appear next to the file to indicate it has changed.

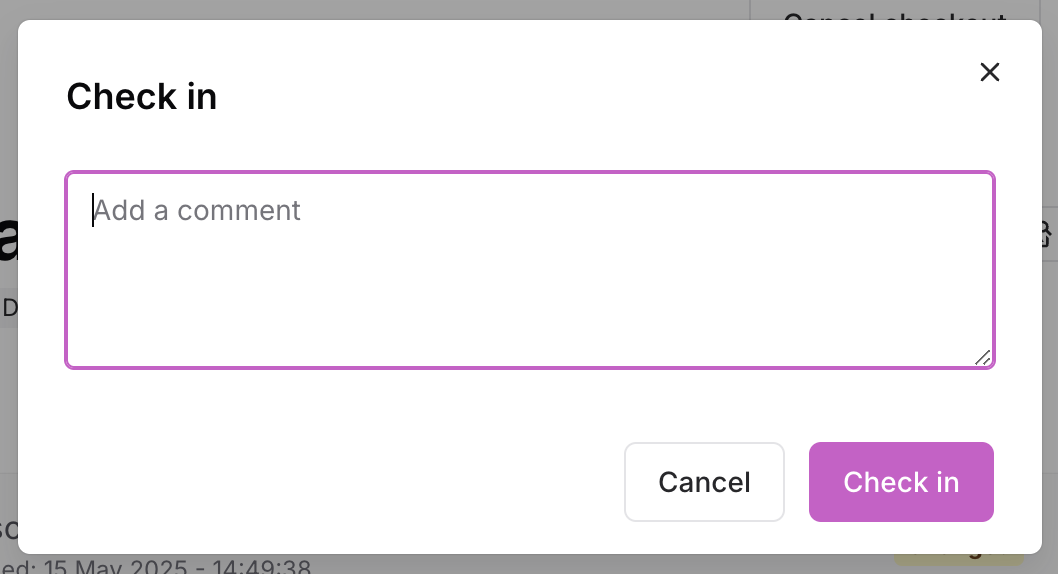
Once you have made all your changes, click the checkin button. If you’d like, you will be able to leave a comment to describe the changes you’ve made. The files will be removed from your computer automatically after they are checked in.
While the files are checked out, they can’t be accessed by anyone else. Clicking cancel checkout will revert back to the previous automated files and allow another designer to check the files out (if required).
If you rebuild a job in the platform, it will re-run automation and any changes made by checking out a file will be lost.
Troubleshooting
Proof not updating with new assets
If the proof that appears after you checkin your amended files doesn’t have the correct assets, make sure you have also uploaded these in StudioLink. You can do this by dragging and dropping them into the app.
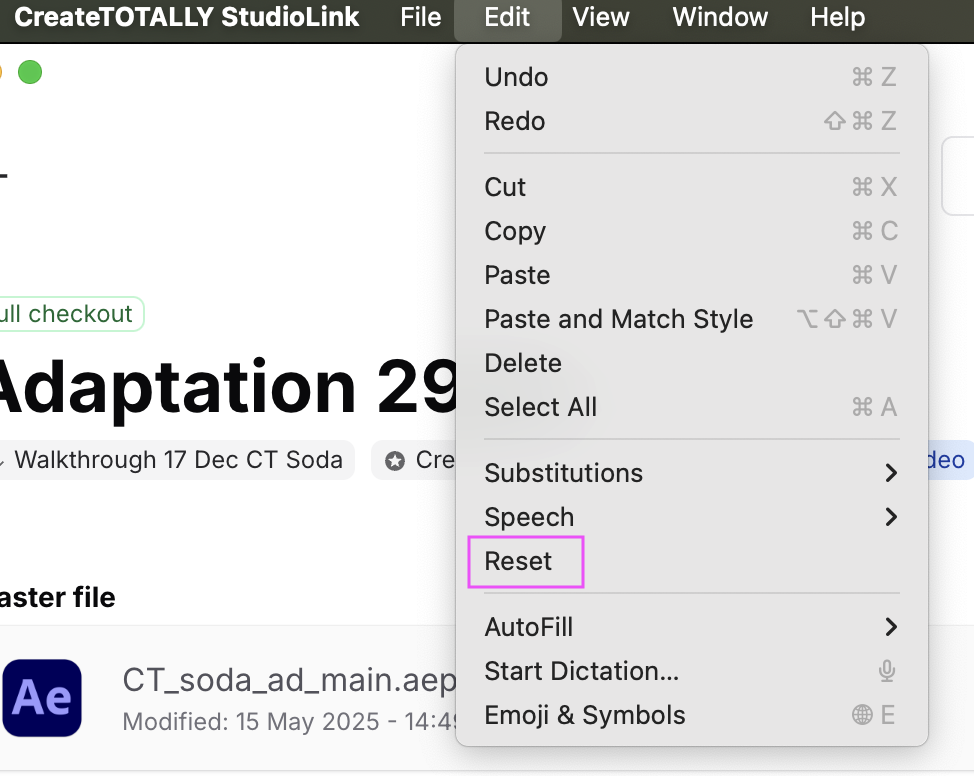
Files stuck in download
If your network connection is lost, you may have files stuck in downloading. To clear all of the files, click on Edit > Reset. This will clear all your downloaded files.
Figma project unavailable
To access Figma projects, the user needs to have a seat in the team that the templates are located.