
Figma design files can be set-up as templates in CreateTOTALLY by using the CreateTOTALLY StudioCraft tagging app. This is available from the Figma app store here.
Preparing a Figma design file to be used as a template involves structuring the project in a logical, organised fashion, as well as tagging the elements that will be customisable.
Each Figma file can contain multiple assets e.g multiple banner ads. These will be exported as an individual files.
File preparation
Getting started
There are a few limitations in how Figma design files can be set-up to be templates in CreateTOTALLY.
- Each file has a max file size of 500MB
- All files can only have 1 page
- Only Figma design files can be used to create a template, not Figjam or Figma slides
- If using variable component sets
- The name “Off” cannot be used as a variant. Please make sure to give your variant a different name
- The component set name must match the Figma variable name that the variants are bound too
- Component sets must be located in the Figma project and not in another project or team library
- Figma files must be located within a project in the team the figma+prod+1@createtotally.com user has access to
Organising your document
Figma allows you to organise your artwork in a hierarchy by nesting frames. This hierarchy gives the document structure and allows you to organise related elements together, making document management easier. It also allows you to use layout features such as auto-layouts.
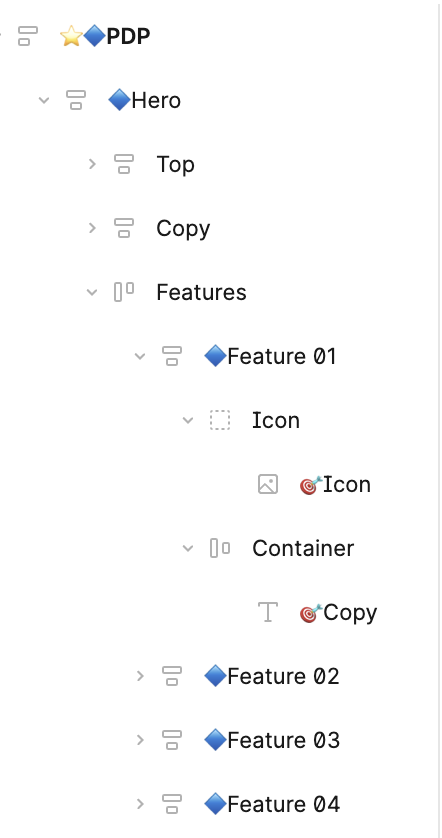
To make customising the template easier within CreateTOTALLY, we display variable elements in the hierarchy set-up within the Figma document. So, for example, if your artwork has modules, these could be set-up in a folder structure. Each folder can be tagged as a container, which will be displayed to users while they are customising the template. In the screenshot below, a hierarchy will be displayed showing Feature 01 and Feature 02 within a Hero folder, within a PDP folder.
We display variables in the order that they appear within Figma. When organising your document ensure the layers appear in the order that will make the most sense for users to complete them, which is normally in the order they appear in the artwork e.g Headline, then subheading, then body copy.
File tagging
Tagging a Figma document allows you to give elements in your document a purpose in CreateTOTALLY. The following can be tagged:
- Dynamic elements - images and text can be marked as dynamic. These can be components or individual image/ text layers. Only variable elements will be available to customise within CreateTOTALLY.
- Output items - frames that contain the design for each of your individual ads or outputs can be marked as an output item.
- Container - frames that you want to be visible to users to help them customise the template can be marked as a container e.g you could mark the name of a module as a container and then all of the variable elements will be displayed within this named element for users customising the template.
- Component sets - component sets can be tagged, allowing users to select a variant that will be displayed.
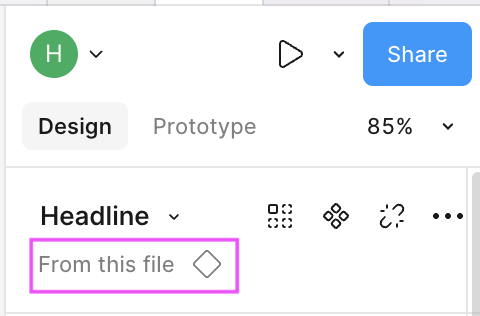
Note - if you want to re-name a tagged element, you will need to do this through the tagging plugin. Select the tagged element, update the name in the plugin and click apply.
🎯 Dynamic elements
A dynamic element is something that can be customised by users within CreateTOTALLY. It can be 1 of 3 types:
- Image frame - an individual image
- Text frame - an individual text element
- Component - If your text or image repeats across multiple output items, we recommend setting it up as a component and tagging the component. This means that users will only need to make 1 selection to customise the component and it will automatically update all instances. Find out more about components in Figma here
- Component sets - a group of variants can be combined into a component set. This gives greater flexibility around what can be customisaed, such as different layouts or colourways
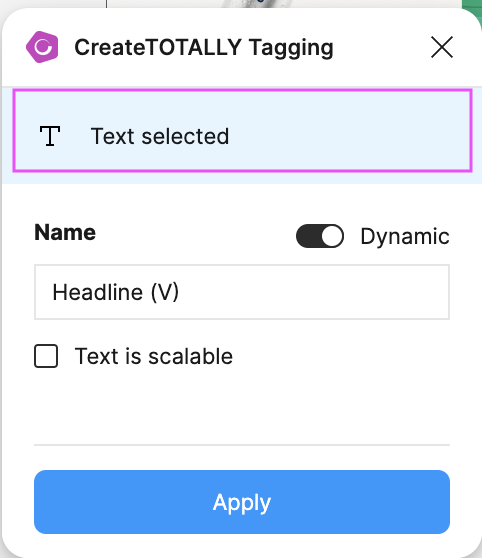
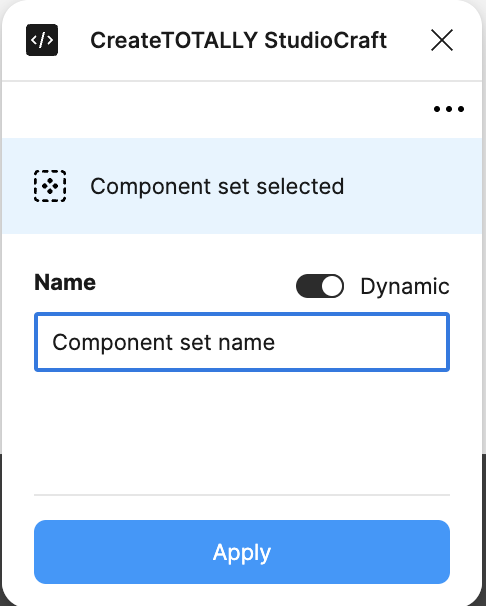
To tag an element, simply select the layer or layers you wish to tag. The plugin will identify what type of layer it is. To apply a tag, set the dynamic toggle to on and click apply. Layers that have been tagged will have an 🎯 emoji added to their name in Figma, allowing them to be easily identified.
Dynamic text
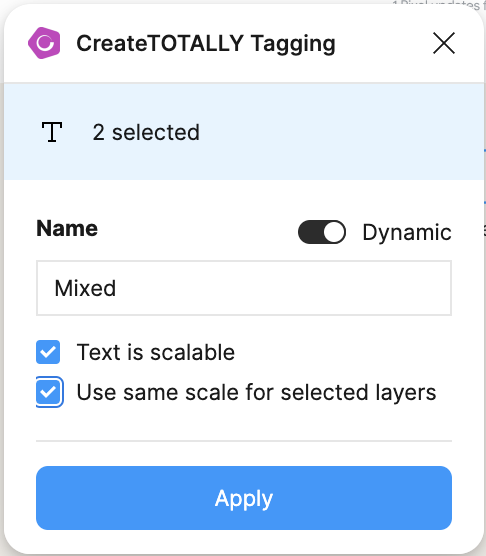
In addition to tagging a text frame as dynamic you can also set the font to scale. This means that if more text is entered than will fit in the text layer, the font size will shrink until it fits. Multiple text elements can be set to sync together, ensuring font sizes are consistent across design elements.
In order for this to work, its important that there is a size set either on the text layer itself, or on the auto-layout container that it is part of. This can be done by setting the text layer to:
Fixed width and height
This will give the text element a fixed space to grow within.
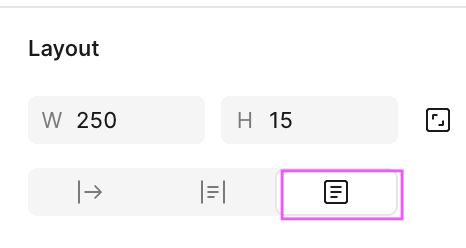
Auto height
This will give the text a fixed width.
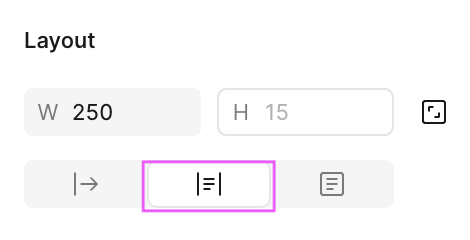
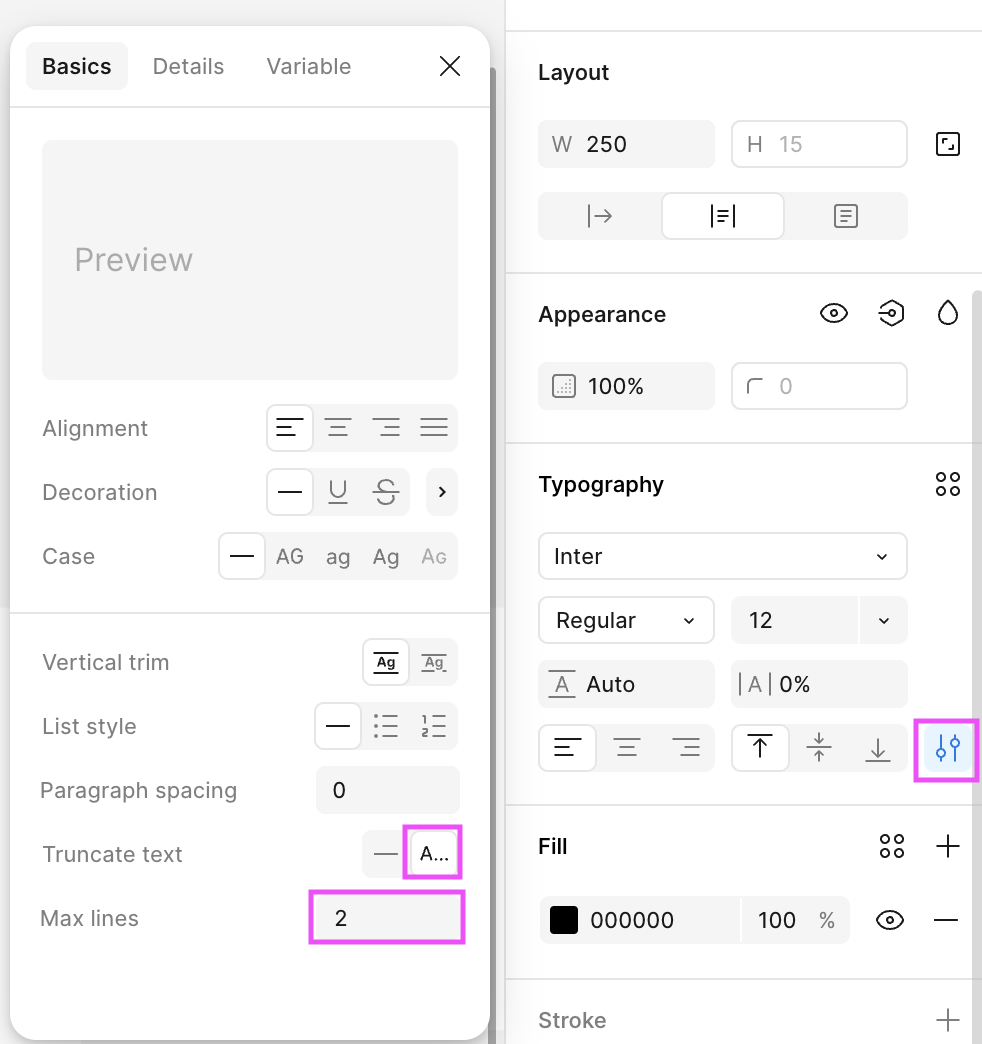
The number of lines the text can grow over can be controlled in the type setting. To do this, set to truncate and specify a max number of lines.
Auto-layout container
If your text is in an auto-layout container, the height should be set based on text truncation, with a max number of rows. The width can either come from:
- Max width set on text layer
- Text layer being set to fill container (this will take its width from the auto-layout container and its properties)
You can test that your text layer is set-up correctly within Figma, but adding more text to your text layer. It should grow to a fixed size.
Using components
Components allow you to use the same variable element across multiple locations (such as multiple output items). This makes it much easier for users who are creating adaptations from the template as they only need to make 1 selection. To use components:
- Create the artwork element you require e.g. text or image and then convert the frame into a component
- A tag can be applied to the text/ image within the component to make it a variable
- Copy the component into the output items it is needed in - note, make sure it remains an instance of the component and doesn’t become detached.

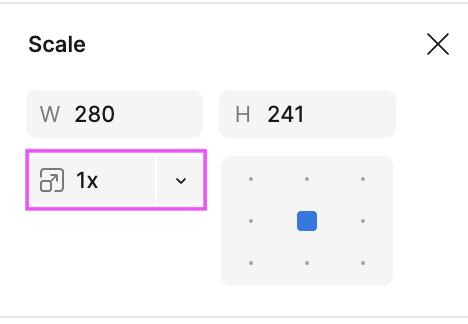
- If you need to change the size of the instance (font or image size), this needs to be done by adjusting the scale. Calculate the % increase/ reduction that the instance needs to be related to the component and enter that in the scale field. Note, if you change the font size directly, a text instance will become detached from the component.
🟩 Component sets
If your design has different layout options or other linked selections, you can utilise component sets to allow users to customise these. A component set is a group of related components in Figma. To find out more about component sets and variants, visit the Figma support site. Each component within a component set is called a variant. Select the component set to apply a tag to it.
Any variant linked to the component set will be captured during analysis. Users will then be able to select the variant they require during customisation. Image or text components that have been tagged will be available for customisation based on the selected component set. For example if you have 3 layouts with different numbers of products in the layouts, the product images available for customisation will change as the user selects the layout.
Figma variables
Figma allows you to create local variables to control different elements of your design. CreateTOTALLY makes use of Figma variables to update your designs to display the variant the user has selected. To work with CreaetTOTALLY, Figma variables need to:
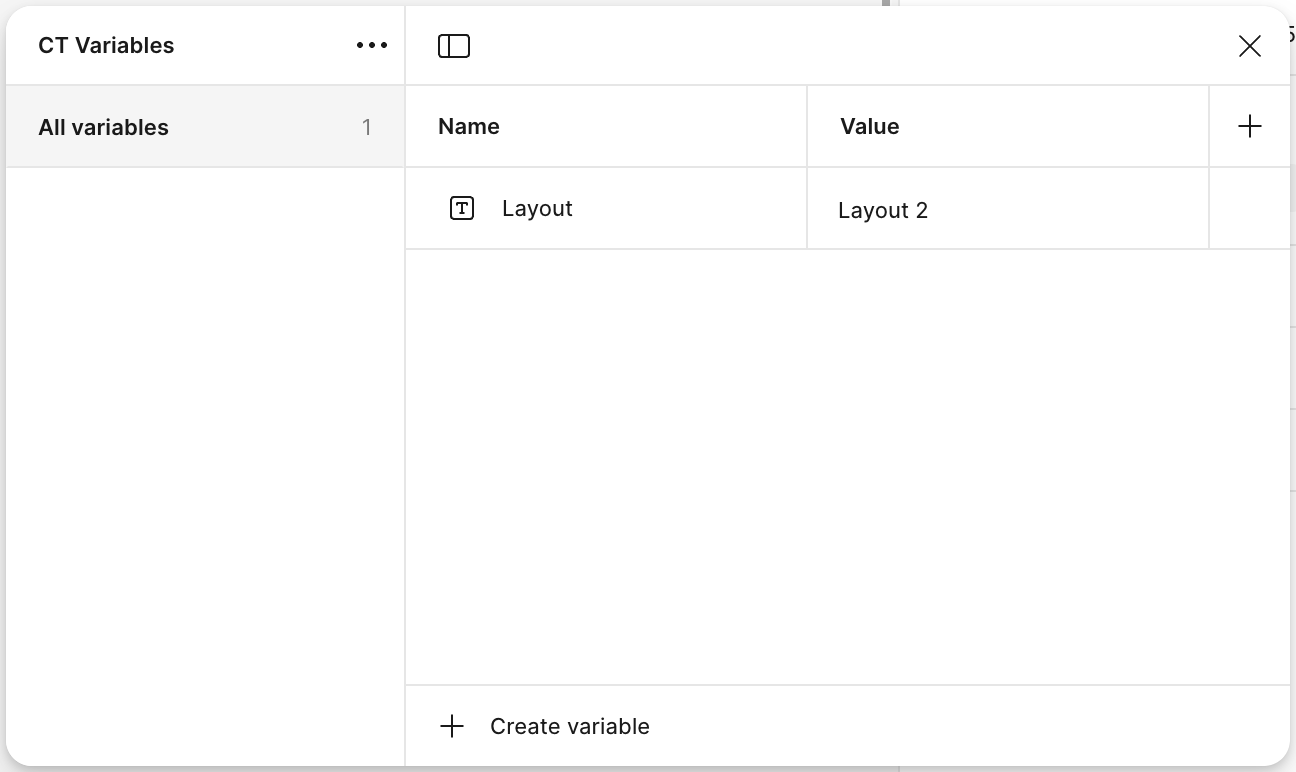
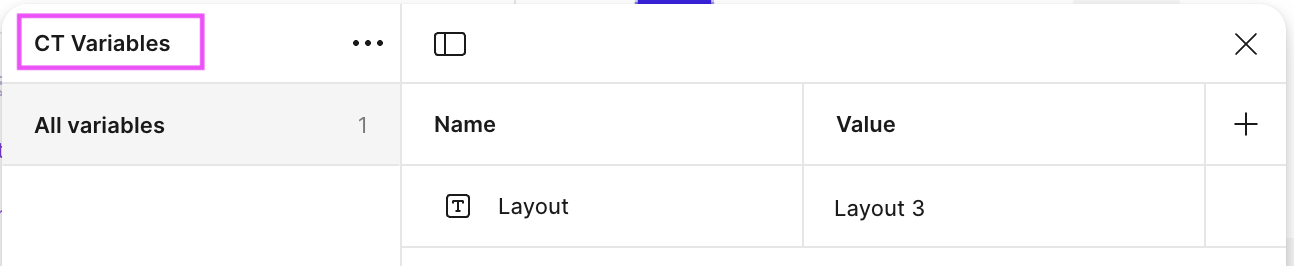
- Be created in a collection call CT Variables. We will ignore any variables created that aren’t in this collection
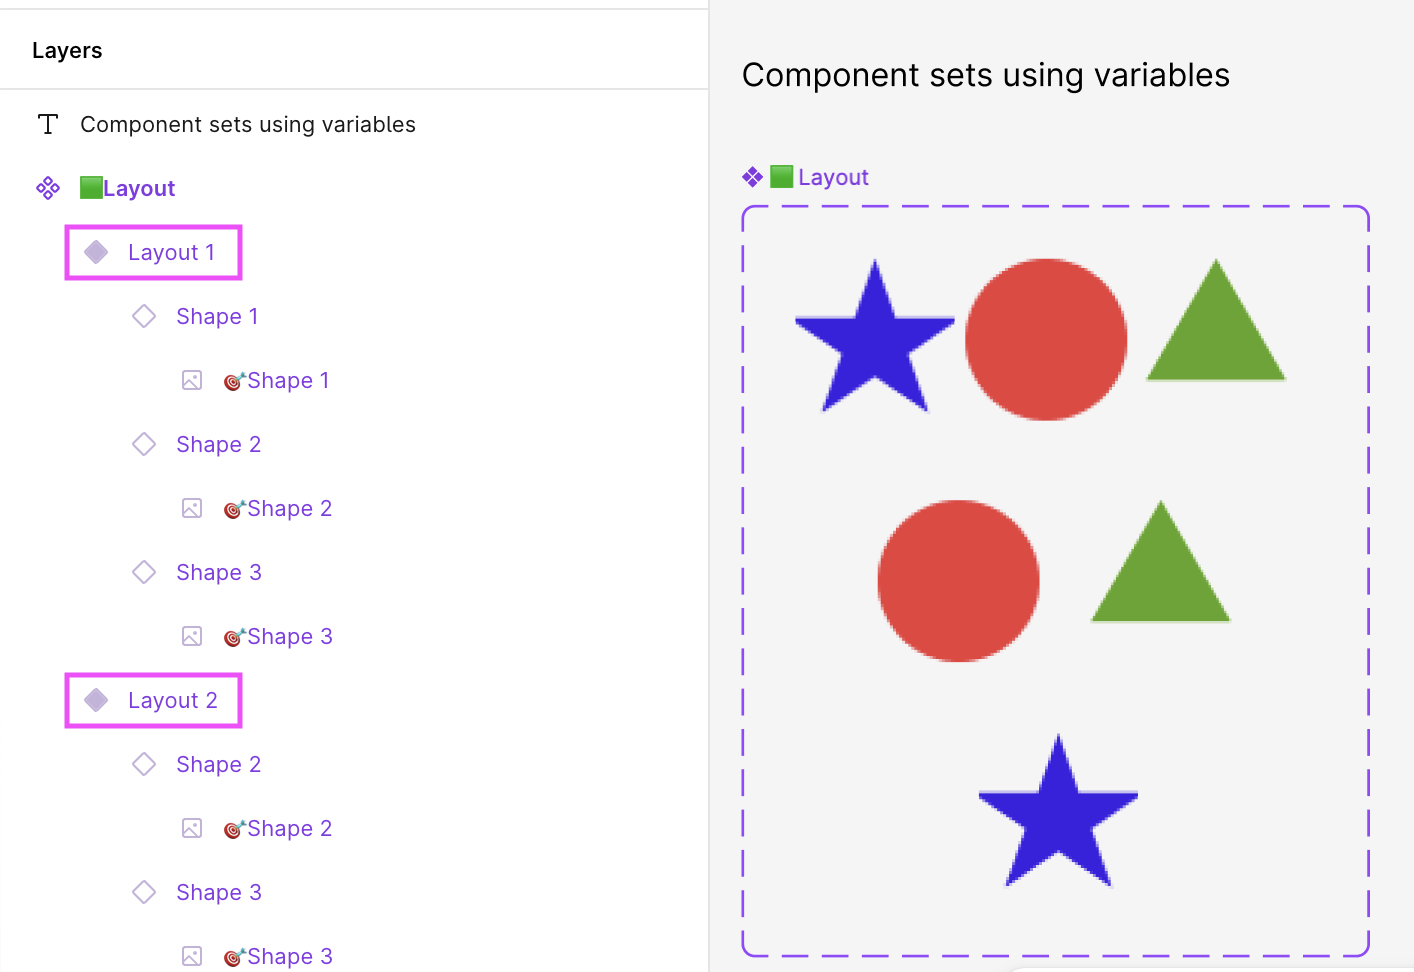
- The variable name must match the component set name e.g in the screenshots below, there needs to be a variable called Layout in the CT Variables collection
- The variable must be bound to the instance on the artwork that you want to update
Creating a component set with customisable components
Start by creating the components that will make up your variants. Tag the image/ text within these to make them customisable in CreateTOTALLY. They will now have 🎯 appear next to the name.
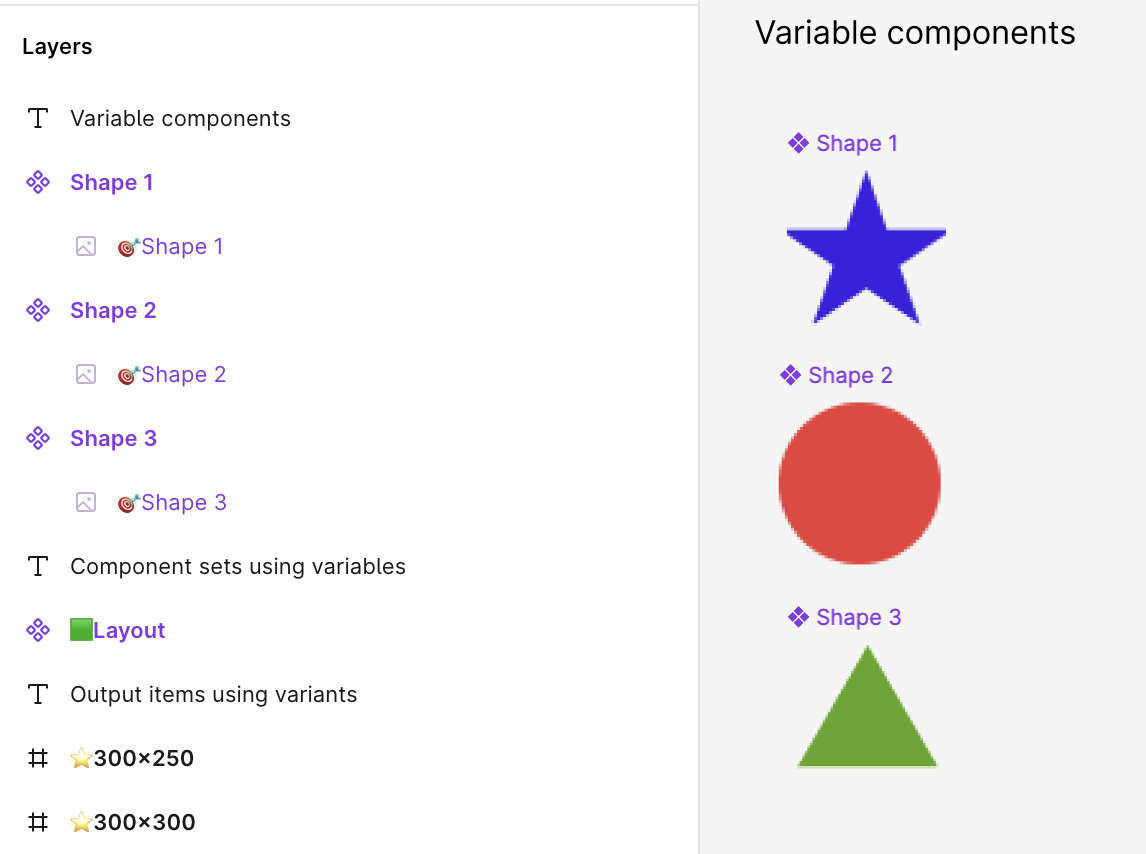
Copy these image/ text objects and use these copies to create your variant layouts. You will see that these shapes are instances of the original component.
Make sure each variant is nested in a single frame and name that frame the variant name.
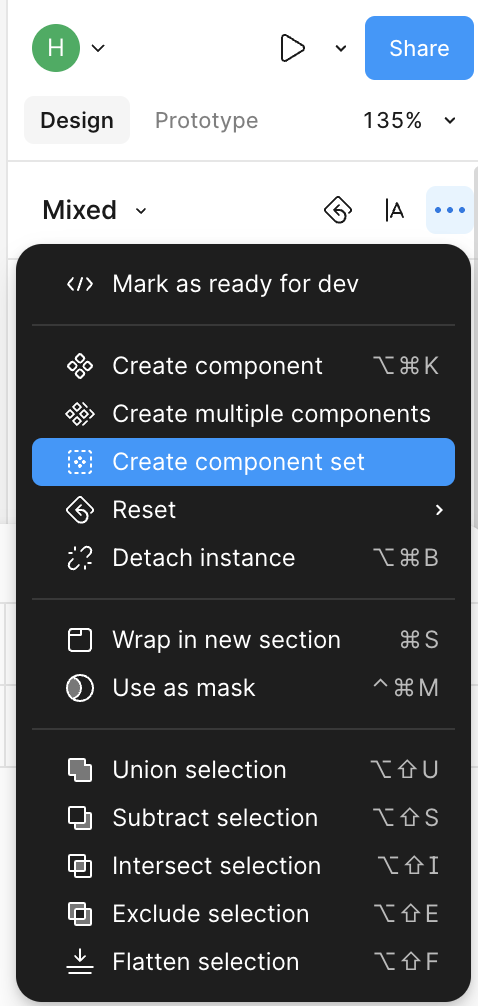
Select all frames and Create component set. Then apply a tag to the component set. It will now have a 🟩 next to its name.
Open the Local Variables and create a new variable. Give it the same name as the component set.
Copy 1 of the variants into your design(s).
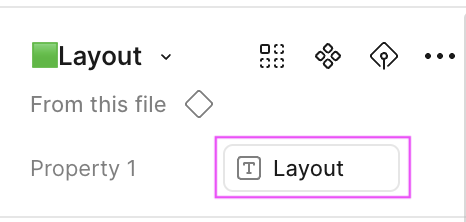
Link it to the variable using the Apply variable button. Select the variable name you want to map to. Note - only have 1 property is supported per component set. The property value will be the variant name.
When the variant is correctly attached to the variable, you will see the variable name when you select the variant in your design.
To test your variants are working as expected, open the local variables and change the value of the variable to the names of your variants. You should see the designs update. If any of your designs don’t update as expected, select the variant instance and map it to the variable.
Language variants
If your designs have different layouts based on the language, you can link this to a Language variable. Language is reserved term in CreateTOTALLY. We will always pass a 2 digital iso language code to a variable called “Language” when automating content.
To use language to apply a different variant, create the component set as above, but link it to a variable called Language in the CT Variables collection. Name the variants with the language code that they related to eg en-gb or fr-fr. Your Account Manager will be able to confirm the language code.
Character styles
To give users the ability to apply text styles during customisation, these can be set-up as character styles. The styles need to be contained within your project (ie not in a team library) and be in a folder called Character.
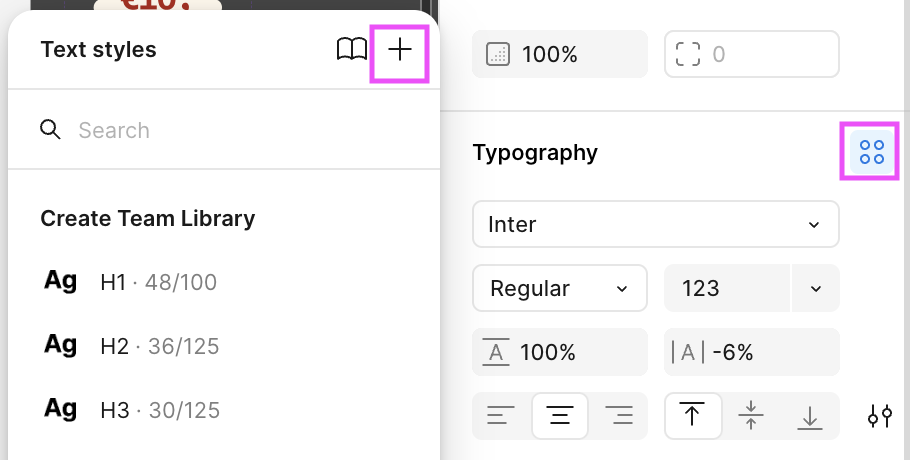
To create a style, highlight the text containing the style you require and click the Apply styles button in the typography section, then the + to add a new style. Name the style Character/Style name to also create the Character folder.
Note - don’t apply mixed character styles to a variable text component that has text scaling, as these styles interfere with the scaling function. Instead, just style the text as required directly in the typography.
🔷 Containers
Containers allow you to visualise Figma frames during customisation. This is useful to identify the hierarchy of elements in your project and makes customising a Figma template easier. In the screenshot below, PDP, Hero and Feature 01 have all been tagged as containers.

⭐️ Output items
An output item is the root frame that contains all your ad artwork. Your Figma file can contain as many output items as you like, for example different sizes of banners and social ads could all be included in the same template. When users are customising a Figma template, they are able to remove output items they don’t require.

Note - you can tag a frame as both an output item and a container, which might be useful if you have specific variable elements in each of the output items.
Within an output item, frames should not be hidden. Any hidden frames need to be deleted before creating the template in CreateTOTALLY.
Auto layouts
Using Figma’s auto layout feature within your design file adds even more flexibility to the template. If your design has elements that sometimes aren’t required, using an auto layout allows them to be hidden during customisation, with the remaining elements being re-positioned. To find out more about auto layouts in Figma, we recommend their support article.
When customising a Figma template, elements that aren’t required can be hidden by clicking on the visibility eye.

Testing your template
Before creating a template of your Figma project in CreateTOTALLY, we recommend testing updating any components used within Figma. This will allow you to see if any of the instances have become detached. To do this, update the values of the components and make sure they update in your output items as expected.
If you’re using component sets, you should also update the values against each variant, to ensure these are updating as expected.
Troubleshooting
Issue: I am creating a template in CreateTOTALLY, but when I try to analyse it, I see an analysis error.
Solution: Check that the Figma file is located in a project within the CreateTOTALLY team. If it is, contact your Account Manager for more assistance.

You will also see an analysis error if you are using Component Set’s and there are multiple variants with the same name.

Issue: Text entered by the user isn't appearing in the output items.
Solution:
Text is in a component: Check that the text is an instance of the component. Manual overrides may cause instances to be come detached from the component. If this is the case, copy the component and past it back into your output item ensuring the link is maintained.
Text is a frame in the output item: Check that the text frame is tagged and that the name of text layer matches the name in the tagging plugin. If you need to make any changes to the name, these need to be made in the plugin.
Issue: Hidden elements are appearing in my output items.
Solution: If you have hidden any elements within an output item, these will become visible during automation. Delete any layers that aren’t required in the design.
Issue: The variant selected during customisations isn’t appearing in my adaptations.
Solution: There are a few reasons this could happen.
- Make sure that all of the instances of the variant within your output items are bound to the variable.
- Make sure the component set and variable names match.
- Make sure the variants aren’t grouped in anyway.
Issue: I have created and tagged component sets, but they aren’t appearing when I analyse the template.
Solution: Check that the variables have been created in a collection call CT Variables. Only variables made here will be available to customise.
Issue: The image selected during customisation isn't appearing in my adaptations.
Solution: All images used in Figma templates need to be less than 4096 x 4096px. Anything over this size cannot be used during customisation.
Issue: I see an automation error status instead of a proof
Solution: There are a range of causes for automation errors. You can see the details of the most common automation errors by clicking on the Automation status on the insertion screen.
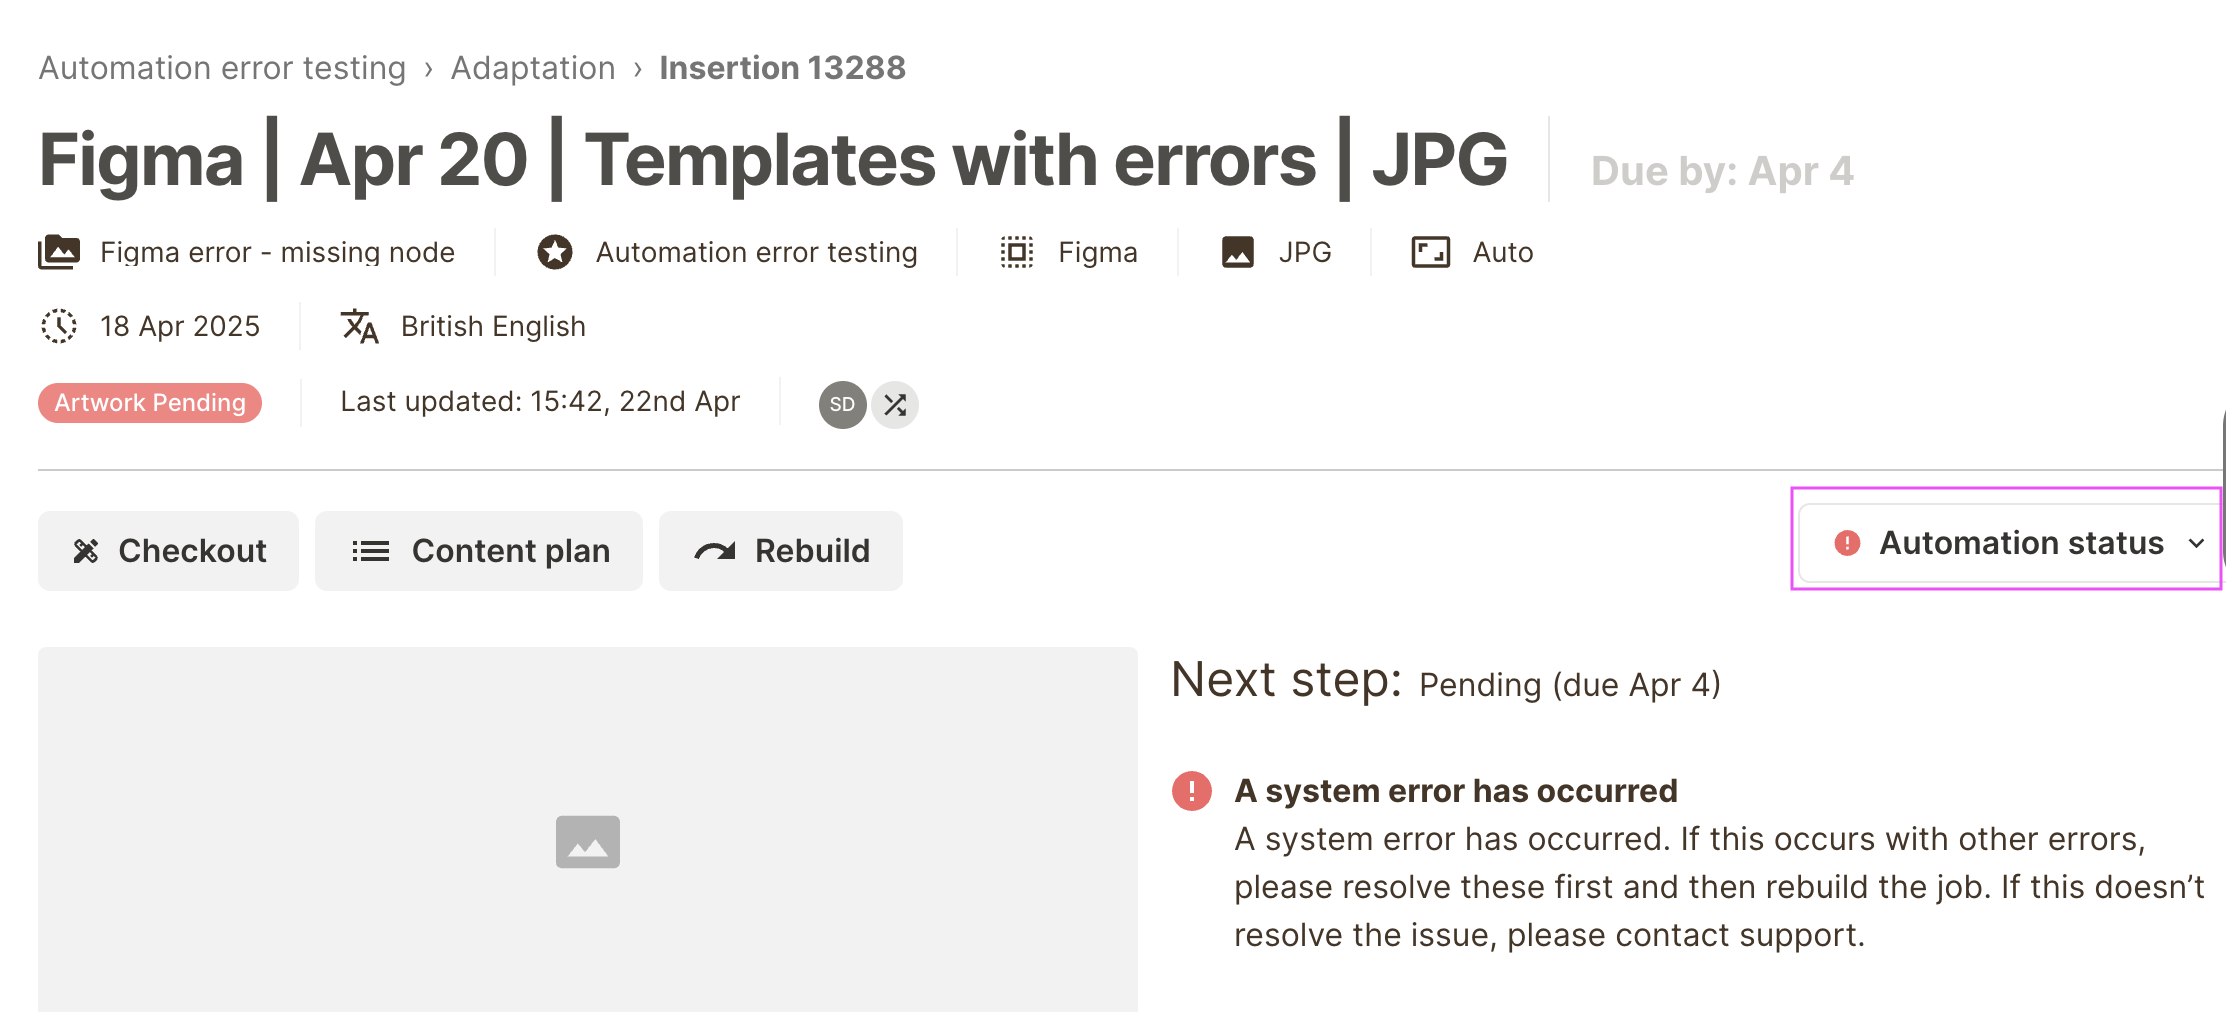
The error information will guide you to solving the issue. These issues could be:
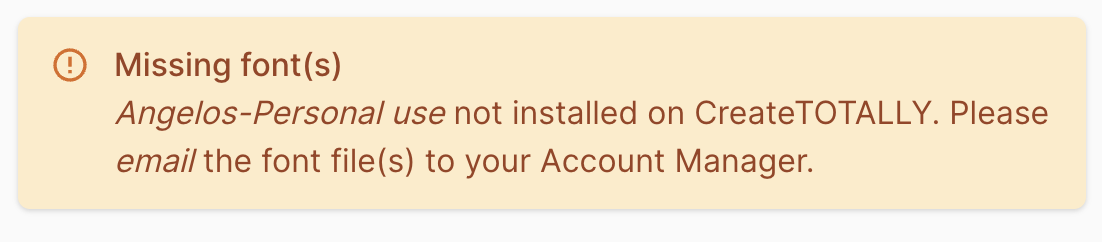
Missing fonts - if the project uses fonts that haven’t been installed on the CreateTOTALLY servers they will need to be installed first. The error will include the name of the font that is missing. The fonts will need to be sent to your account manager to be installed.
Missing node - if the Figma project has been amended since analysis and a node (variant, component, dynamic element) has been removed, this will cause an error if it is selected by the user in the front-end.

Missing variable - if a Component set is tagged, but there isn’t a matching variable in a CT Variables collection, this will cause an error.

Note - it is currently only possible to display 1 automation error. If your Figma template has more than 1 error, additional errors will not be reported.