After Effects Project Preparation

Welcome to this series of tutorials, which teaches you the basic tools and techniques of StudioCraft for After Effects.

To package After Effects projects to upload into CreateTOTALLY, you will need our After Effects plugin. This can be downloaded here.

Not all After Effects versions are created equally.

We require a minimum of After Effects CC 2021 v18.4.6 to work perfectly.

Folders, comps and layers

We love tidy files

Tidy files let our AI read your projects faster.

Your project must be clearly laid out with your final comp easily identified.

Your final comp must end in "_main" (For example myFinalComp_main). There can only be 1 comp that includes the name main.

Name your layers

We read and use your layer name information during our analysis and automation processes.

Use unique layer names where possible. (Fig. 1)
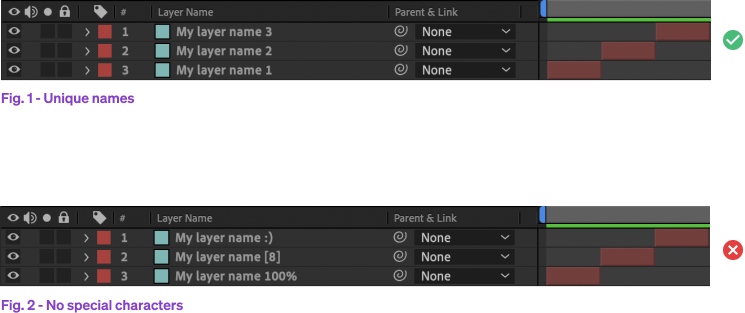
Don’t use special characters in your layer names. Special characters include any of the following [ ( ~ ! @ # $ % ^ & * ; “”‘’ : \ / <>`'") ]. (Fig. 2)

Text and formatting

Pre-compose text layers

Placing dynamic text layers together into a precomp lets us localise each layer and makes it possible for us to scale them as a group.

It’s best-practice to isolate dynamic text and to remove empty text layers. (Fig 1)
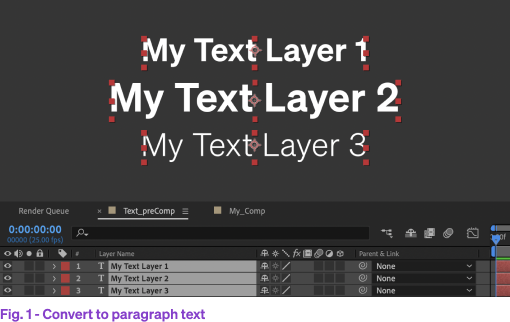
If you need to add keyframe animations, apply the animation to the precomp that’s nested inside the parent comp. (Fig 2)

Paragraph and point text settings (Part 1)

Converting editable text fields to paragraph text can optimise your multi-line text layer for localisation.

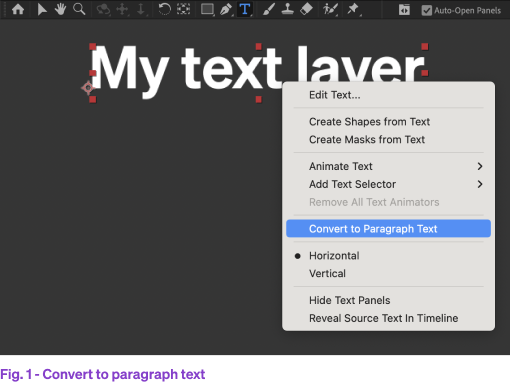
The ‘Convert to Paragraph Text’ setting lets you create a text field that wraps the content. It’s useful when you need to localise large paragraphs of text that needs to fit within a specific area. This can be done by selecting the text “T” tool, right clicking on the text field and choosing “Convert to Paragraph Text”. (Fig 1)
Drag the transform handles to define the bounding area for your paragraph. (Fig 2)

Paragraph and point text settings (Part 2)

Converting editable text fields from paragraph text to point text can optimise your single-line text layer for localisation.

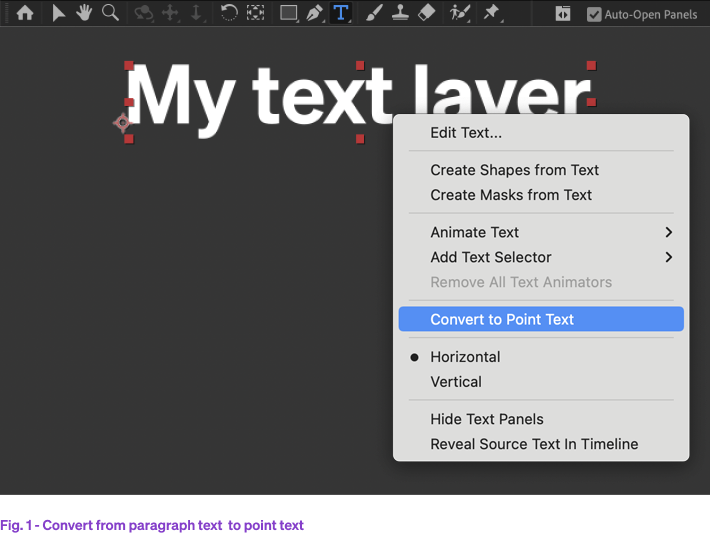
Point text is the default text tool in After Effects. It’s useful when you need to localise a single line of text that needs its text field to grow dynamically. This can be done by selecting the text “T” tool, right clicking on the text field and choosing “Convert to Point Text”. (Fig 1)
Text anchor points

We detect anchor points in order to correctly scale and reposition your text layers.

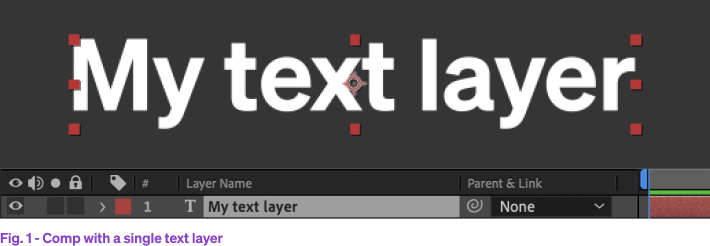
For comps with a single text layer, your text layer anchor point should be set to ‘centre, centre’. (Fig. 1)
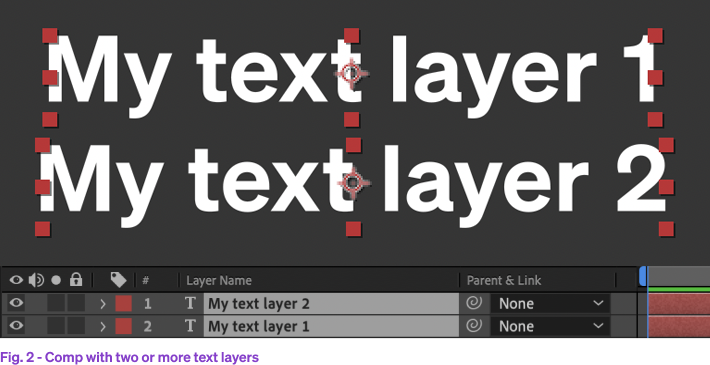
For comps with two or more text layers, all text layer anchor points should also be set to ‘centre, centre’. (Fig. 2)
Locking text to an image, symbol or graphic

We can detect the relationship between a dynamic text field and an image, symbol or graphic.

For comps where a dynamic text field needs to be grouped with an image, symbol or graphic, first set your text alignment to align to the direction you’d like the text field to grow. (Fig. 1)
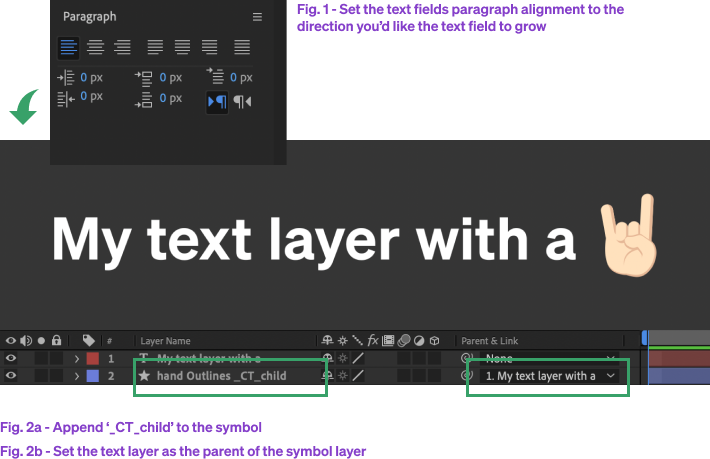
Then append the tag ‘_CT_child’ to the image, symbol or graphic layer name. (Fig. 2a)

Finally, set the dynamic text layer as the parent of the image, symbol or graphic layer. (Fig. 2b)

Text in linked Illustrator smart objects

If you want to allow your users to apply character styles to the text in your project, this can be done by setting it up in Illustrator and linking it as a smart object.

To do this create a layer in your After Effects project where the text should appear. Give it the same name as the text layer in your Illustrator smart object, then link the Illustrator file to it.

The text in illustrator should have a paragraph style applied as a default, with the available character styles set-up but NOT applied to the text.

Supplied assets

Pre-render ginormous files and image sequences

Oversized footage is a waste of space and will slow your project down.

For example, if your source video is 7.8GB and 20 minutes long in your project but the final edit only uses 18 seconds, those 18 seconds can be pre-rendered and your original 7.8GB source video can then be removed / deleted.
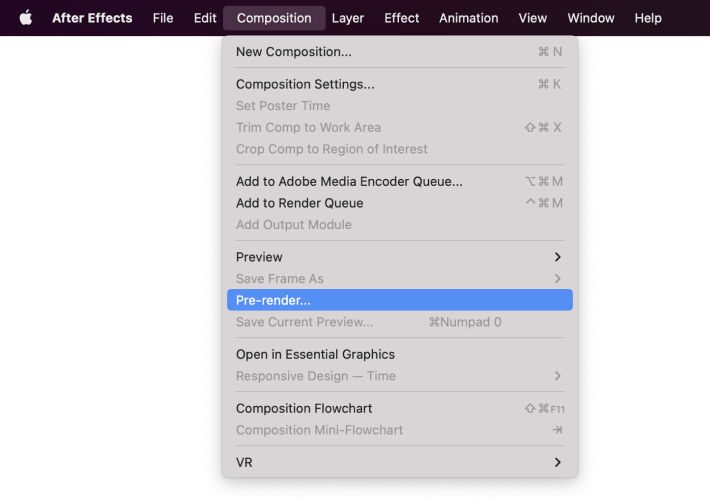
Footage can be pre-rendered by choosing “Composition” / “Pre-render”.

Advice to improve render speeds and project 

To improve the speed of rendering the localised assets and reduce the possibility of errors, it is best practice to pre-process complicated elements of the artwork

  • Image sequences should be pre-rendered as a ProRes mov. 
  • The project should be set-up to use GPU acceleration wherever possible
  • All assets or precomps should be set to the same pixel dimensions as the final rendered output
  • Complex precomps should be pre-rendered as a ProRes mov.

Video quality

In order to produce the very best, we need quality input.

File type accepted: MP4 / MOV

We recommend a that file sizes be kept under 500mb for individual asset.

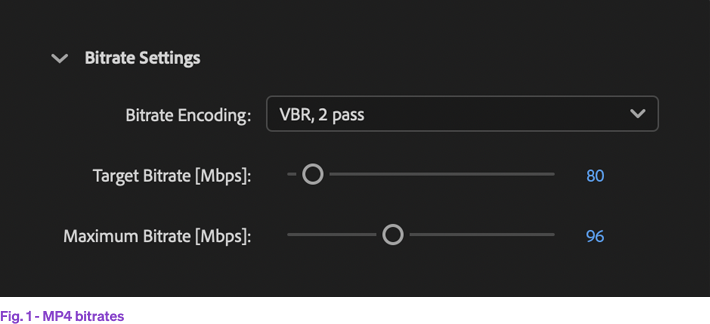
For MP4’s, the minimum bitrate should be 80Mbps, with a maximum of 96Mbps. (Fig. 1)
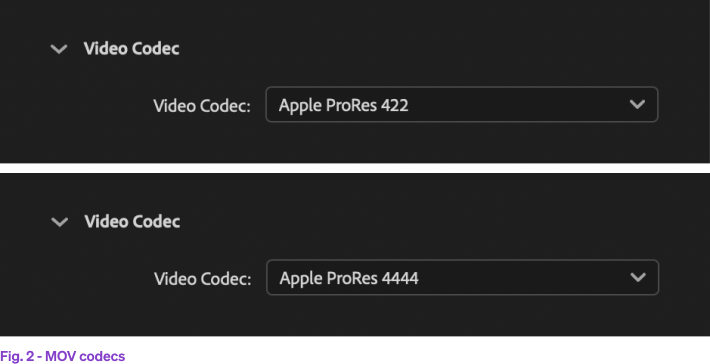
For MOV’s, the codec we accept is ProRes 422 or 4444 for assets with an alpha channel. (Fig. 2)
Switching video

Our end-users can easily localise selected footage in your project.

File types accepted: MP4 / MOV
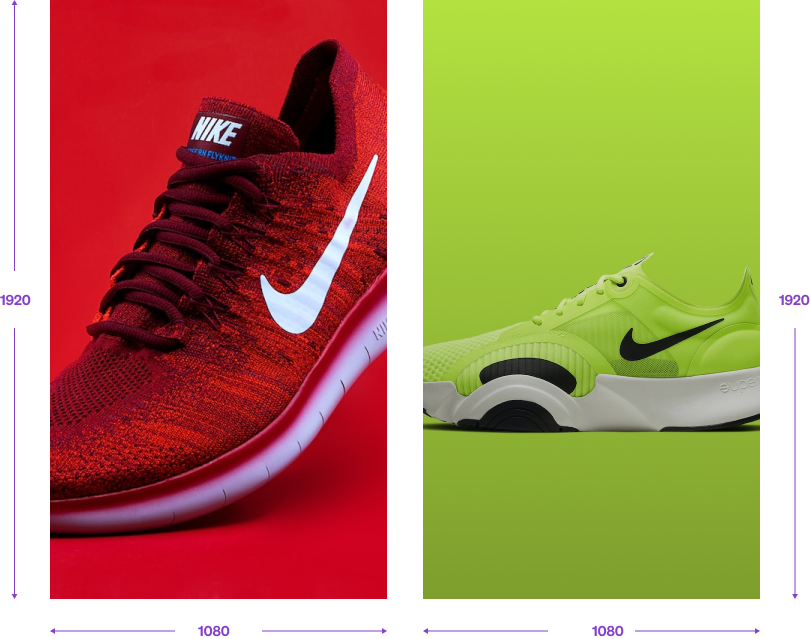
When supplying alternate video footage, the replacement must be the same dimensions and length as the original asset.

Switching images

Our end-users can also switch static images.

File types accepted: JPG / PNG / PSD / PSB / TIFF

When supplying alternate static images,
the replacement must be the same dimensions.

Switching audio

Our end-user can localise audio tracks.

File types accepted: MP3 / WAV / AIFF
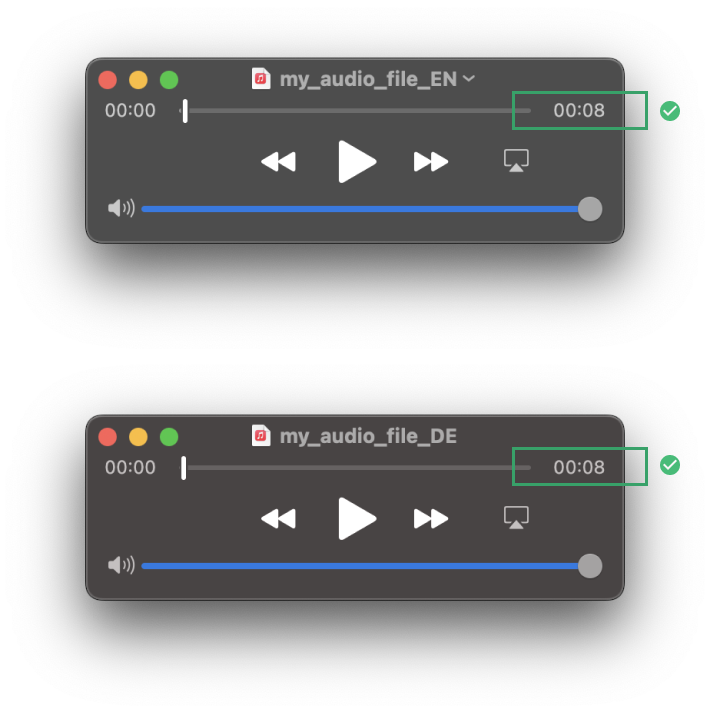
When supplying alternate audio files,
the replacement must be the length as the original asset.

Plugin support

Plugins supported by default can be found here. Any other plugins will need to be installed manually and licensed:

Using StudioCraft for After Effects

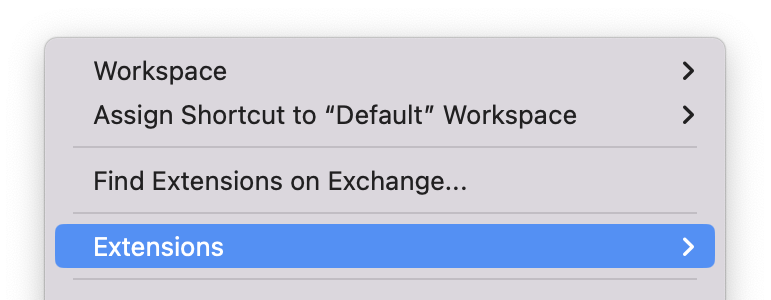
StudioCraft for After Effects is a simple plugin we’ve created that helps you pre-flight and package your project.

To package After Effects projects to upload into CreateTOTALLY, you will need to install StudioCraft for After Effects. Installation guide can be found here.

Use StudioCraft for After Effects to collect all project files and fonts.

Our plugin reports back any issues with your file so you can be sure your project will be delivered seamlessly.

Before uploading the project to CreateTOTALLY, you must perform a quality check on the project. Our Preflight panel warns of problems that can prevent the project from rendering as desired. StudioCraft for After Effects ensures your project will function correctly when you upload to CreateTOTALLY.
Preflight tool

StudioCraft for After Affects will perform the following Preflight:
  • Check Keyframes on text layers
  • Check Project comps that are to be rendered has _main in its name
  • Check that Project plugins are supported by CreateTOTALLY
  • Check for oversized comp(s)
  • Checks Project setting for Video Rendering and Effects
  • Checks for sequences
  • Checks Alphanumeric characters in layer, comps, files name
  • Checks for Empty spaces in layer name
  • Checks for duplicates layer name
  • Checks for duplicates comp name
  • Collects Project Fonts
To start the Preflight click the arrow
Check the box to confirm that the fonts are licensed and click Preflight and collect
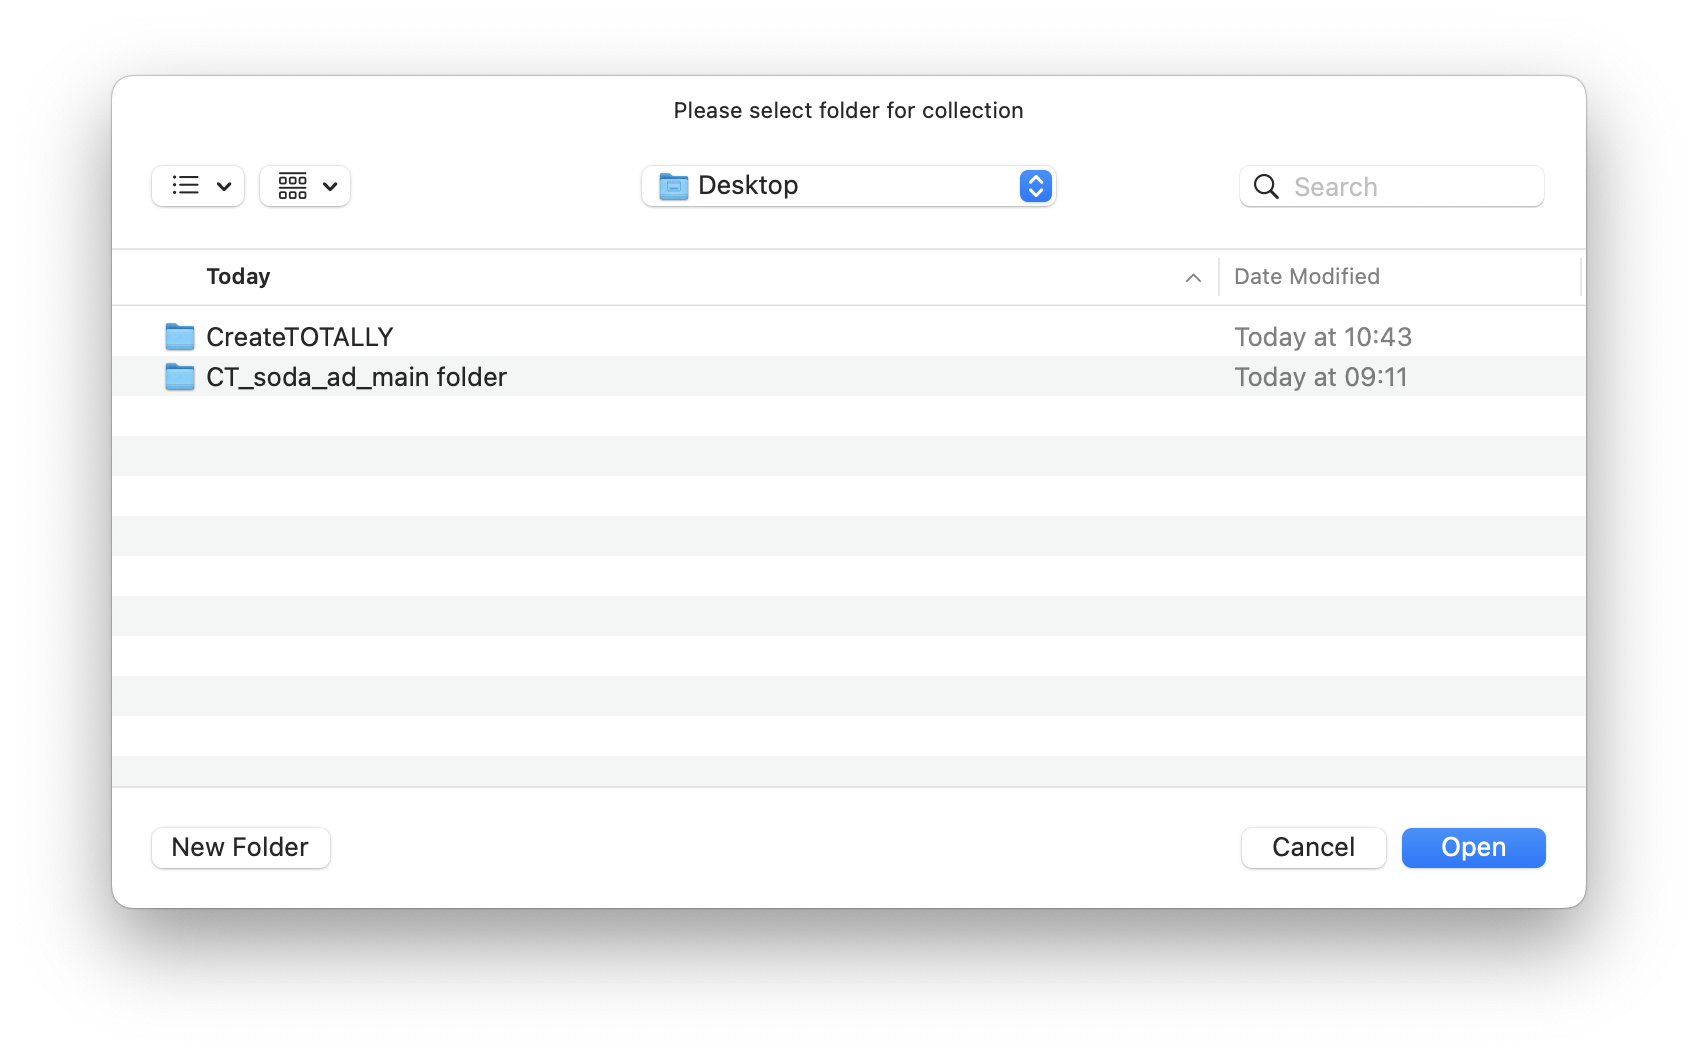
Please select folder for collection
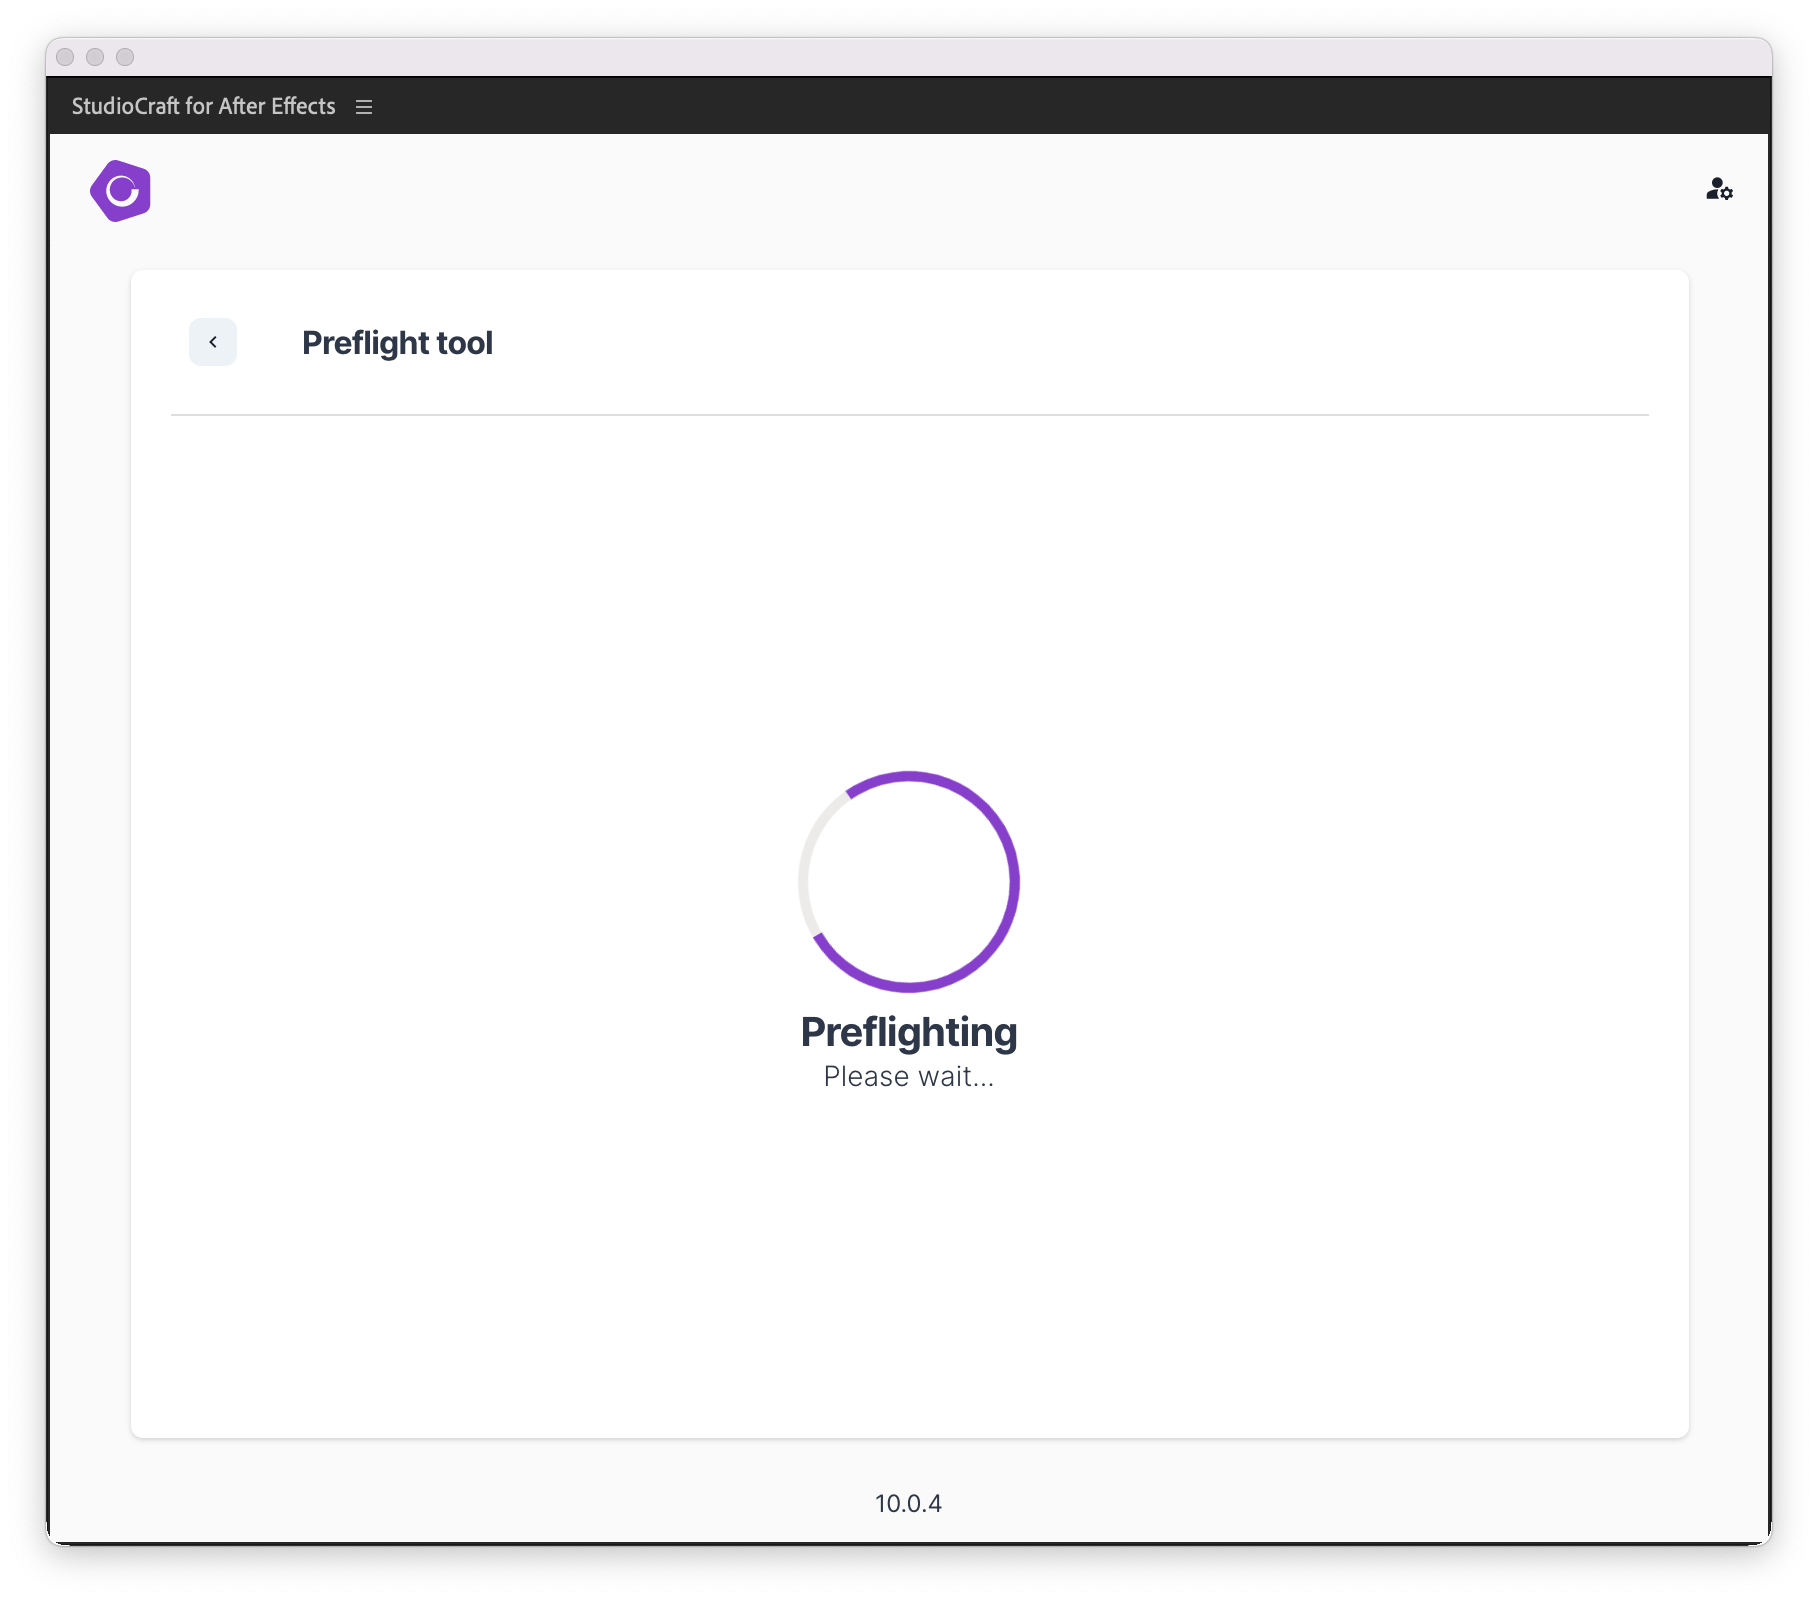
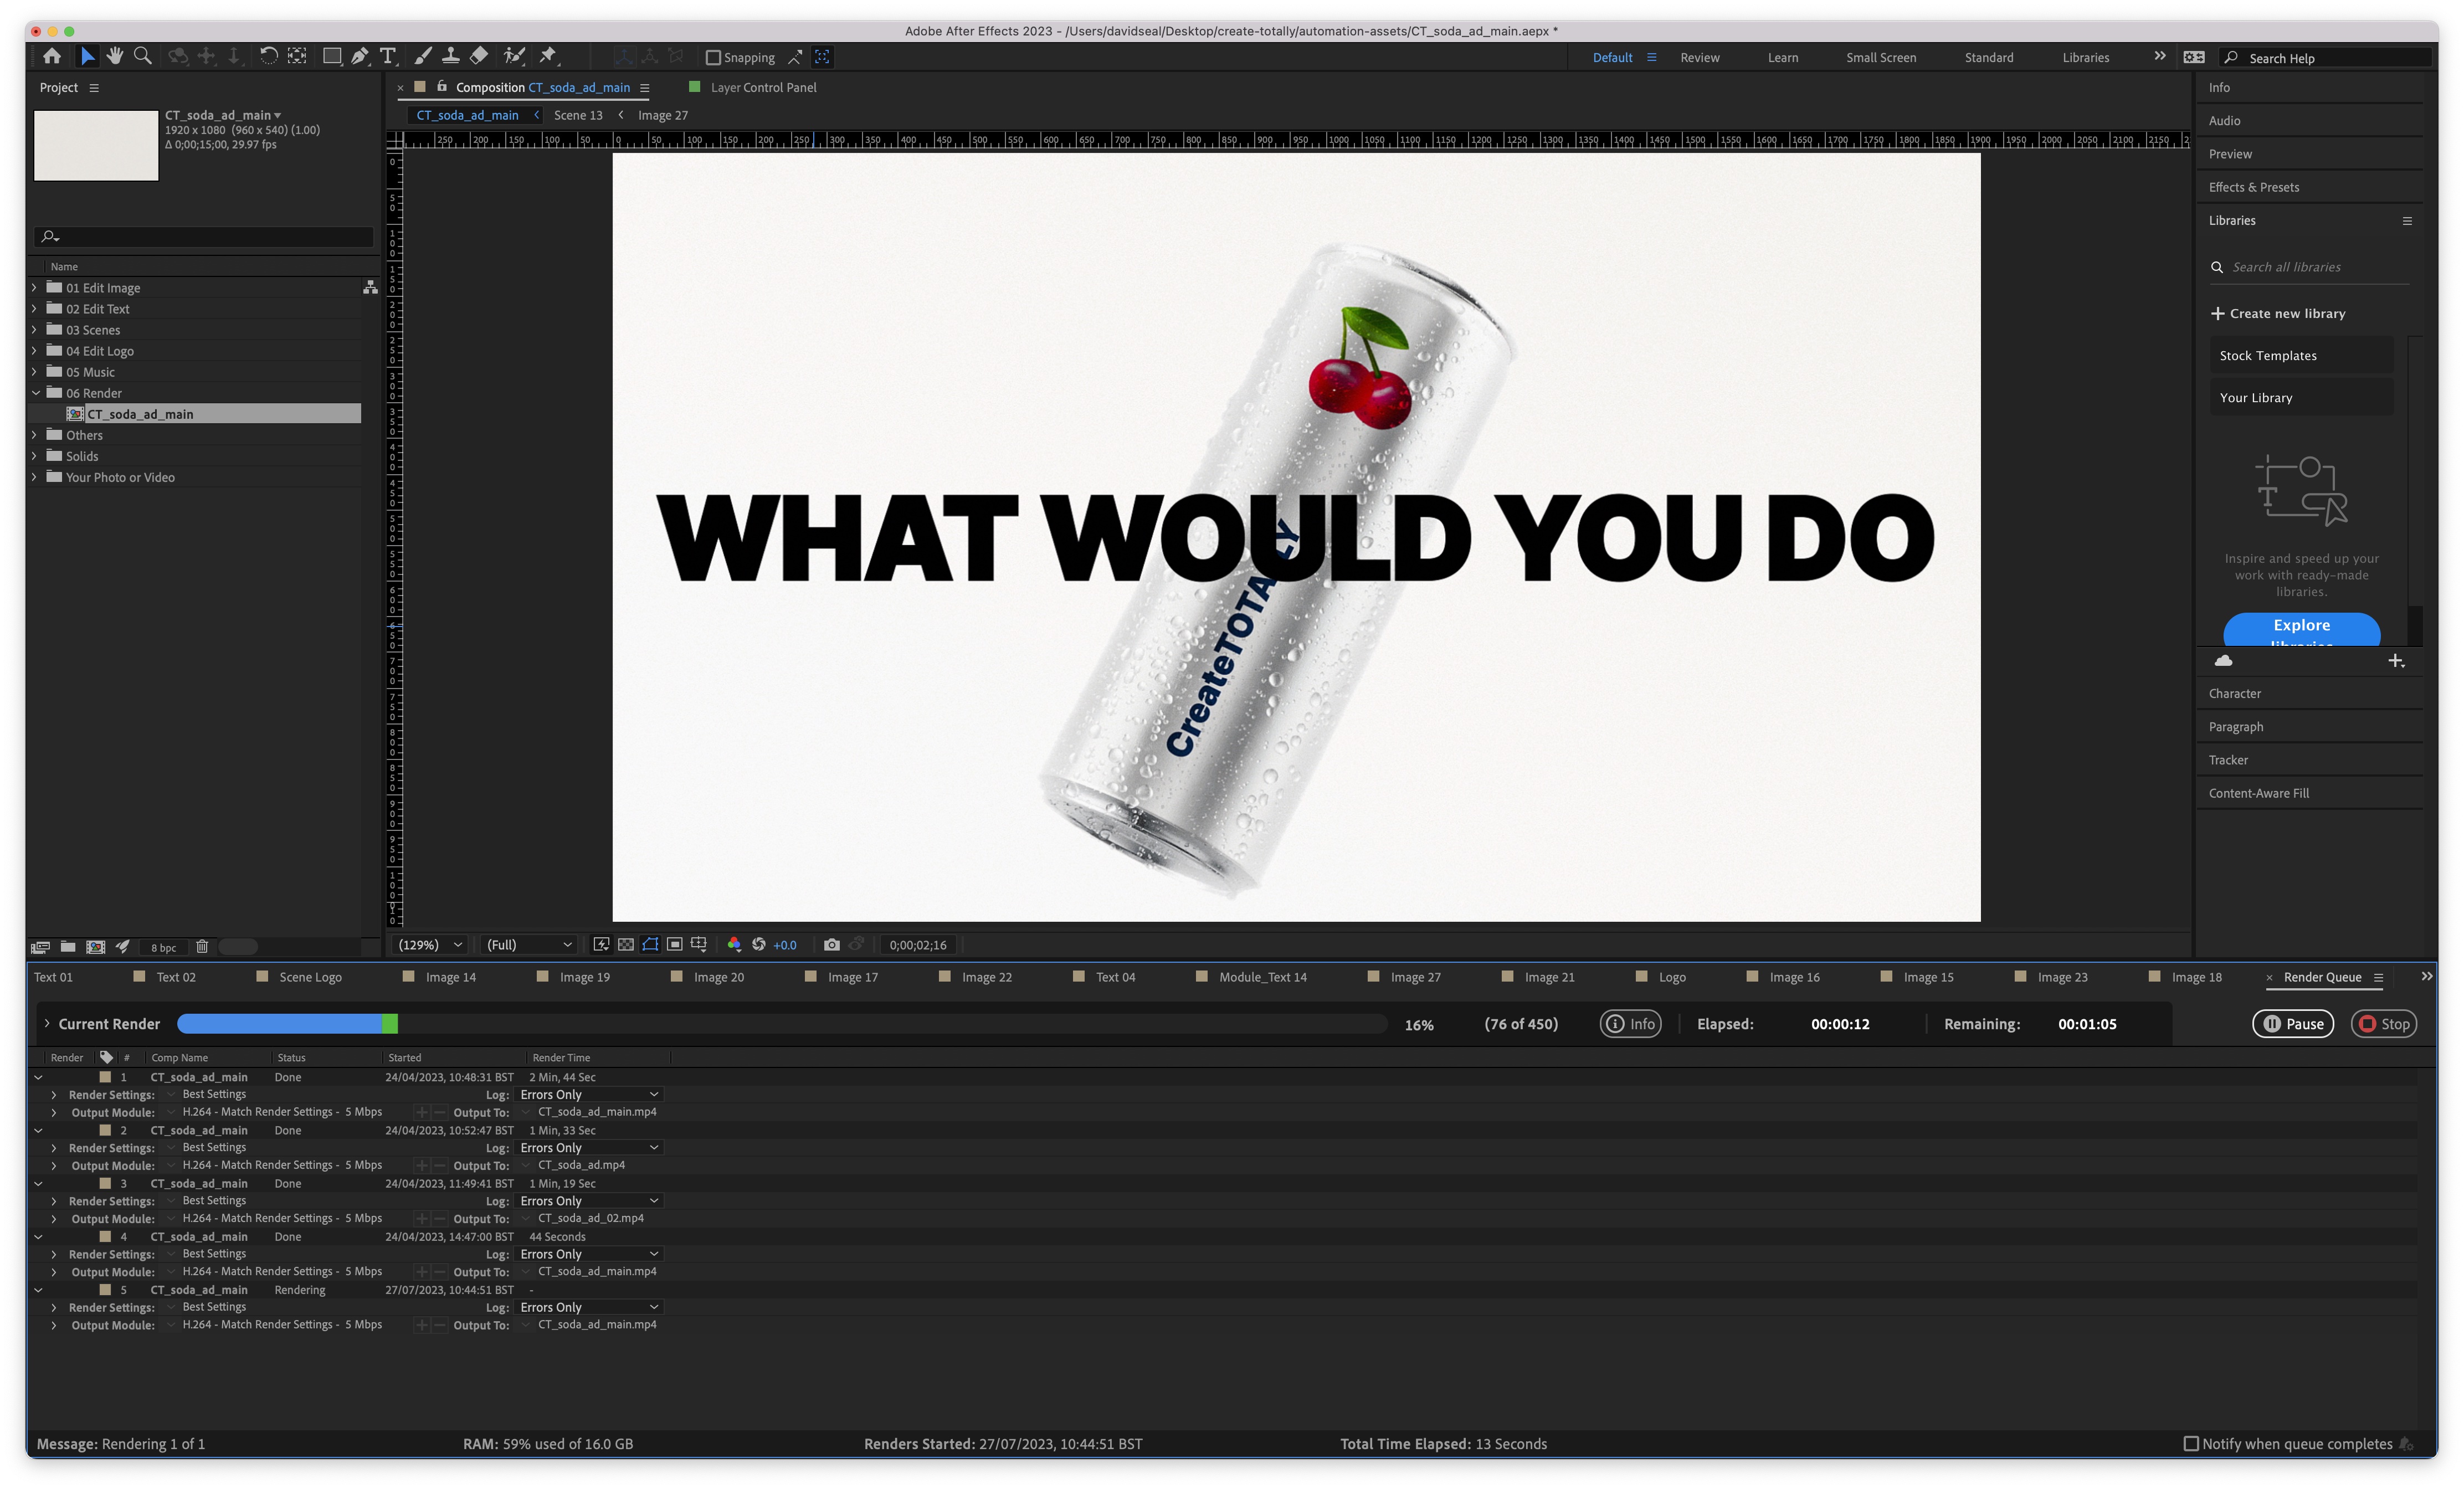
During the Preflight process we automatically rendered a preview of your project
Once the Preflight process has been completed with give a pass summary screen

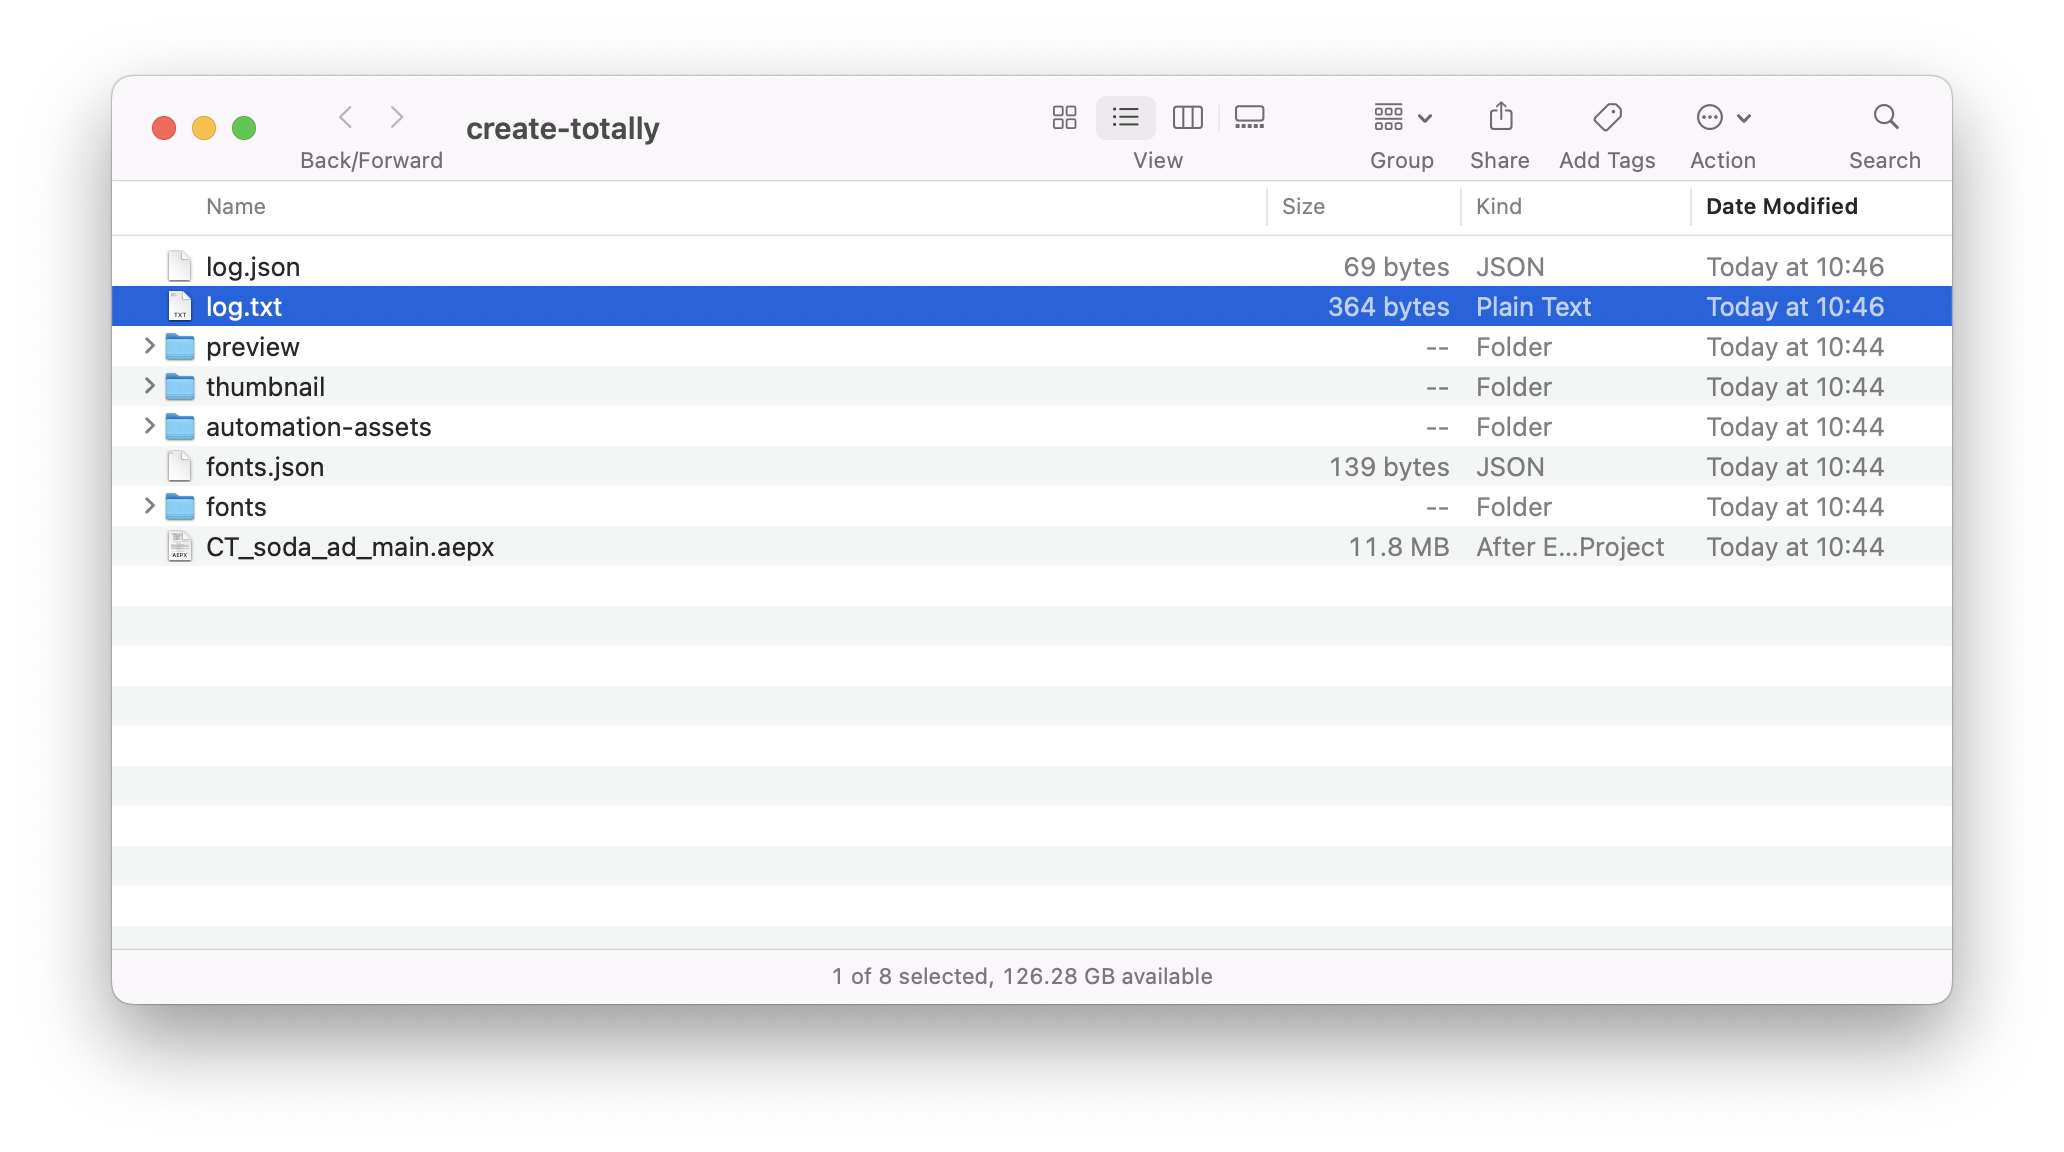
Once the preflight check is complete we package up your project with all your footage and fonts and also create the following

  • Preflight report
  • Rendered preview of your project
  • Thumbnail

Common Preflight issues

Errors must be fixed before uploading to CreateTOTALLY, you will be unable to complete the package process until there are no more errors.
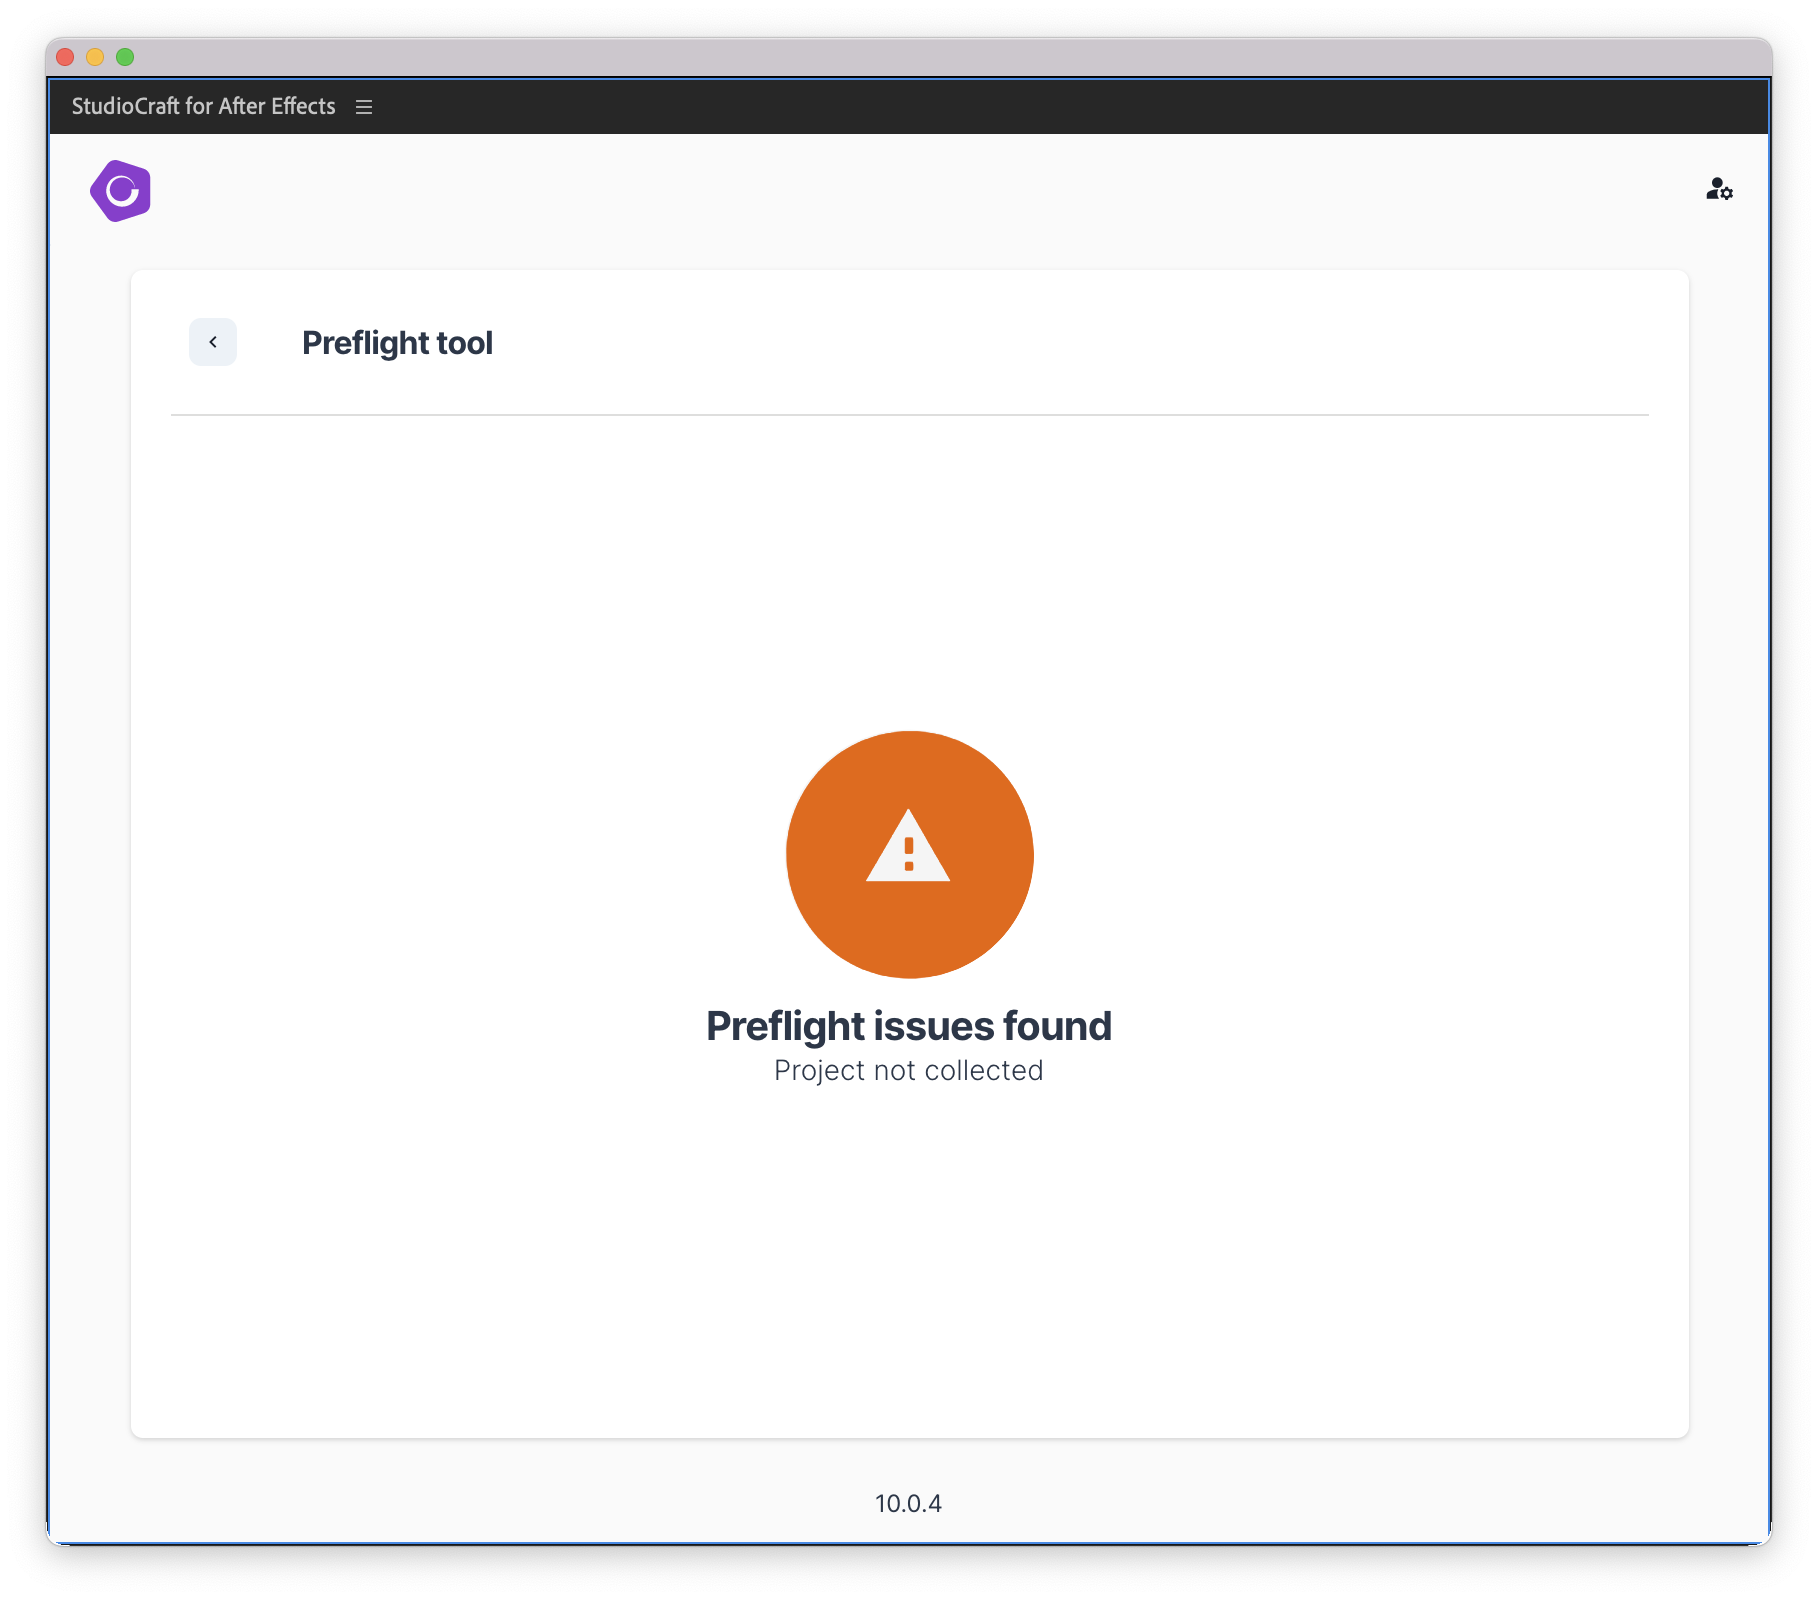
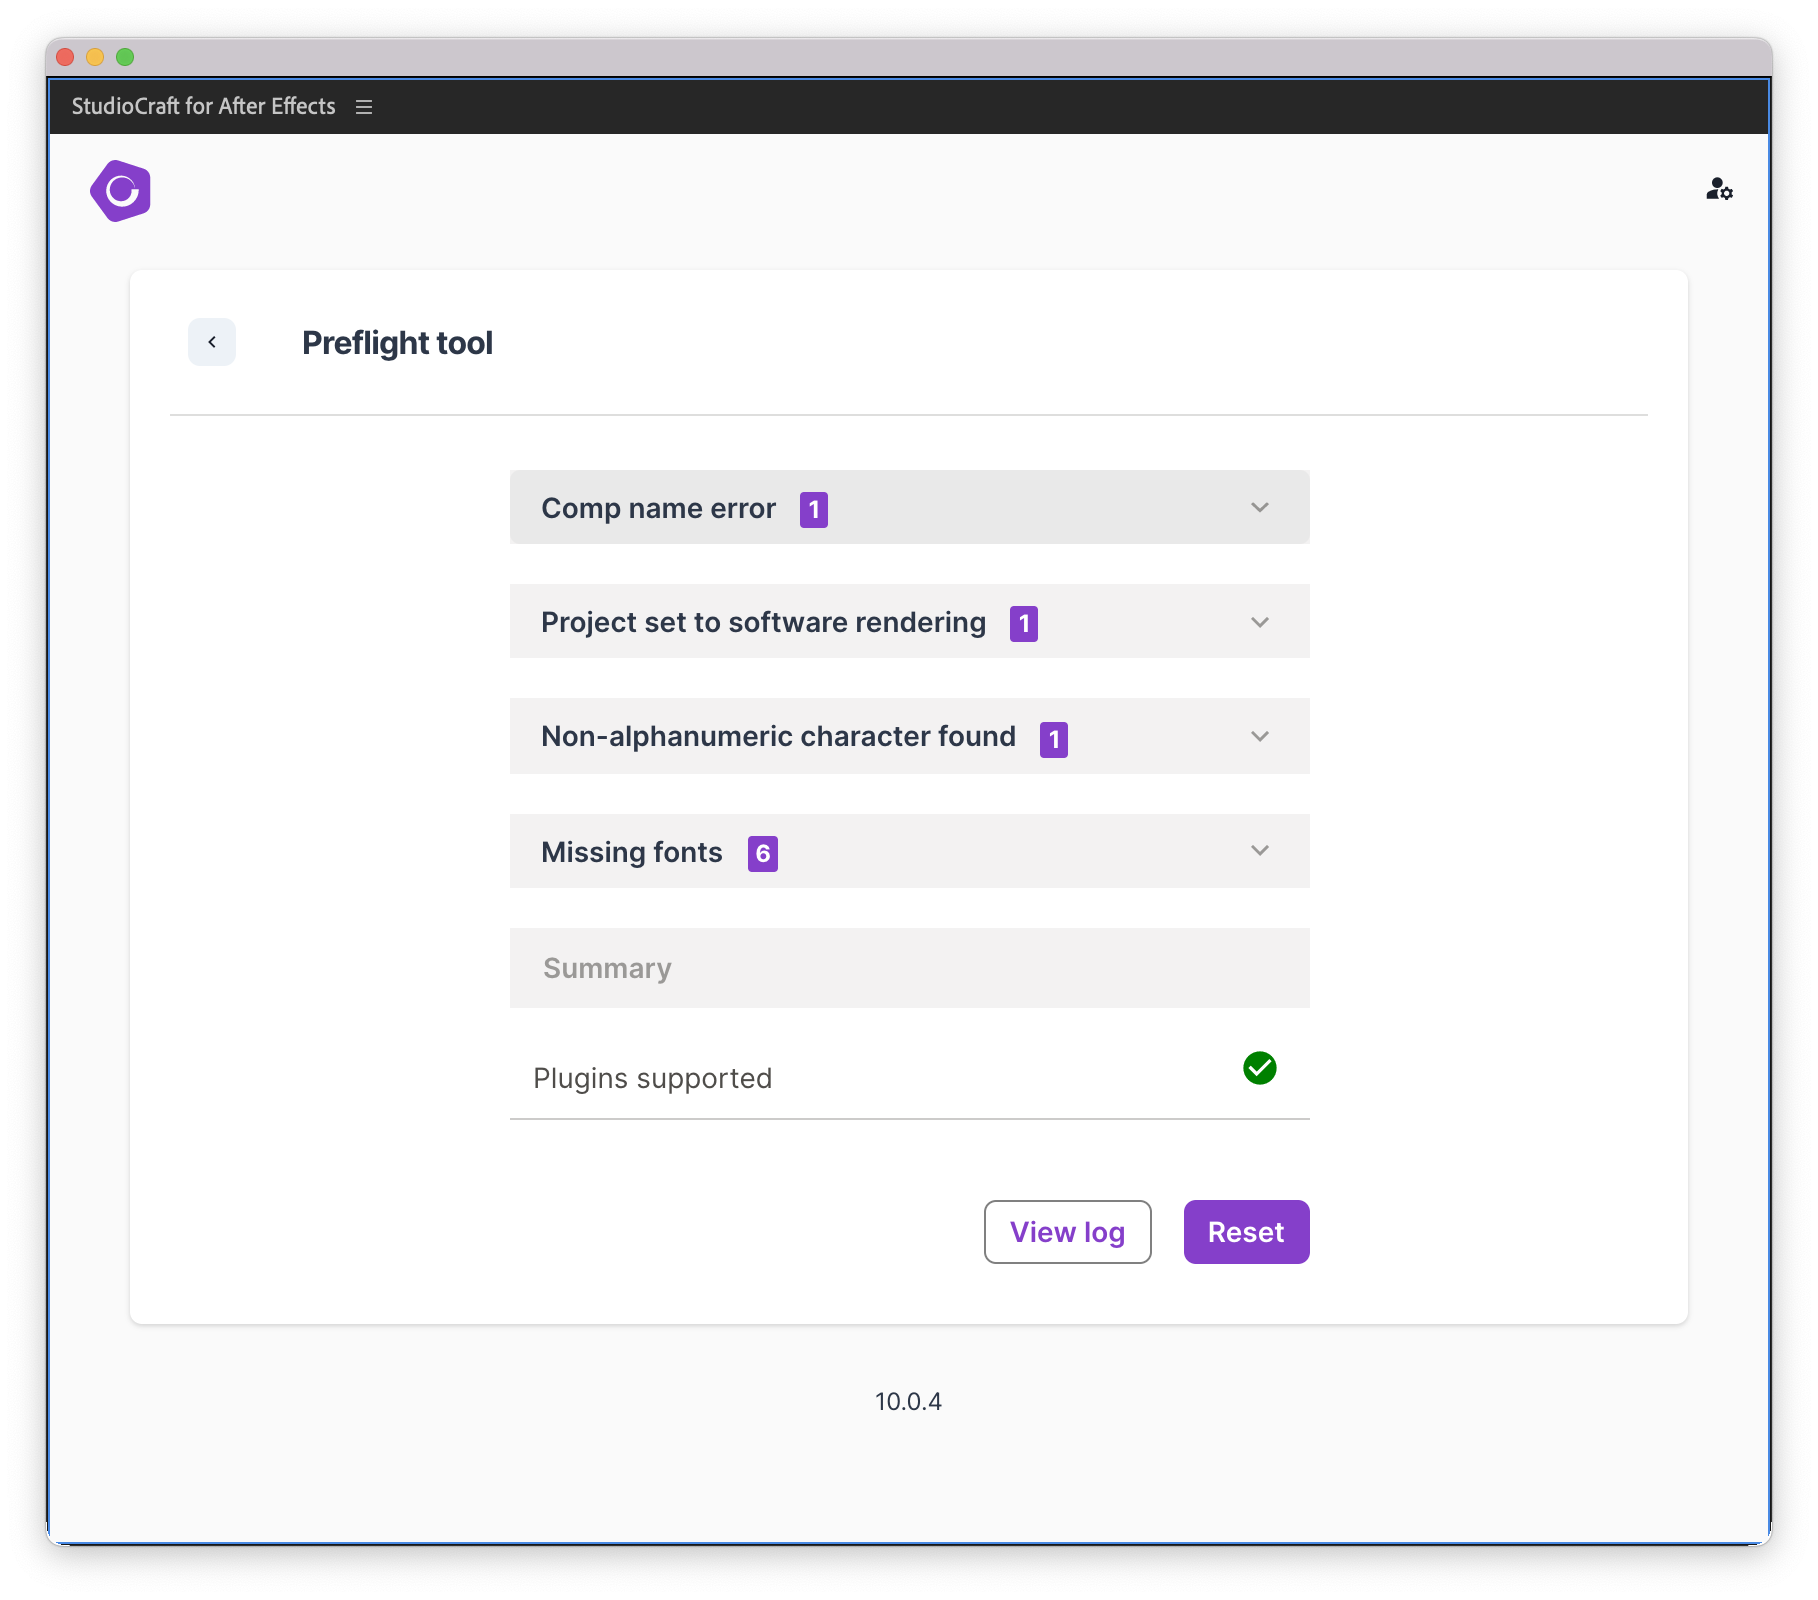
Warning message if Preflight issues found
if errors are found we display them on the summary screen. Each Preflight error is highlighted in detail.
Your final comp must end in '_main'
The project should be set-up to use GPU acceleration wherever possible
Layer names can only contain alphanumeric characters (a-z,0-9) and should not include any special characters (such as [ ( ~ ! @ # $ % ^ & * ; “”‘’ : \ / <>`’“) ]).
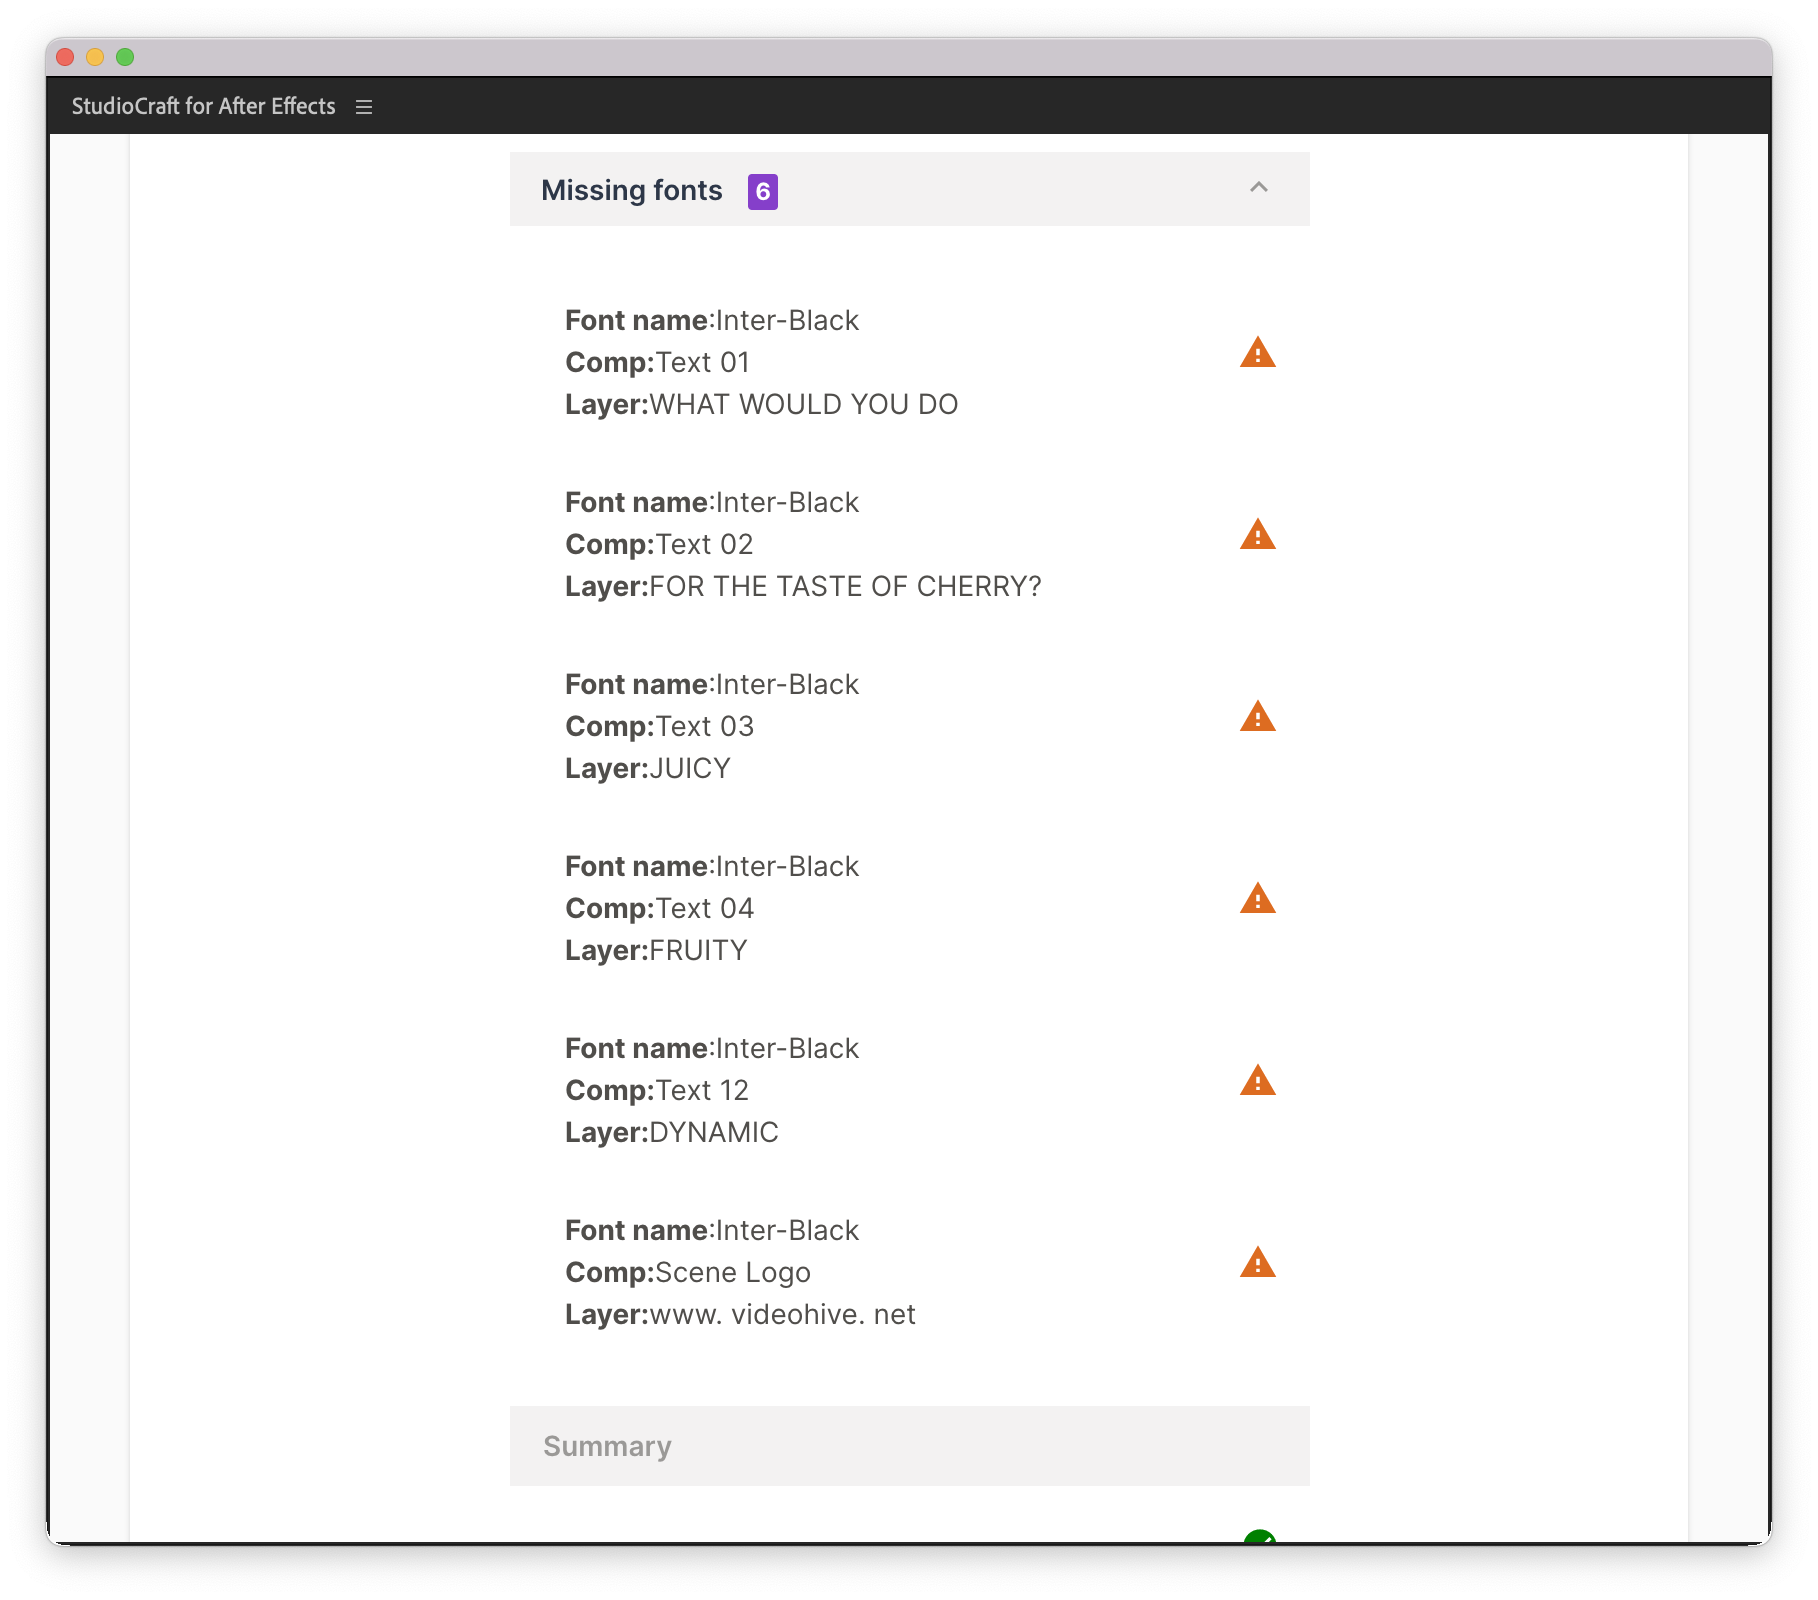
All fonts used in the project need to be included in the After Effects Collect.

Project checklist

Before uploading a project file for localisation, check the following

  • Has the project been pre-flighted using the latest plugin version?
  • Are the fonts included in the package?
  • Are all text elements correctly formatted and tagged for localisation/ scaling:
  • Text layers contain a single character style
  • All paragraph styles are set to 0
  • Leading is set to allow text to display correctly over multiple lines
  • Text elements on the same frame are precomped, with anchors set to the centre. See detailed instructions here
  • Text that needs to scale with a logo is correctly set-up.  See detailed instructions here

Welcome to this series of tutorials, which teaches you the basic tools and techniques of StudioCraft for After Effects.

To package After Effects projects to upload into CreateTOTALLY, you will need our After Effects plugin. This can be downloaded here.

Not all After Effects versions are created equally.

We require a minimum of After Effects CC 2021 v18.4.6 to work perfectly.

Folders, comps and layers

We love tidy files

Tidy files let our AI read your projects faster.

Your project must be clearly laid out with your final comp easily identified.

Your final comp must end in "_main" (For example myFinalComp_main). There can only be 1 comp that includes the name main.

Name your layers

We read and use your layer name information during our analysis and automation processes.

Use unique layer names where possible. (Fig. 1)

Don’t use special characters in your layer names. Special characters include any of the following [ ( ~ ! @ # $ % ^ & * ; “”‘’ : \ / <>`'") ]. (Fig. 2)

Text and formatting

Pre-compose text layers

Placing dynamic text layers together into a precomp lets us localise each layer and makes it possible for us to scale them as a group.

It’s best-practice to isolate dynamic text and to remove empty text layers. (Fig 1)

If you need to add keyframe animations, apply the animation to the precomp that’s nested inside the parent comp. (Fig 2)

Paragraph and point text settings (Part 1)

Converting editable text fields to paragraph text can optimise your multi-line text layer for localisation.

The ‘Convert to Paragraph Text’ setting lets you create a text field that wraps the content. It’s useful when you need to localise large paragraphs of text that needs to fit within a specific area. This can be done by selecting the text “T” tool, right clicking on the text field and choosing “Convert to Paragraph Text”. (Fig 1)

Drag the transform handles to define the bounding area for your paragraph. (Fig 2)

Paragraph and point text settings (Part 2)

Converting editable text fields from paragraph text to point text can optimise your single-line text layer for localisation.

Point text is the default text tool in After Effects. It’s useful when you need to localise a single line of text that needs its text field to grow dynamically. This can be done by selecting the text “T” tool, right clicking on the text field and choosing “Convert to Point Text”. (Fig 1)

Text anchor points

We detect anchor points in order to correctly scale and reposition your text layers.

For comps with a single text layer, your text layer anchor point should be set to ‘centre, centre’. (Fig. 1)

For comps with two or more text layers, all text layer anchor points should also be set to ‘centre, centre’. (Fig. 2)

Locking text to an image, symbol or graphic

We can detect the relationship between a dynamic text field and an image, symbol or graphic.

For comps where a dynamic text field needs to be grouped with an image, symbol or graphic, first set your text alignment to align to the direction you’d like the text field to grow. (Fig. 1)

Then append the tag ‘_CT_child’ to the image, symbol or graphic layer name. (Fig. 2a)

Finally, set the dynamic text layer as the parent of the image, symbol or graphic layer. (Fig. 2b)

Text in linked Illustrator smart objects

If you want to allow your users to apply character styles to the text in your project, this can be done by setting it up in Illustrator and linking it as a smart object.

To do this create a layer in your After Effects project where the text should appear. Give it the same name as the text layer in your Illustrator smart object, then link the Illustrator file to it.

The text in illustrator should have a paragraph style applied as a default, with the available character styles set-up but NOT applied to the text.

Supplied assets

Pre-render ginormous files and image sequences

Oversized footage is a waste of space and will slow your project down.

For example, if your source video is 7.8GB and 20 minutes long in your project but the final edit only uses 18 seconds, those 18 seconds can be pre-rendered and your original 7.8GB source video can then be removed / deleted.

Footage can be pre-rendered by choosing “Composition” / “Pre-render”.

Advice to improve render speeds and project 

To improve the speed of rendering the localised assets and reduce the possibility of errors, it is best practice to pre-process complicated elements of the artwork

  • Image sequences should be pre-rendered as a ProRes mov. 
  • The project should be set-up to use GPU acceleration wherever possible
  • All assets or precomps should be set to the same pixel dimensions as the final rendered output
  • Complex precomps should be pre-rendered as a ProRes mov.

Video quality

In order to produce the very best, we need quality input.

File type accepted: MP4 / MOV

We recommend a that file sizes be kept under 500mb for individual asset.

For MP4’s, the minimum bitrate should be 80Mbps, with a maximum of 96Mbps. (Fig. 1)

For MOV’s, the codec we accept is ProRes 422 or 4444 for assets with an alpha channel. (Fig. 2)

Switching video

Our end-users can easily localise selected footage in your project.

File types accepted: MP4 / MOV

When supplying alternate video footage, the replacement must be the same dimensions and length as the original asset.

Switching images

Our end-users can also switch static images.

File types accepted: JPG / PNG / PSD / PSB / TIFF

When supplying alternate static images,
the replacement must be the same dimensions.

Switching audio

Our end-user can localise audio tracks.

File types accepted: MP3 / WAV / AIFF

When supplying alternate audio files,
the replacement must be the length as the original asset.

Plugin support

Plugins supported by default can be found here. Any other plugins will need to be installed manually and licensed:

Using StudioCraft for After Effects

StudioCraft for After Effects is a simple plugin we’ve created that helps you pre-flight and package your project.

To package After Effects projects to upload into CreateTOTALLY, you will need to install StudioCraft for After Effects. Installation guide can be found here.

Use StudioCraft for After Effects to collect all project files and fonts.

Our plugin reports back any issues with your file so you can be sure your project will be delivered seamlessly.

Before uploading the project to CreateTOTALLY, you must perform a quality check on the project. Our Preflight panel warns of problems that can prevent the project from rendering as desired. StudioCraft for After Effects ensures your project will function correctly when you upload to CreateTOTALLY.

Preflight tool

StudioCraft for After Affects will perform the following Preflight:
  • Check Keyframes on text layers
  • Check Project comps that are to be rendered has _main in its name
  • Check that Project plugins are supported by CreateTOTALLY
  • Check for oversized comp(s)
  • Checks Project setting for Video Rendering and Effects
  • Checks for sequences
  • Checks Alphanumeric characters in layer, comps, files name
  • Checks for Empty spaces in layer name
  • Checks for duplicates layer name
  • Checks for duplicates comp name
  • Collects Project Fonts
To start the Preflight click the arrow
Check the box to confirm that the fonts are licensed and click Preflight and collect
Please select folder for collection
During the Preflight process we automatically rendered a preview of your project
Once the Preflight process has been completed with give a pass summary screen

Once the preflight check is complete we package up your project with all your footage and fonts and also create the following

  • Preflight report
  • Rendered preview of your project
  • Thumbnail

Common Preflight issues

Errors must be fixed before uploading to CreateTOTALLY, you will be unable to complete the package process until there are no more errors.
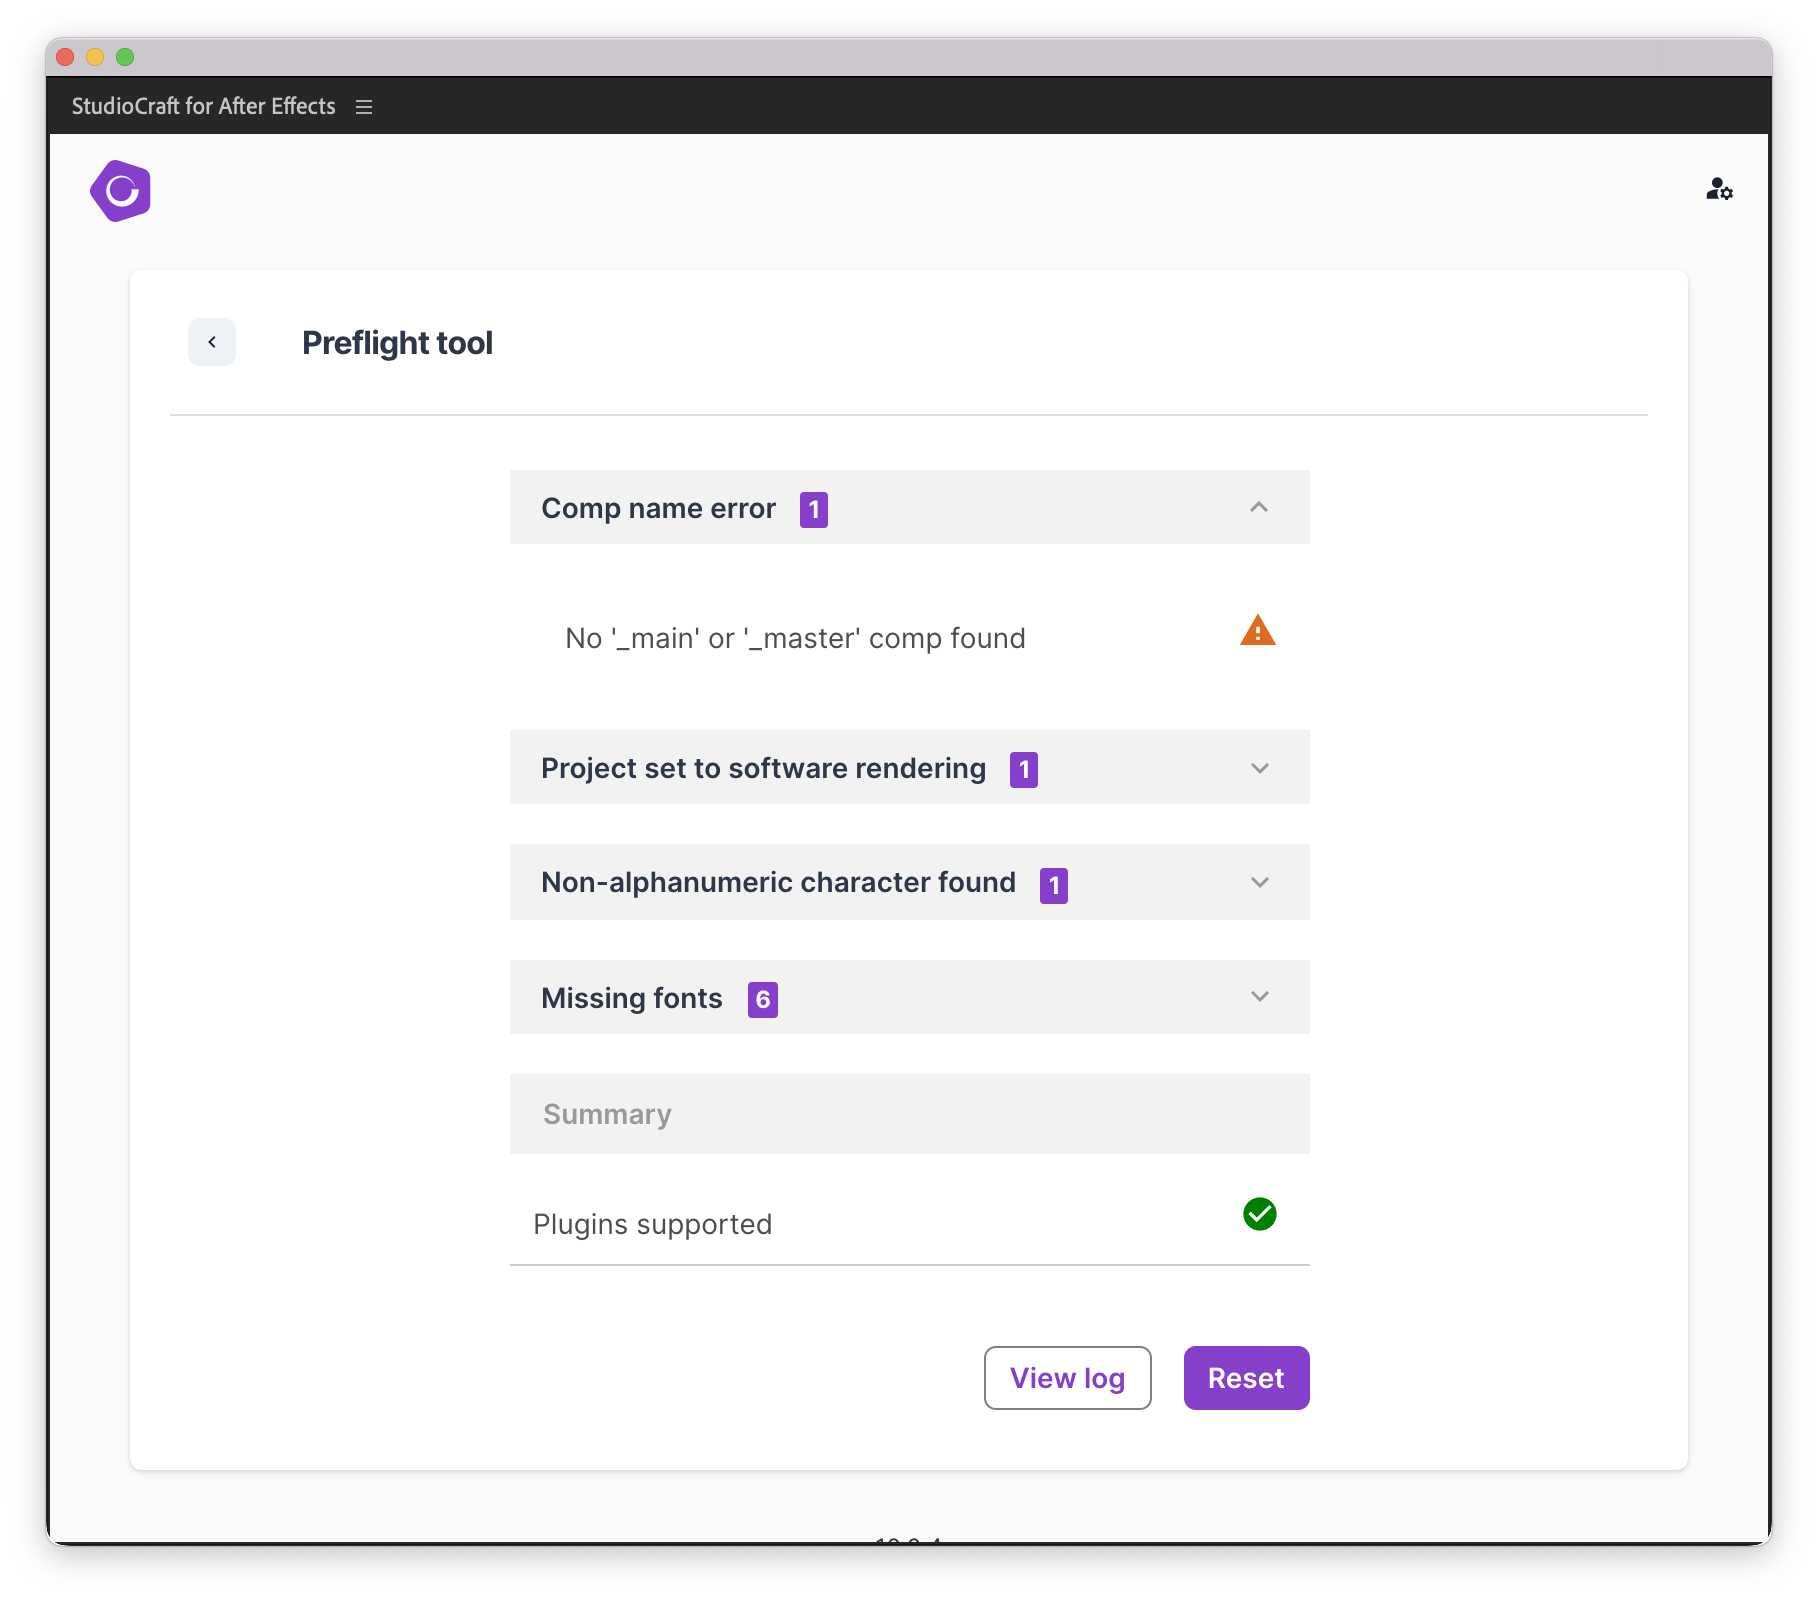
Warning message if Preflight issues found
if errors are found we display them on the summary screen. Each Preflight error is highlighted in detail.
Your final comp must end in '_main'
The project should be set-up to use GPU acceleration wherever possible
Layer names can only contain alphanumeric characters (a-z,0-9) and should not include any special characters (such as [ ( ~ ! @ # $ % ^ & * ; “”‘’ : \ / <>`’“) ]).
All fonts used in the project need to be included in the After Effects Collect.

Project checklist

Before uploading a project file for localisation, check the following

  • Has the project been pre-flighted using the latest plugin version?
  • Are the fonts included in the package?
  • Are all text elements correctly formatted and tagged for localisation/ scaling:
  • Text layers contain a single character style
  • All paragraph styles are set to 0
  • Leading is set to allow text to display correctly over multiple lines
  • Text elements on the same frame are precomped, with anchors set to the centre. See detailed instructions here
  • Text that needs to scale with a logo is correctly set-up.  See detailed instructions here