
Every client manages work differently. To allow for these differences, the platform allows customised approval workflows to be generated. These can be configured using Workflow Manager.
Workflow types
Each part of the platform can have its own workflows set-up. These are:
- Media Plans
- Artwork proofing
- Projects
Configuring workflows
When creating a workflow, the first step is to configure when you want it to be used. The configuration options available depend on the type of workflow selected, but in general they include:
- Market
- Country
- Campaign
- Media Type
- Language
- Retailer
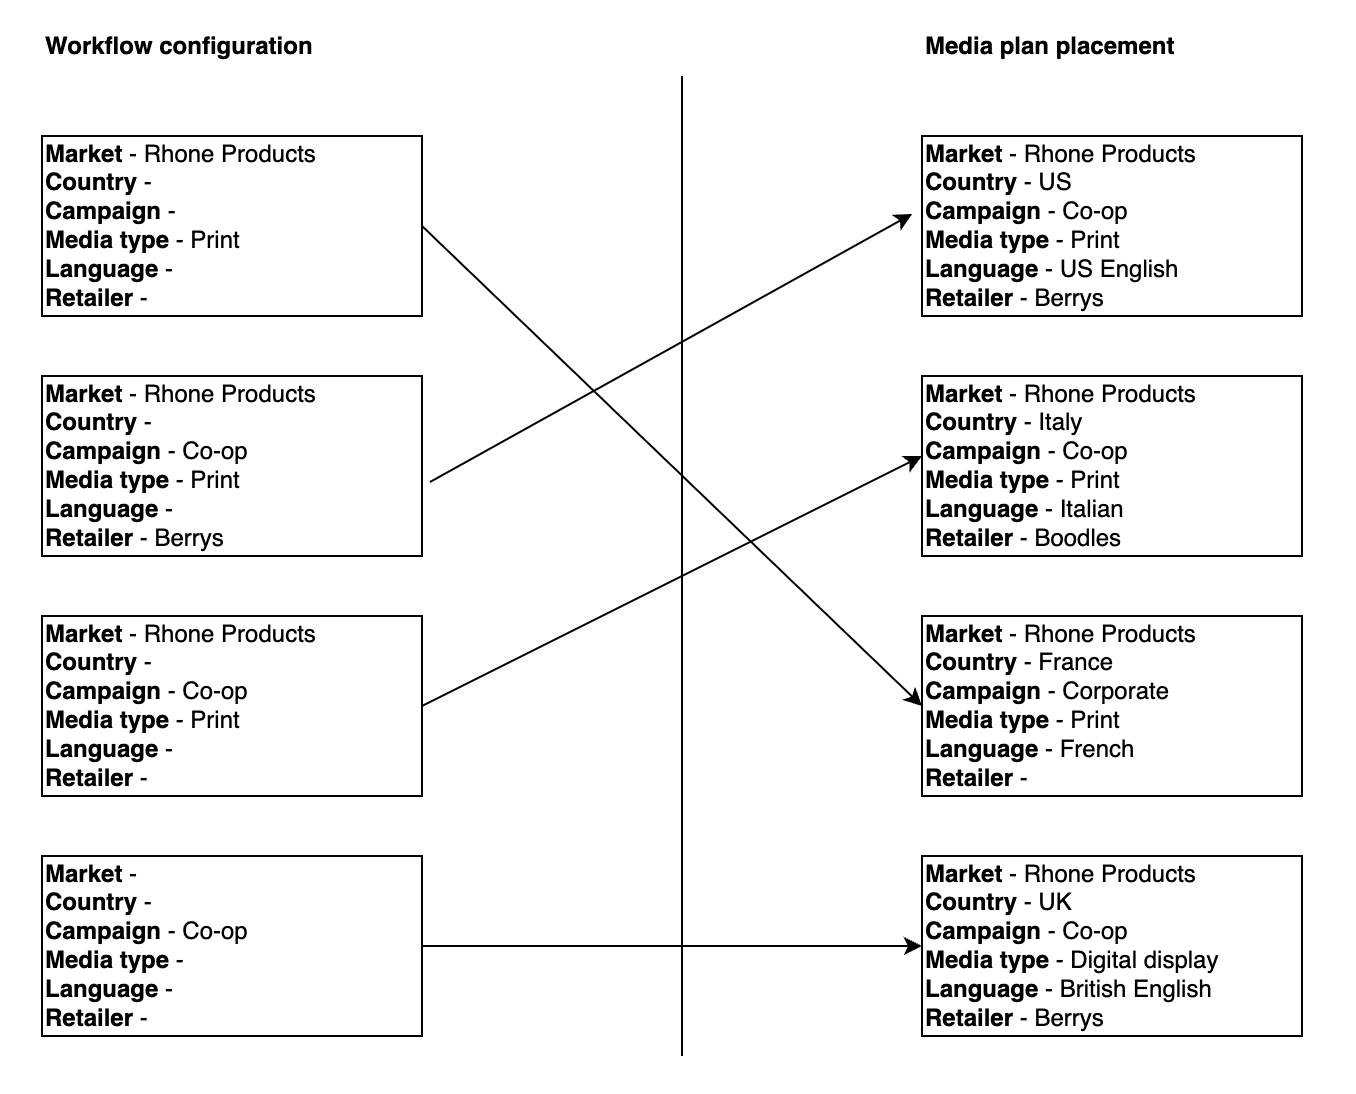
A client can have as many workflows as they require. The workflow that is applied will be based on the configuration applied to the workflow and the details of the item in the system (e.g Media plan placement). The workflow with the closest matching configuration will be applied.
It is advisable to have a default template set-up with limited configuration, so that there is always a workflow applied.
Below are some examples of how workflows will be applied to media placements.
Workflow stages
A workflow consists of a number of stages. At each stage, we are defining what needs to happen and who the owner of the stage is. If the stage is a review stage, we will also define who will make any amends (if required).
Workflow stages can be configured to be review stages, or task stages. The system requires a certain order and number of task stages, but review stages can be completely customised.
Media Plan workflows
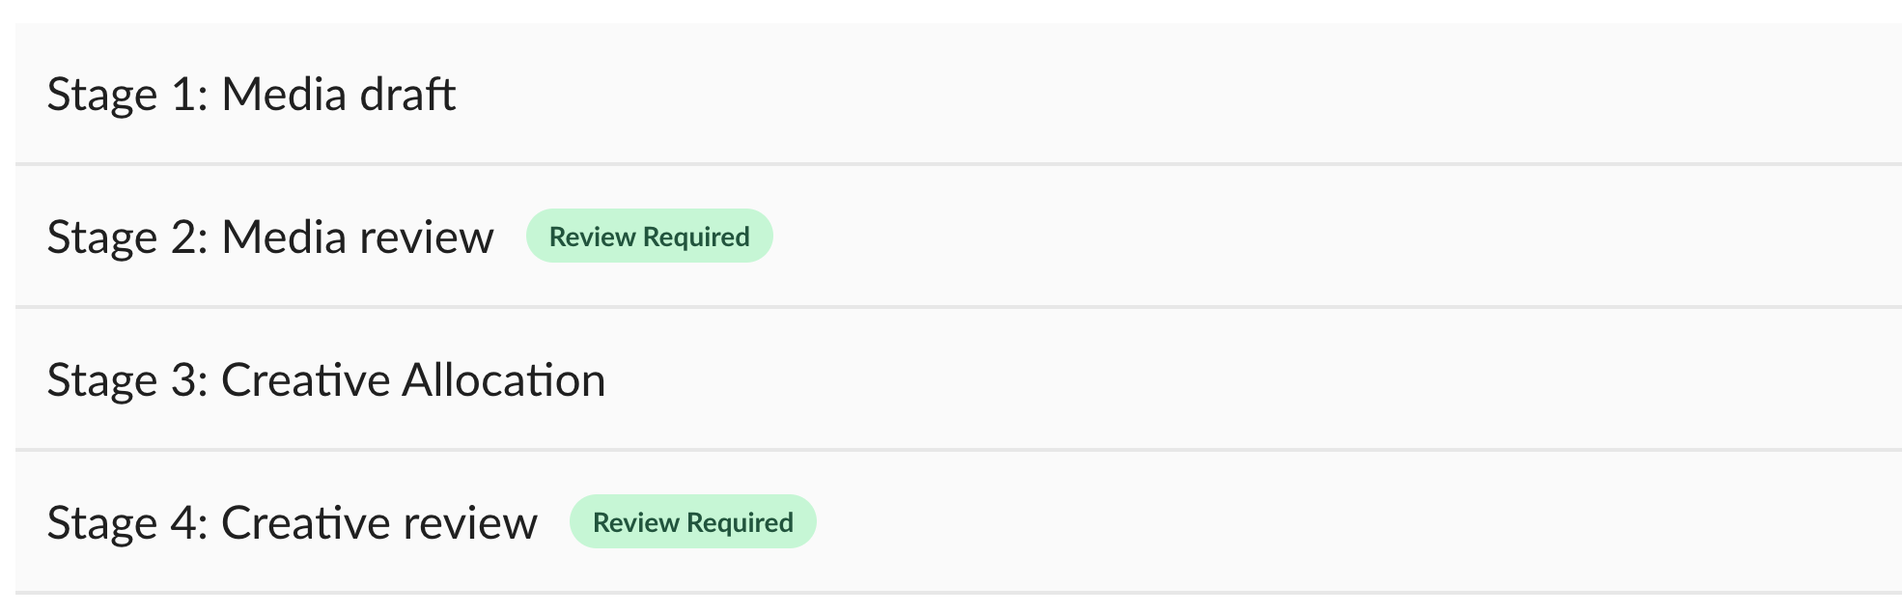
For a Media Plan, there are 2 task stages that are required and 2 optional review stages:
- Media draft - this is the status assigned to a placement when it is first created. In this status users can continue to edit the placement, changing details without anything happening. When they are happy all the entered details are correct, they can submit it to the next stage.
- Media review (optional) - if the media details require approval, a review stage can be added here
- Creative Allocation - this is the status assigned to a placement that needs to have its Creative Assets and Customisation selected.
- Creative Allocation review (optional) - if the creative selection and customisation requires approval, a review stage can be added here
For each of the stages, you can define:
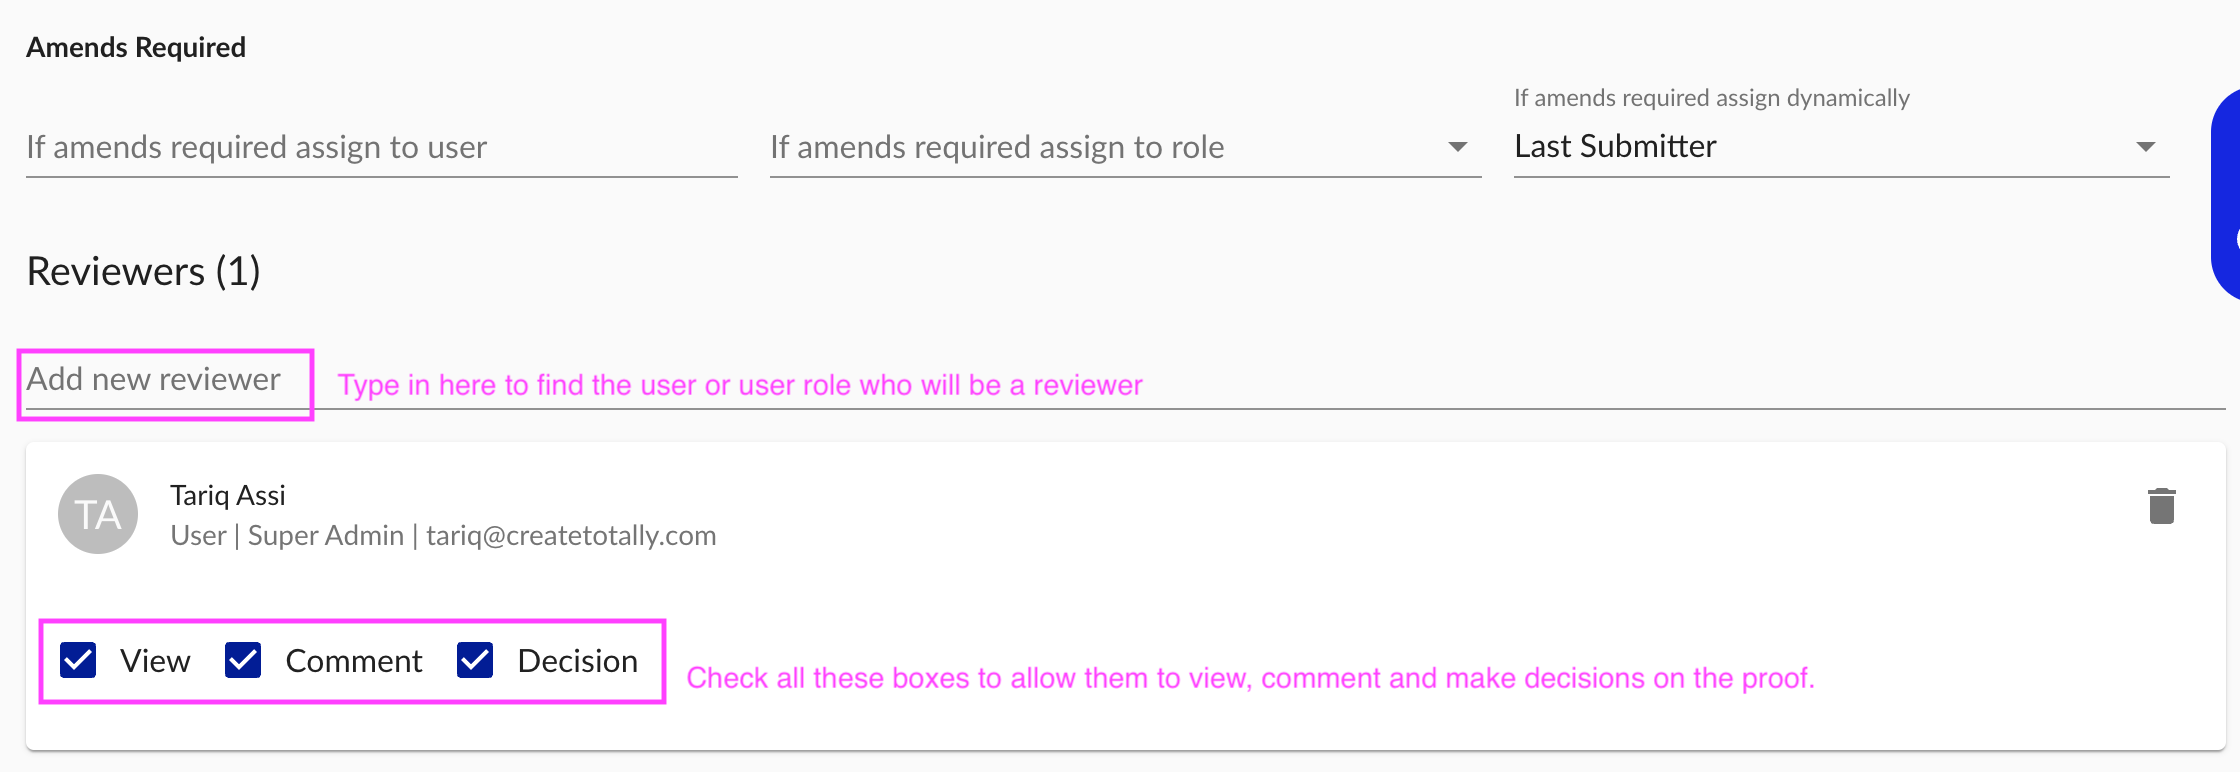
- Whether the stage is a review stage. You can have review stages for both the media placement and the creative allocation. To configure a review stage check the “requires review” box and configure:

- The reviewers of the stage (note - please ensure you check all the checkboxes to allow the reviewers to view, comment and decide on the stage) -
- User
- User role (users will be selected based on the the campaign user role they have assigned for the campaign the media plan is for, as well as any other criteria set on that role such as media type, market, language, country, retailer and stage)
- An assignee if amends are required - if changes are requested, a task will be created for the user set-up in the “amends required” section.
- User
- User role
- Assigned dynamically
- Media Plan Placement Creator (the person who created that placement)
- Last Submitter (the person who pressed the submit button against the placement)
- Last approver (the person who approved the previous stage of the task)
- Creative Asset Selector (the person who saved the customisation of the placement).
- If it is a review stage you DON’T need to assign an initial assignee
If the stage isn’t a review stage, it is considered a task stage. A task stage means that someone needs to complete an action in the system and submit it. You need task stages for media draft and creative allocation. To configure task stages:
- Assign the initial assignee - this is the person who will be assigned the task to complete. For media draft tasks, the initial assignee is likely to be the media plan owner/ creator. For Creative Allocation tasks, it will depend on whether the user creating the media plan is also doing the creative allocation and so varies per client
- User role
- Assigned dynamically
- Media Plan Owner (the person who owns the Media Plan)
- Media Plan Creator (the person who created the media plan)
- Media Plan Placement Creator (the person who created that placement)
- Last Submitter (the person who last actioned the media plan - note this option shouldn’t be used for a media draft task).
- Last approver (the person who approved the previous stage of the task - this should NOT be used for Media draft initial assignee, as there is no last approver)

You can tag the stage with additional information to allow the platform to know to use the stage in a specific way:
- If the stage relates to Creative Allocation, you need to apply the tag “Creative Allocation” to it.
- If the stage will be reviewed by a client, you can apply the tag “Client review” to it.
A standard media plan workflow that requires both stages to be reviewed will look like
A standard media plan workflow that doesn’t require approval, will look like

Note: the stages can be named whatever is appropriate to the client, these are just our recommendations.
Artwork proof workflows
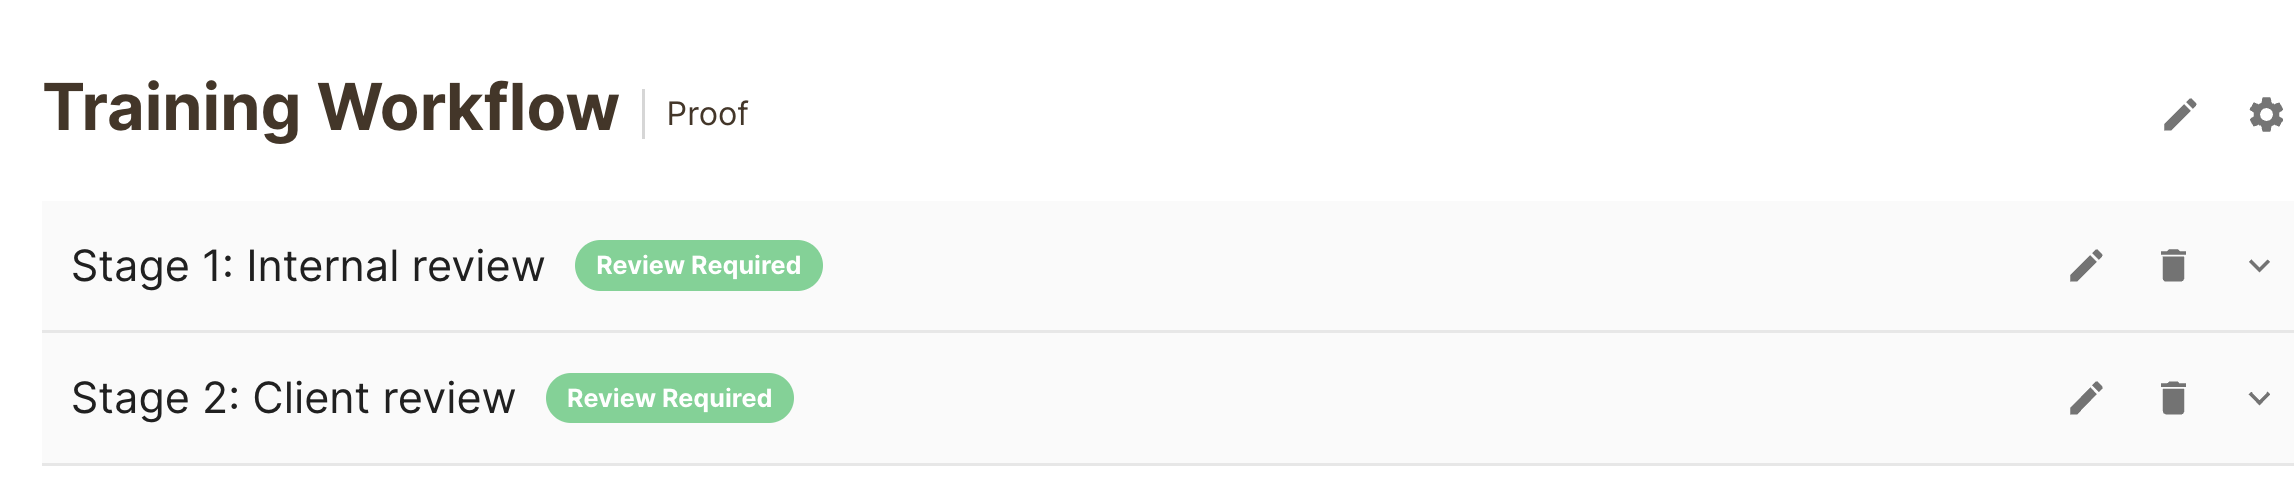
Proof workflows are applied to the automated artwork generated from the platform. Unlike media plan workflows, only review stages are relevant for proof workflows. This is because all that needs to be completed is the review of automated artwork. You can configure any number of stages for review. Typically these involve a number of internal stages for the studio to verify the artwork meets brand guidelines and then client approval stage(s).
For each stage, you can configure:
- The reviewers of the stage (note - please ensure you check all the checkboxes to allow the reviewers to view, comment and decide on the stage) -
- User
- User role
- An assignee if amends are required - if changes are requested, a task will be created for the user set-up in the “amends required” section.
- User
- User role
- Assigned dynamically
- Media Plan Placement Creator (the person who created that placement)
- Last Submitter (the person who pressed the submit button against the placement)
- Last approver (the person who approved the previous stage of the task)
A standard 2 stage proof workflow looks like:
Project document workflows
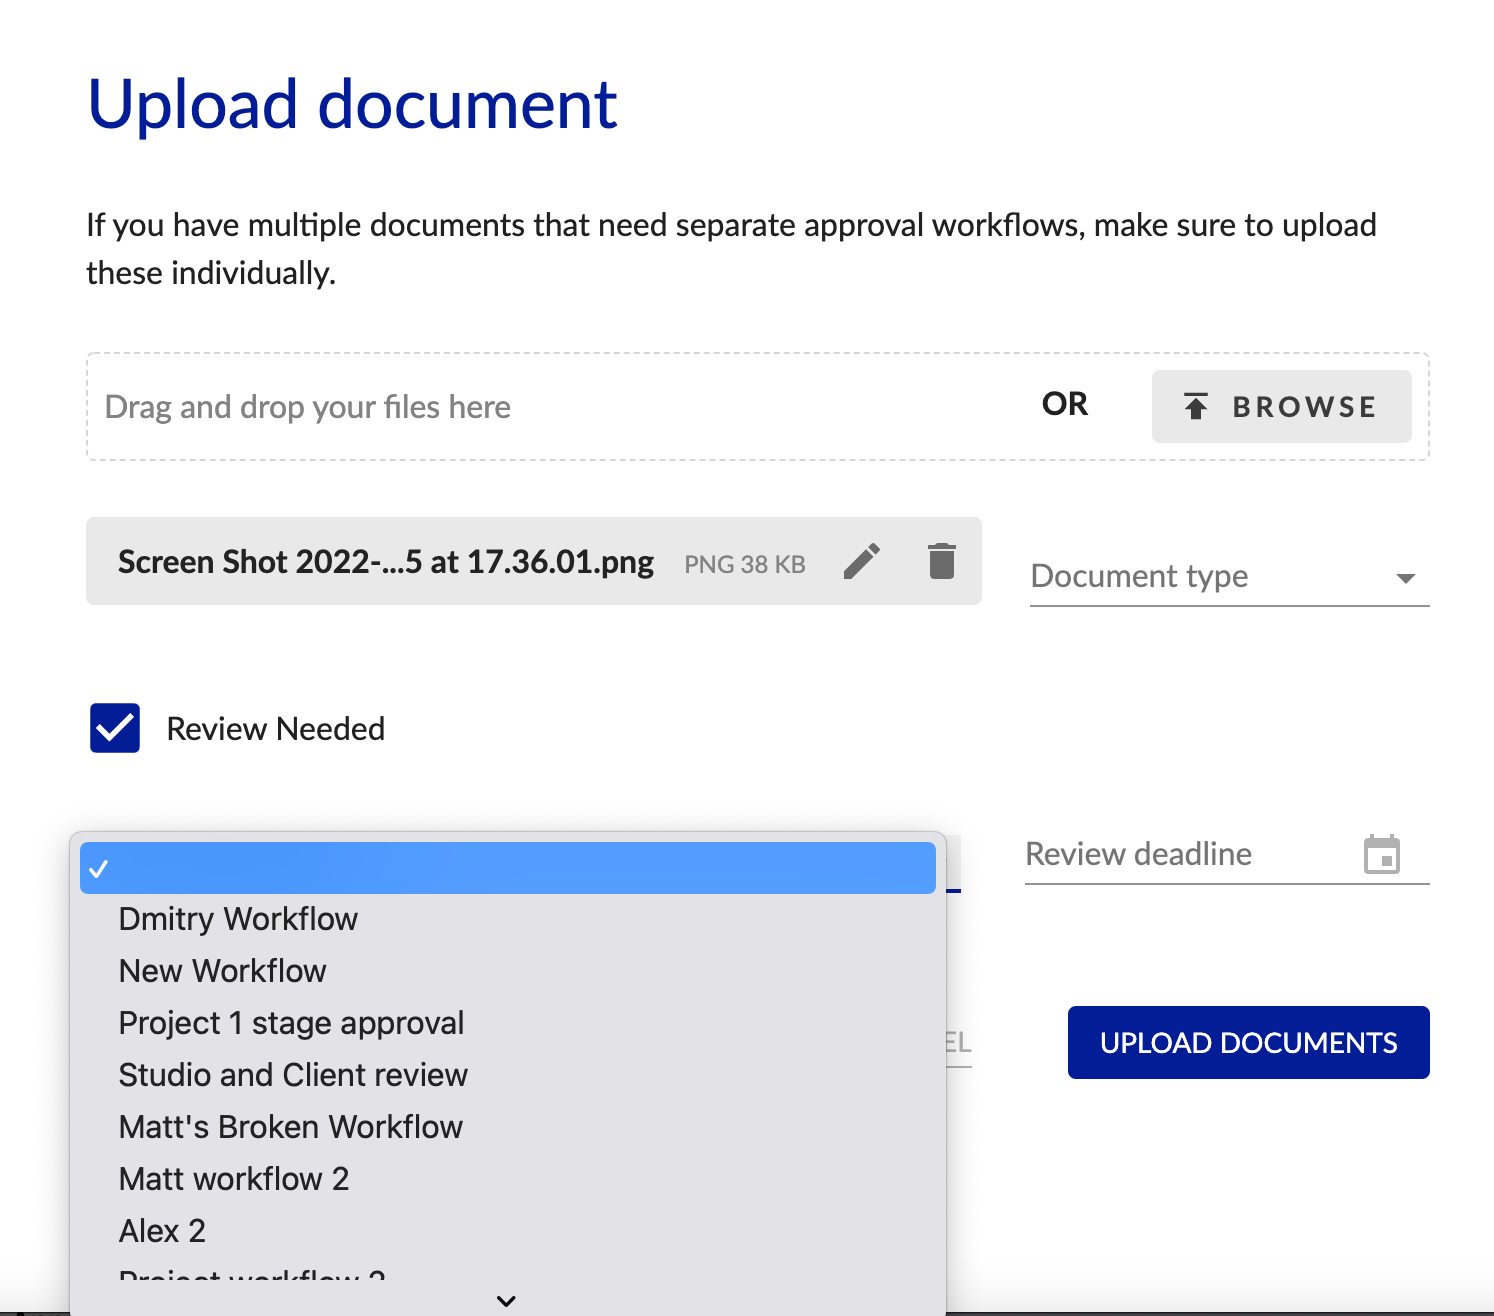
Project documents can have their own workflows applied. As with Artwork proof workflows, these should all be review stage as the purpose of the project is to gather feedback and approvals for project documents.
Unlike Media Plan and Artwork proof workflows, you are able to select the Project workflow you require when uploading a document. For this reason it's important to name them in a way that is clear to the client.
For each stage, you can configure:
- The reviewers of the stage (note - please ensure you check all the checkboxes to allow the reviewers to view, comment and decide on the stage) -
- User
- User role
- An assignee if amends are required - if changes are requested, a task will be created for the user set-up in the “amends required” section.
- User
- User role
- Assigned dynamically
- Document Creator (the person who created that document)
- Document updater (the last person to have amended the document)