
To automate a HTML banner, you will need to have a HTML package containing the elements of your banner. This can be created in any ad design platform that outputs code in HTML format, such as Google Web Designer. Your package will include:
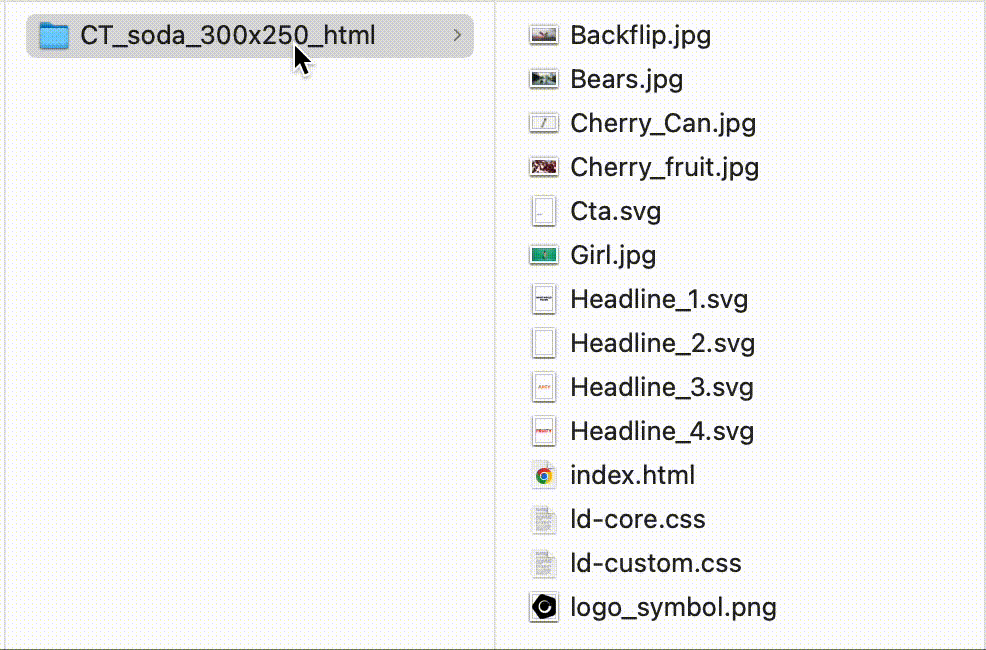
- index.html file - this is file contains your banner design, with links to all the other resources it needs to display
- jpg/ png/ svg/ gif files - any images you need in your ad need to be in 1 of these image formats. Any editable text should be added as an svg file
- mp4 file - if your banner contains a video
- css or js files - its possible that your banner will have external links to a css or js file. These will be required to ensure the banner displays the design and animation required.
The folder shouldn't contain any sub-folders, as its important that any linked files are located in the same folder as your index.html file so that they are displayed correctly.
You can download a sample HTML file here and a sample Illustrator file here.
Note - many design tools do not create banner code in HTML which makes them unsuitable as a source of the HTML file.
Preparing your HTML file
When designing your HTML file, the text should be added as an SVG image and not as live text. CreateTOTALLY will use Illustrator to automate this text, creating a size efficient SVG file, while also allowing anyone reviewing the file to make modifications in Illustrator. This image should be the same size as your HTML banner and the file name should match the layer name of the text element in Illustrator (see below).
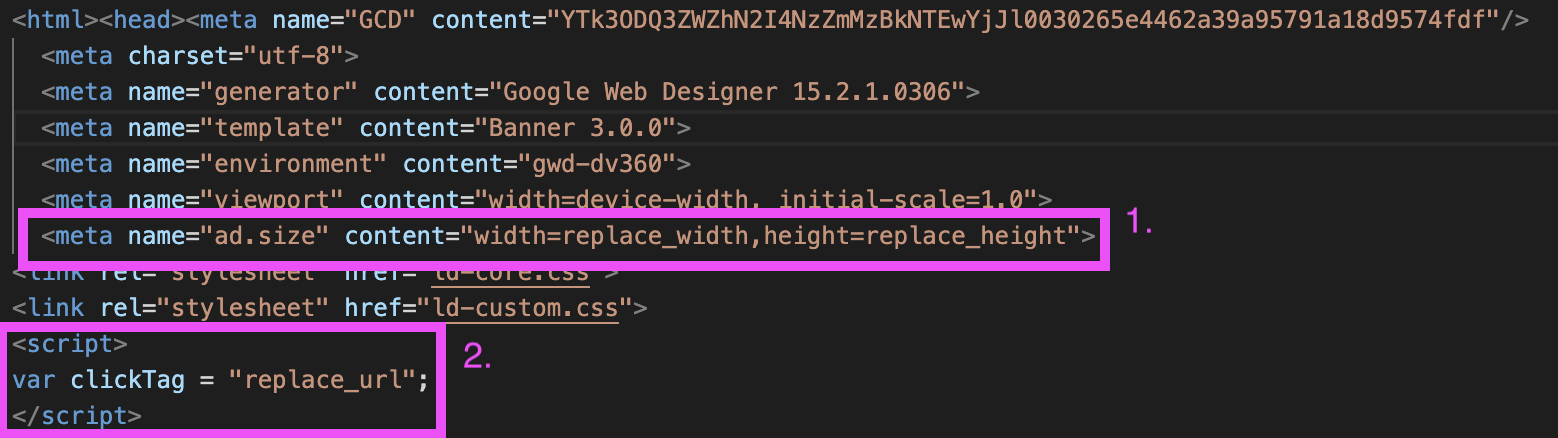
Required code changes
The HTML file you create needs to be changed in 2 small ways to work in CreateTOTALLY and your ad server:
1. Add a meta property for the ad size. This code sits in the head and looks like:
<meta name="ad.size" content="width=replace_width,height=replace_height">
2. Add a variable to populate the clickTag for the ad server. The variable name will vary by Ad Server and not all Ad Servers require the click URL to be in the html. The code for this also sits in the head and looks like:
<script>
var clickTag = "replace_url";
</script>
replace_url will be populated by CreateTOTALLY with the click tag that you add when you customise your banner.
Create a zip package
Once you have made these changes to your index.html file, create a zip package of all of the folder containing all the files your banner requires. This will be uploaded into CreateTOTALLY as your Master Template.
Note it is important that you zip the folder and that the name of your zip package is the SAME as the name of the folder. Do NOT name your folder or zip folder html.
Preparing your Illustrator file
CreateTOTALLY utilises Illustrator to help your visualise your text and images within the HTML. This means that when you customise text, you will be able to make modifications in Illustrator and not have to worry about the HTML code. CreateTOTALLY will convert the text from Illustrator into an optimised SVG file. This means you don't need to worry about hosting custom fonts and your files will stay small and lightweight.
Text
In Illustrator, set-up artboards for each individual line of text. The artboards needed be be named as a number eg 1, 2, 3, 4, 5 (as in the screenshot below). Note this is different to the default Illustrator artboard naming, so be sure to make this change.
It is easiest for each artboard to contain a separate headline.

Create a layer called Text and within that layer nest an individual layer for each of your text elements. The naming of these layers is important. it needs to:
- Match the name of the files in your HTML folder AND
- Include a .artboard number extension e.g in the screenshot below Headline_1 is the name of the image in the HTML folder, the layer name in Illustrator is Headline_1.1 as the text for headline 1 is on artboard 1.
This naming is important as during automation, the SVG file CreateTOTALLY creates will be named to match this layer.
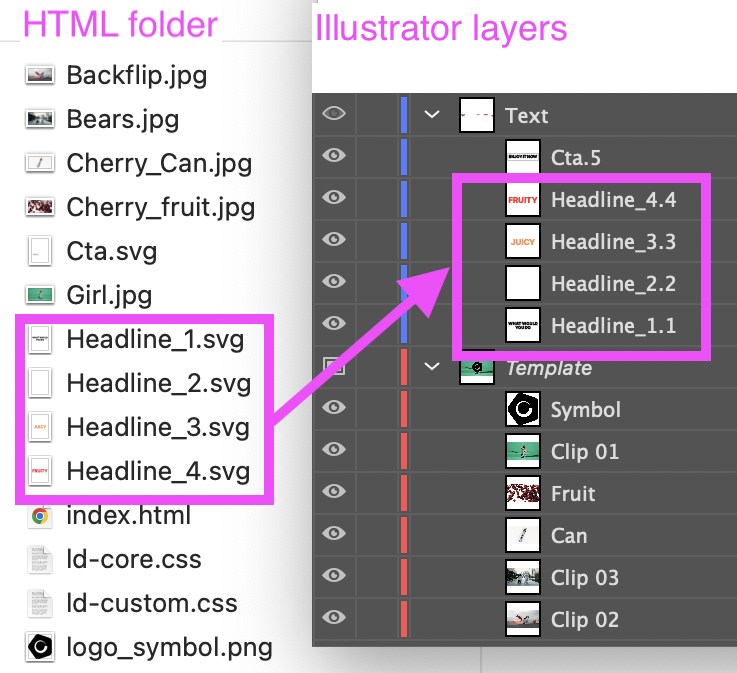
Images
Any customisable images you require can be added to Illustrator. Create a layer called "Template" and add a layer within this for each of your images. These can either be added on 1 artboard, or on individual artboards.
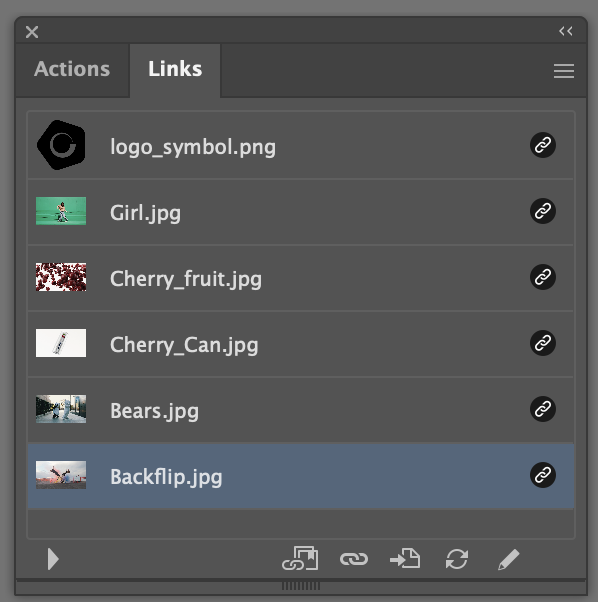
The images need to be set-up as:
- A linked object - do not embed your images in Illustrator
- The image name needs to match the name of the image linked in the HTML banner
- The linked image needs to be uploaded into CreateTOTALLY with the same name
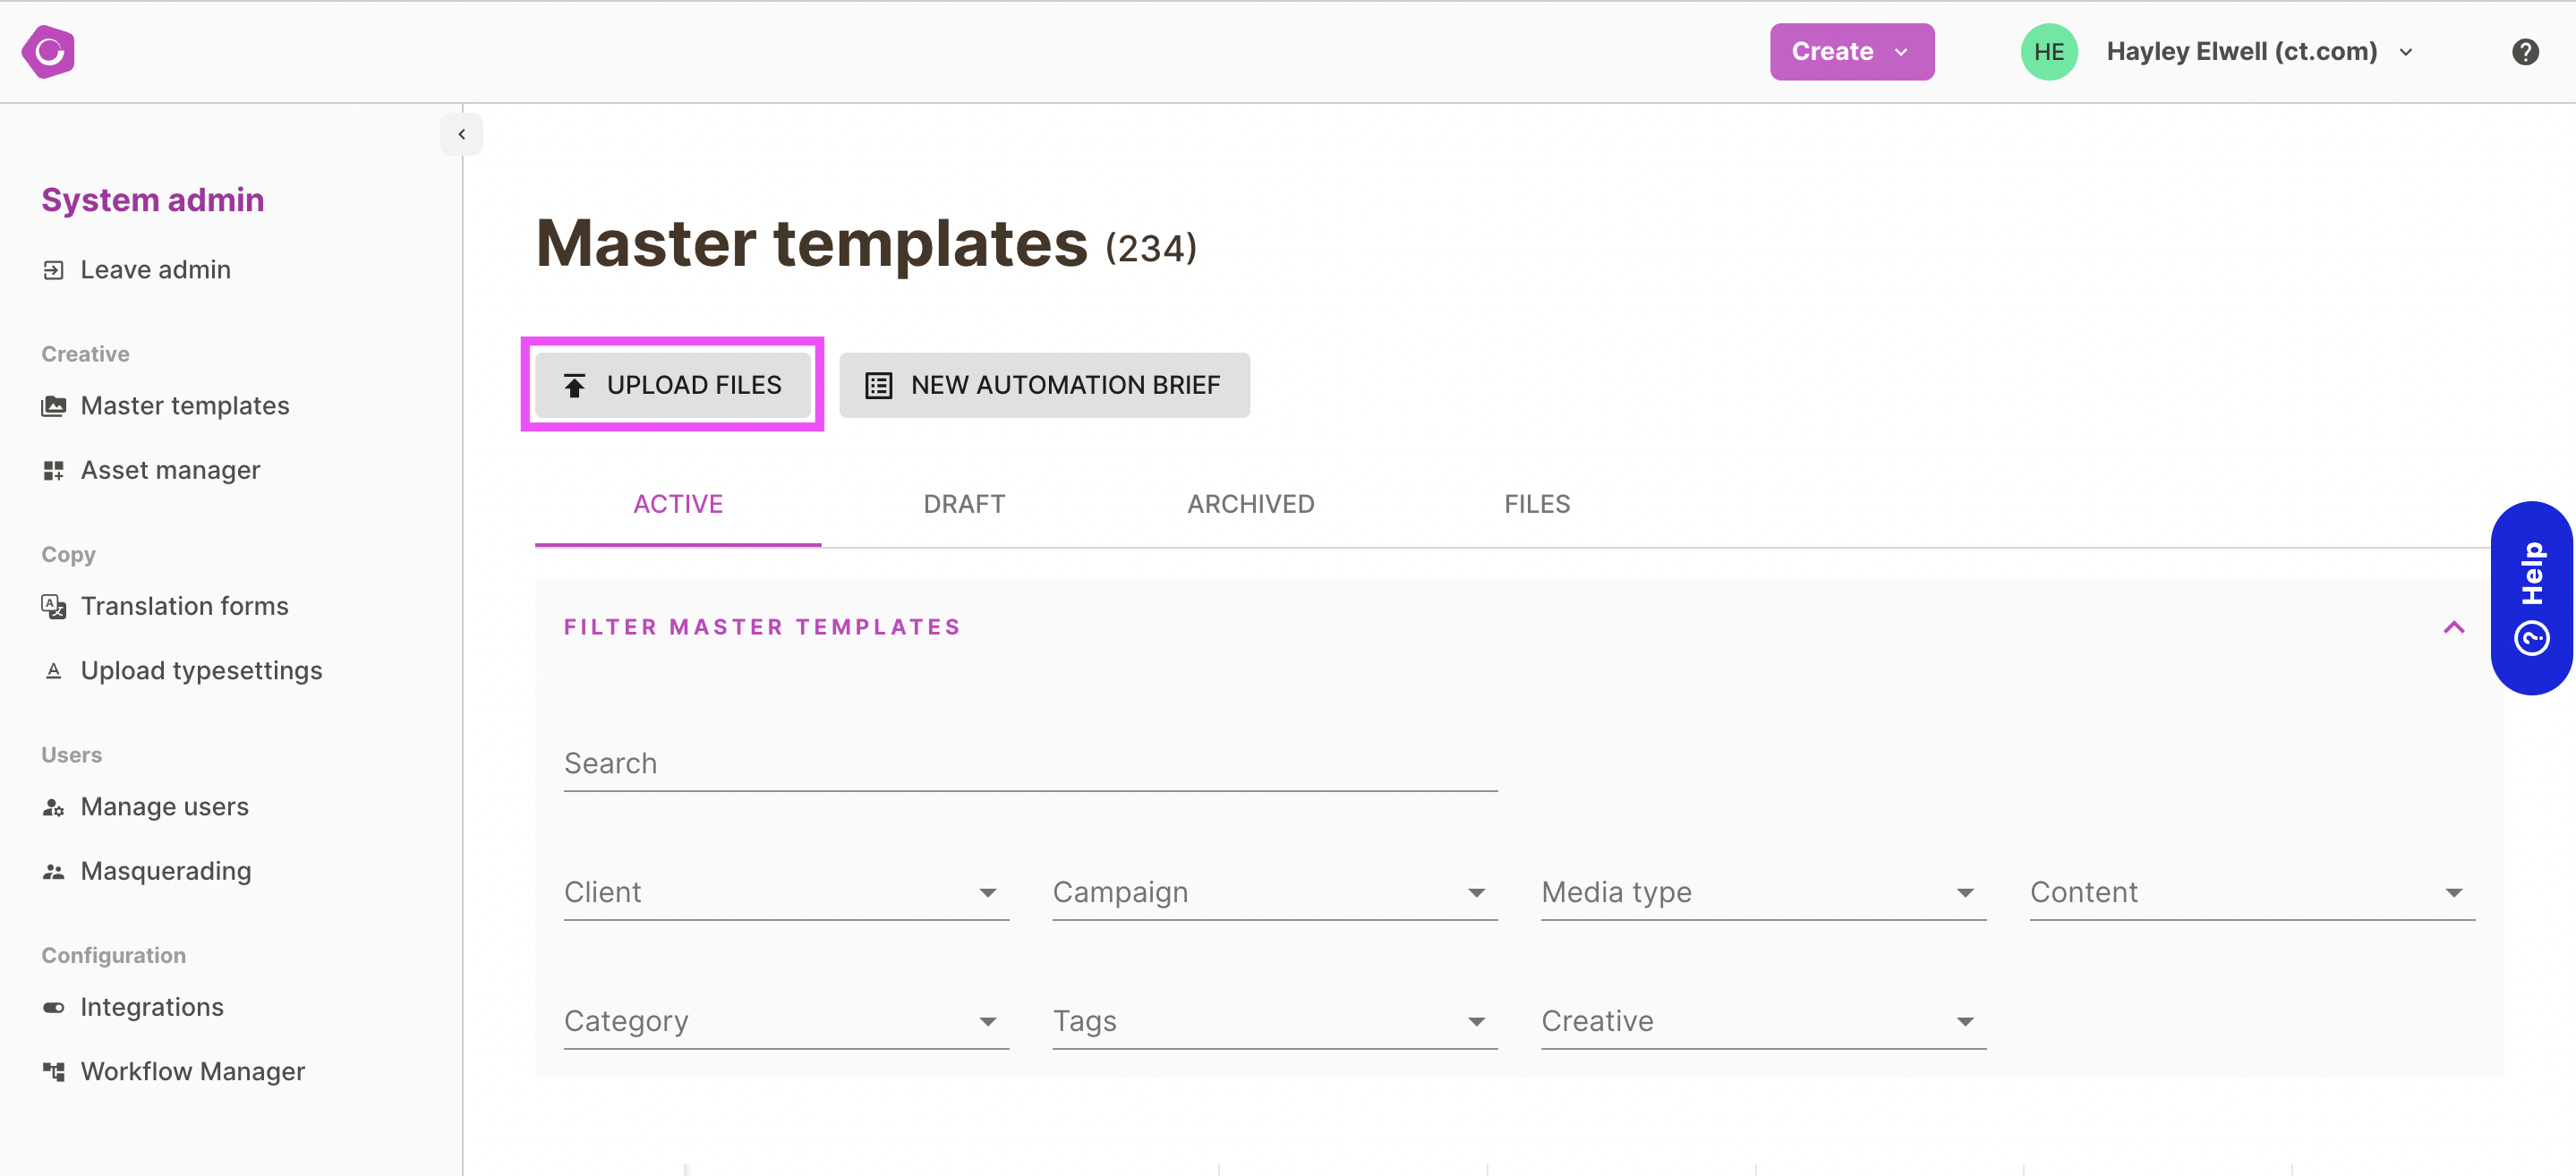
Creating your Master Template
To create your Master Template, start by navigating to System Admin > Master Templates. Upload the zip package you prepared earlier by clicking "upload files".
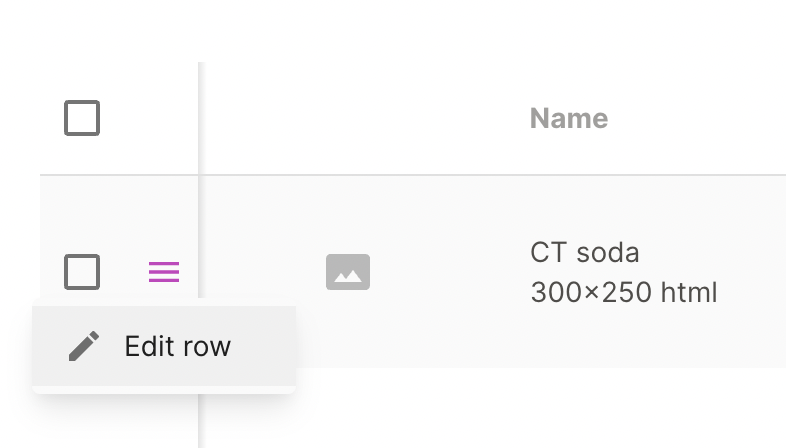
Next complete the details required to make your Master Template active by clicking edit row.
Complete the following details:
- Name - by default this will be the name of the zip package
- Status - set to active so that you can upload your project files in the next step
- Creative - select the Creative this Master Template should appear under. This will also select the campaign it appears in
- Media Type - select Digital Display
- Content Type - select Animated
- Material - select Digital
- Start/ End/ Copy dates - by default these will all be set to today's date, so make sure to change the end date to some time in the future.
- Translation form - if you have a translation form set-up, select this from the drop-down form
- Customisation - if you will have text, video or image customisation, toggle these on to yes at the bottom of the form
Uploading files in the file tree
Once you set your Master Template to active, it will appear in the file tree. Click on the files tab and then expand the folders to find the Creative you selected above. You will then see the name of the Master Template you just uploaded. Expand its folder and the Automation folder within it.
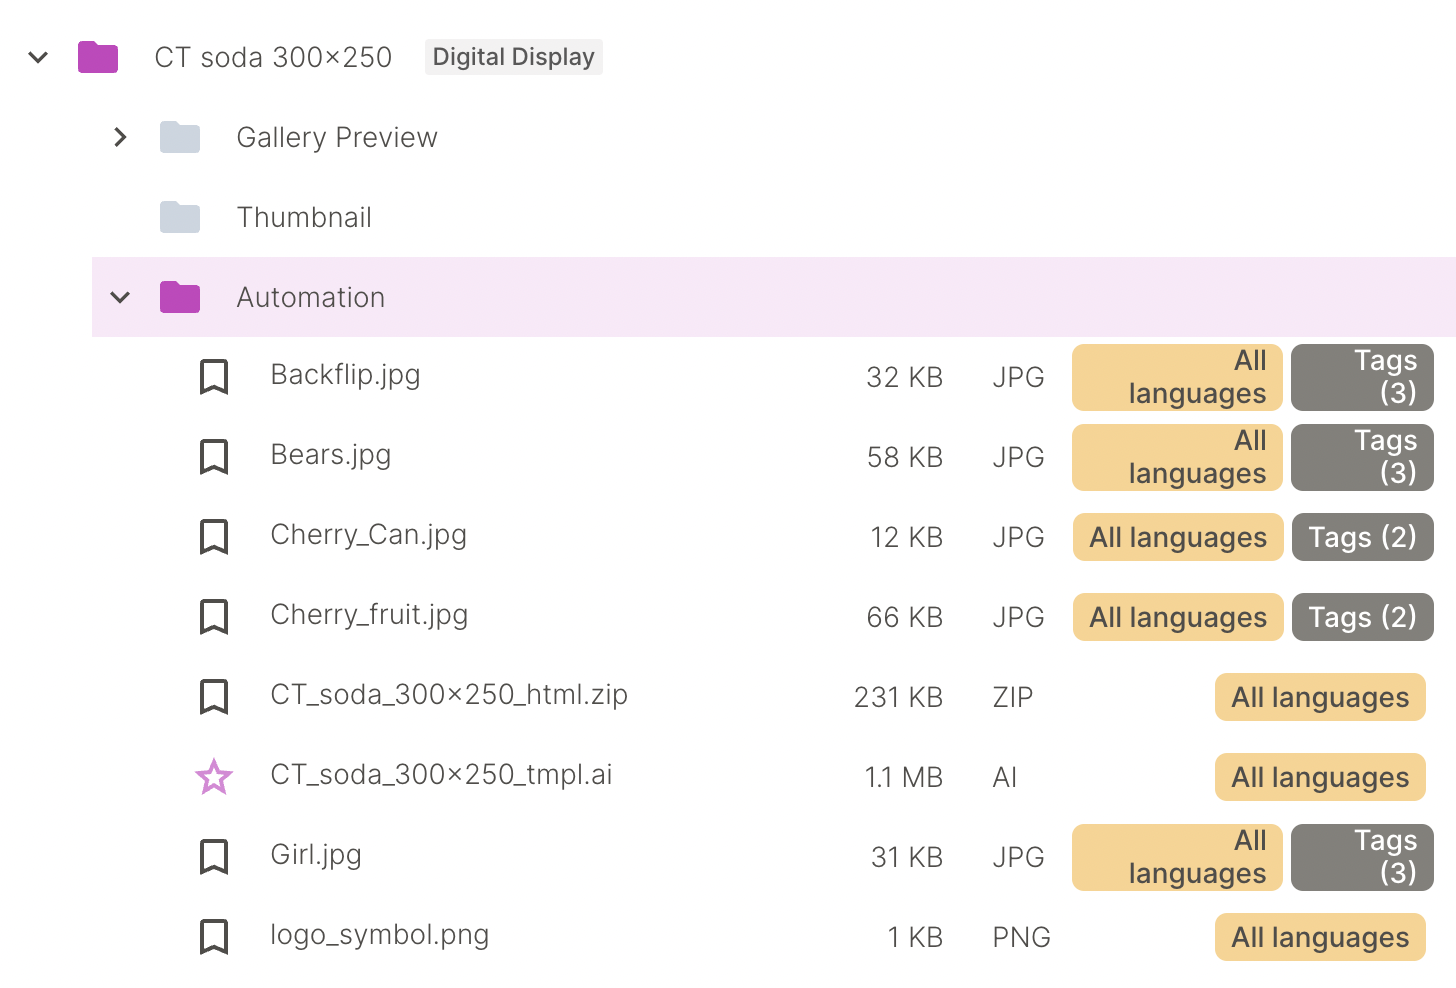
Drag the following files into the Automation folder:
- HTML zip package
- Illustrator file
- All images/ videos used in the HTML
Click upload in the modal that appears.
When the files have uploaded, click the analyse button next to the Illustrator file. This will identify all of the customisable elements within the file.

While analysis is happening, you will see an analysing label appear next to the Master Template name. Once this is complete, the label will disappear and a confirmation message will be displayed to you.

Making images customisable
If you would like to customise the images in your Master Template, click the pencil icon next to the image you would like to customise.

You will then be able to mark the image as customisable.

Give the variable a name. This is the name that will appear to the user who is creating an adaptation from this Master Template. Select the tags that appear on the images you want to make available and click Update. Click here for more about setting up images for Image Customisation.
Repeat this for all the images that you want to make customisable.
Your HTML banner is now ready to test. Click here to find out more about testing Master Templates.